Lenovo ThinkPad 560E User's Guide for TP 560X - Page 82
memory size appears at the upper left corner of
 |
View all Lenovo ThinkPad 560E manuals
Add to My Manuals
Save this manual to your list of manuals |
Page 82 highlights
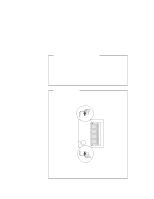
Using Advanced Features of Your ThinkPad 5 Place the memory slot cover over the memory slot; then install the screw back into its place. 6 Turn the computer over again and confirm that the new memory size appears at the upper left corner of the screen. For example, if you install the 32 MB DIMM you should see the following: 6496 KB OK You have finished installing the DIMM. Reconnect all cables. Notes: 1. For the following status, turn off the computer and go to page 66 to reinstall the DIMM and do the memory test with Easy-Setup (see page 25). If a 2 1 error code appears under the memory count. 48576 KB OK 21 If the total memory size is not the same as the value you calculated. 2. If you changed the memory installed in the computer, you need to create a new hibernation file. 68 IBM ThinkPad 560X User's Guide
-
 1
1 -
2
-
3
-
4
-
5
-
6
-
7
-
8
-
9
-
10
-
11
-
12
-
13
-
14
-
15
-
16
-
17
-
18
-
19
-
20
-
21
-
22
-
23
-
24
-
25
-
26
-
27
-
28
-
29
-
30
-
31
-
32
-
33
-
34
-
35
-
36
-
37
-
38
-
39
-
40
-
41
-
42
-
43
-
44
-
45
-
46
-
47
-
48
-
49
-
50
-
51
-
52
-
53
-
54
-
55
-
56
-
57
-
58
-
59
-
60
-
61
-
62
-
63
-
64
-
65
-
66
-
67
-
68
-
69
-
70
-
71
-
72
-
73
-
74
-
75
-
76
-
 77
77 -
 78
78 -
 79
79 -
 80
80 -
 81
81 -
 82
82 -
 83
83 -
 84
84 -
 85
85 -
 86
86 -
 87
87 -
88
-
89
-
90
-
91
-
92
-
93
-
94
-
95
-
96
-
97
-
98
-
99
-
100
-
101
-
102
-
103
-
104
-
105
-
106
-
107
-
108
-
109
-
110
-
111
-
112
-
113
-
114
-
115
-
116
-
117
-
118
-
119
-
120
-
121
-
122
-
123
-
124
-
125
-
126
-
127
-
128
-
129
-
130
-
131
-
132
-
133
-
134
-
135
-
136
-
137
-
138
-
139
-
140
-
141
-
142
-
143
-
144
-
145
-
146
-
147
-
148
-
149
-
150
-
151
-
152
-
153
-
154
-
155
-
156
-
157
-
158
-
159
-
160
-
161
-
162
-
163
-
164
-
165
-
166
-
167
-
168
-
169
-
170
-
171
-
172
-
173
-
174
-
175
-
176
-
177
 |
 |
