Lenovo ThinkPad S31 ThinkPad S30, S31 Hardware Maintenance Manual (October 200
Lenovo ThinkPad S31 Manual
 |
View all Lenovo ThinkPad S31 manuals
Add to My Manuals
Save this manual to your list of manuals |
Lenovo ThinkPad S31 manual content summary:
- Lenovo ThinkPad S31 | ThinkPad S30, S31 Hardware Maintenance Manual (October 200 - Page 1
ThinkPad s30, s31 Hardware Maintenance Manual - Lenovo ThinkPad S31 | ThinkPad S30, S31 Hardware Maintenance Manual (October 200 - Page 2
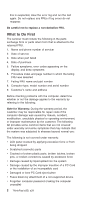
Before using this information and the product it supports, be sure to read the general information under " that this publication may contain references to, or information about, IBM products (machines and programs), programming, or services that are not announced in your country. Such references or - Lenovo ThinkPad S31 | ThinkPad S30, S31 Hardware Maintenance Manual (October 200 - Page 3
Contents ThinkPad s30, s31 Hardware Maintenance Manual 1 Read This First 1 What to Do First 2 How to Disable the Password 3 Product Overview 4 Fn Key Combinations 4 Status Indicators 5 Related service information 7 Restoring the pre-installed software 7 Creating the service - Lenovo ThinkPad S31 | ThinkPad S30, S31 Hardware Maintenance Manual (October 200 - Page 4
58 1185 Hinge ASM 59 1190 Hinge ASM (Wireless-s30 only). . . . . 61 1195 Base ASM 63 Computer Parts Listing 64 LCD Unit Parts Listing 67 Service Tools 68 Notices 69 Trademarks 69 iv ThinkPad s30, s31 - Lenovo ThinkPad S31 | ThinkPad S30, S31 Hardware Maintenance Manual (October 200 - Page 5
ThinkPad s30, s31 Hardware Maintenance Manual About This Manual This manual contains service and reference information for the IBM ThinkPad s30 and s31products. Use this manual along with the diagnostics tests to troubleshoot problems effectively. The manual is divided into sections as follows: v - Lenovo ThinkPad S31 | ThinkPad S30, S31 Hardware Maintenance Manual (October 200 - Page 6
the returned FRU: 1. Name and phone number of servicer 2. Date of service 3. Date when part failed 4. Date of purchase 5. Failure symptoms, error codes appearing on the blown by attachment of a non-supported device v Forgotten computer password (making the computer unusable) 2 ThinkPad s30, s31 - Lenovo ThinkPad S31 | ThinkPad S30, S31 Hardware Maintenance Manual (October 200 - Page 7
indicate damage caused by non-warranted activities: v Missing parts might be a symptom of unauthorized service or modification. v Hard disk drive spindles can become noisy from being subjected to excessive force the hard disk drive password, the hard disk drive must be replaced. ThinkPad s30, s31 3 - Lenovo ThinkPad S31 | ThinkPad S30, S31 Hardware Maintenance Manual (October 200 - Page 8
an overview of the system features of the ThinkPad s30 and s31 series. Feature Processor Bus architecture Memory Description 56 Kbps (depends on the model) One Type II Mini-PCI card AC Adapter CardBus support Mini-PCI Type-IIIa 56-Watt type Fn Key Combinations The following table shows the Fn - Lenovo ThinkPad S31 | ThinkPad S30, S31 Hardware Maintenance Manual (October 200 - Page 9
Decrease brightness Toggle ThinkLight on/off Enables the FullScreen Magnifier (s31 only) Note: Some models use the three volume control volume control buttons are located above the keyboard, next to the ThinkPad button. Status Indicators The system status LED indicators show the current computer - Lenovo ThinkPad S31 | ThinkPad S30, S31 Hardware Maintenance Manual (October 200 - Page 10
enabled. The Arrow keys can be used as screen-scroll function keys. The cursor cannot be moved with the Arrow keys. Not all application programs support this function. You enable or disable Scroll Lock mode by pressing the ScrLk key. The computer is operational. This indicator is always on when the - Lenovo ThinkPad S31 | ThinkPad S30, S31 Hardware Maintenance Manual (October 200 - Page 11
Service Partition and install the preloaded system from the Recovery CD, do the following; To create the Service Partition (SP): 1. Erase all partitions on the hard-disk drive using FDISK or a similar application. 2. Boot with the Recovery CD (and the boot diskette if required). ThinkPad s30, s31 - Lenovo ThinkPad S31 | ThinkPad S30, S31 Hardware Maintenance Manual (October 200 - Page 12
this menu-go to step 1. 4. Enter ″Y″ and the Service Partition will be created and loaded with D2D files. Note: If you do not want to create the Service Partition, press ″N″, and then go to step 8. 5. restart the computer. 2. Attach the external diskette drive to the computer. 8 ThinkPad s30, s31 - Lenovo ThinkPad S31 | ThinkPad S30, S31 Hardware Maintenance Manual (October 200 - Page 13
4. Follow the on-screen instructions. Checkout Guide Use the following procedure as a guide for computer problems. Note: The diagnostic tests are intended to test only IBM products. Non-IBM products, prototype cards, or symptom; then go to the page shown in the ″Go to″ column. ThinkPad s30, s31 9 - Lenovo ThinkPad S31 | ThinkPad S30, S31 Hardware Maintenance Manual (October 200 - Page 14
on display problems). page 19. Symptoms cannot be recreated (intermittent problems). Use the customer-reported symptoms, and go to "Symptom-to-FRU Index" on page 19. Testing the computer The ThinkPad computer has the arrow keys, and press Enter. A pull-down menu appears: 10 ThinkPad s30, s31 - Lenovo ThinkPad S31 | ThinkPad S30, S31 Hardware Maintenance Manual (October 200 - Page 15
differs depending on the model. 4. Run the applicable function test. 5. Follow the instructions on the screen. If there is a problem, PC-Doctor shows some messages. 6. Reseat the cable or connector of the detected the system. 2. The encryption is disabled on the Access Point. ThinkPad s30, s31 11 - Lenovo ThinkPad S31 | ThinkPad S30, S31 Hardware Maintenance Manual (October 200 - Page 16
Follow the description in the window. If the test detects a fan ASM problem, replace the fan. Keyboard and Auxiliary Input Device Checkout Note: Remove the detects a keyboard problem, do the following one at a time to correct the problem. Do not replace a non-defective FRU. 12 ThinkPad s30, s31 - Lenovo ThinkPad S31 | ThinkPad S30, S31 Hardware Maintenance Manual (October 200 - Page 17
properly installed into the connector. A loose connection can cause an error. 1394/LAN or Wireless Board Checkout (s30 only) Do the following to isolate the problem to the system internal 1394/LAN or wireless board: ThinkPad s30, s31 13 - Lenovo ThinkPad S31 | ThinkPad S30, S31 Hardware Maintenance Manual (October 200 - Page 18
charged battery ASM; then check that power is supplied by the battery ASM. If you suspect a power problem, refer to the appropriate power supply check listed below: v "Checking the AC Adapter" v "Checking +17.0 2 Ground If the voltage is not correct, replace the AC Adapter. 14 ThinkPad s30, s31 - Lenovo ThinkPad S31 | ThinkPad S30, S31 Hardware Maintenance Manual (October 200 - Page 19
the range, do the following: v Replace the system board. v If the problem is not corrected, go to "Undetermined Problems" on page 25. Note: An audible noise from the AC Adapter does not not used in these steps, are used for communications between the system and the battery. ThinkPad s30, s31 15 - Lenovo ThinkPad S31 | ThinkPad S30, S31 Hardware Maintenance Manual (October 200 - Page 20
not a hardware problem. No service actions are necessary if the pointer movement problem or pointing stick problem occurs, do the following: 1. Boot from the diagnostics diskette and start the program. 2. Go to Interactive Tests on the main menu and select Mouse. 3. Follow the instructions ThinkPad s30, s31 - Lenovo ThinkPad S31 | ThinkPad S30, S31 Hardware Maintenance Manual (October 200 - Page 21
insufficient. Note: When battery is low, the battery status indicator blinks orange. Note: In the IBM BIOS Setup Utility, the computer can be set to suspend when the lid is closed. The following critically low battery condition occurs. v The power switch is pressed. (BIOS Setup) ThinkPad s30, s31 17 - Lenovo ThinkPad S31 | ThinkPad S30, S31 Hardware Maintenance Manual (October 200 - Page 22
hibernation utility diskette into the diskette drive (you can create the diskette using the Diskette Factory). v Turn on the computer. v Follow the instructions on the screen. Note: If you change the memory size, you need to recreate the hibernation file or partition. For partition-based hibernation - Lenovo ThinkPad S31 | ThinkPad S30, S31 Hardware Maintenance Manual (October 200 - Page 23
to help you decide the next possible FRUs to be replaced when servicing a computer. Numeric error codes show the errors detected in POST or Undetermined Problems" on page 25. Note: For IBM devices not supported by diagnostic codes in this ThinkPad computer, see the manual for ThinkPad s30, s31 19 - Lenovo ThinkPad S31 | ThinkPad S30, S31 Hardware Maintenance Manual (October 200 - Page 24
system, then reboot the system. 2. System board 0280 Previous boot incomplete - Default configuration used 1. Load Setup Defaults in the BIOS Setup Utility. 2. System board 20 ThinkPad s30, s31 - Lenovo ThinkPad S31 | ThinkPad S30, S31 Hardware Maintenance Manual (October 200 - Page 25
. 2. System board 1. Load Setup Defaults in BIOS Setup Utility. 2. System board 1. DIMM 2. System board System board 1. Load Setup Defaults in BIOS Setup Utility. 2. System board ThinkPad s30, s31 21 - Lenovo ThinkPad S31 | ThinkPad S30, S31 Hardware Maintenance Manual (October 200 - Page 26
in Sequence 1. Check that the operating system has no failure and is installed correctly. 2. Enter IBM BIOS Setup Utility and see whether the hard disk drive and the diskette drive are properly installed lines displayed. 1. LCD FPC ASM 2. LCD inverter 3. LCD 4. System board 22 ThinkPad s30, s31 - Lenovo ThinkPad S31 | ThinkPad S30, S31 Hardware Maintenance Manual (October 200 - Page 27
) slots PC Card (PCMCIA) assembly 2. System board CompactFlash Card-Related Symptoms Symptom/Error FRU/Action in Sequence System cannot detect the System board CompactFlash Card ThinkPad s30, s31 23 - Lenovo ThinkPad S31 | ThinkPad S30, S31 Hardware Maintenance Manual (October 200 - Page 28
FRU/Action in Sequence External display does not 1. CRT adapter work correctly. 2. System board USB does not work correctly. 1. Power board ASM 2. System board 24 ThinkPad s30, s31 - Lenovo ThinkPad S31 | ThinkPad S30, S31 Hardware Maintenance Manual (October 200 - Page 29
FRU shown by the FRU code. Rerun the test to verify that no more errors exist. Undetermined Problems You are here because the diagnostic tests did not identify which adapter or device failed, which installed devices to isolate the failing FRU (do not isolate non-defective FRUs). ThinkPad s30, s31 25 - Lenovo ThinkPad S31 | ThinkPad S30, S31 Hardware Maintenance Manual (October 200 - Page 30
if the problem has changed. 6. If the problem does not recur, reconnect the removed devices one at a time until you find the failing FRU. 7. If the problem remains, replace the following FRUs one at a time. Do not replace a non-defective FRU. a. System board b. LCD panel ASM 26 ThinkPad s30, s31 - Lenovo ThinkPad S31 | ThinkPad S30, S31 Hardware Maintenance Manual (October 200 - Page 31
the Serialization Information Data using the ThinkPad CE Utility Diskette. The serial number new UUID using the ThinkPad CE Utility Diskette. The ThinkPad Utility will automatically do not press any key until prompted, then follow the instructions on the screen. 7. When the test is completed, - Lenovo ThinkPad S31 | ThinkPad S30, S31 Hardware Maintenance Manual (October 200 - Page 32
. v Do not damage any parts. Only certified and trained personnel should service the computer. v The arrows in this section show the direction of movement used to establish personal grounding. FRU Service Procedures Review the following procedures before replacing any FRU. 28 ThinkPad s30, s31 - Lenovo ThinkPad S31 | ThinkPad S30, S31 Hardware Maintenance Manual (October 200 - Page 33
characteristic of TFT LCD technology, but excessive pixel problems can cause viewing concerns. The LCD should be service this computer: v Have a screw kit (10L1956) available. v Always use new screws if you are instructed. v Use a torque screwdriver (U.S. only) if you have one. ThinkPad s30, s31 - Lenovo ThinkPad S31 | ThinkPad S30, S31 Hardware Maintenance Manual (October 200 - Page 34
1010 Battery ASM To remove the battery ASM: 1. Slide the release latch as shown. 2. Remove the battery ASM. Reverse the steps described above when installing a new battery pack. 30 ThinkPad s30, s31 - Lenovo ThinkPad S31 | ThinkPad S30, S31 Hardware Maintenance Manual (October 200 - Page 35
. Size Step (Quantity) Head & Color Torque 1 M2.0 x 7L (4) Flat head, black 2.5 kgf-cm 2 N/A N/A 2.0 kgf-cm Note: Make sure you use the correct screw for replacement. ThinkPad s30, s31 31 - Lenovo ThinkPad S31 | ThinkPad S30, S31 Hardware Maintenance Manual (October 200 - Page 36
mode. For the s30 series To remove the hard disk drive ASM: 1. Slide and lift the drive bracket as shown to remove the bracket. 32 ThinkPad s30, s31 - Lenovo ThinkPad S31 | ThinkPad S30, S31 Hardware Maintenance Manual (October 200 - Page 37
2. Disconnect the IDE connector from the system board and remove the hard disk drive. For the s31 series To remove the hard disk drive ASM: 1. Slide and lift the drive bracket as shown to remove the bracket. 2. Remove the screw from the HDD/FPC bracket. ThinkPad s30, s31 33 - Lenovo ThinkPad S31 | ThinkPad S30, S31 Hardware Maintenance Manual (October 200 - Page 38
3. Remove the HDD/FPC bracket. 4. Disconnect the IDE connector from the system board and remove the hard disk drive. Size Step (Quantity) Head & Color Torque 2 M2.0 x 4L (1) Flat head, black 2.0 kgf-cm Note: Make sure you use the correct screw for replacement. 34 ThinkPad s30, s31 - Lenovo ThinkPad S31 | ThinkPad S30, S31 Hardware Maintenance Manual (October 200 - Page 39
operating or is in suspend mode. To remove the hard disk drive FPC ASM: v Grip the plastic strap as shown and remove the FPC ASM. ThinkPad s30, s31 35 - Lenovo ThinkPad S31 | ThinkPad S30, S31 Hardware Maintenance Manual (October 200 - Page 40
board. Size Step (Quantity) Head & Color Torque 2 M2.0 x 4L (2) Flat head, black 2.0 kgf-cm Note: Make sure you use the correct screw for replacement. 36 ThinkPad s30, s31 - Lenovo ThinkPad S31 | ThinkPad S30, S31 Hardware Maintenance Manual (October 200 - Page 41
1045 Suspend Board Cable ASM v 1010 Battery ASM v 1020 Keyboard ASM v 1040 Suspend Board ASM To remove the suspend board cable ASM: v Disconnect the suspend board cable from the system board. ThinkPad s30, s31 37 - Lenovo ThinkPad S31 | ThinkPad S30, S31 Hardware Maintenance Manual (October 200 - Page 42
card. Size Step (Quantity) Head & Color Torque 1 M2.0 x 4L (2) Flat head, black 2.0 kgf-cm Note: Make sure you use the correct screw for replacement. 38 ThinkPad s30, s31 - Lenovo ThinkPad S31 | ThinkPad S30, S31 Hardware Maintenance Manual (October 200 - Page 43
1055 Modem Cable ASM v 1010 Battery ASM v 1020 Keyboard ASM v 1050 Modem Card ASM To remove the modem cable ASM: v Disconnect the modem cable from the system board. ThinkPad s30, s31 39 - Lenovo ThinkPad S31 | ThinkPad S30, S31 Hardware Maintenance Manual (October 200 - Page 44
: 1. Gently disconnect the two cables from the wireless card. 2. Carefully release the latches on both sides of the wireless card. 3. Remove the wireless card. 40 ThinkPad s30, s31 - Lenovo ThinkPad S31 | ThinkPad S30, S31 Hardware Maintenance Manual (October 200 - Page 45
. 3. Disconnect the card-to-system board cable from the card. 4. Carefully release the latches on both sides of the card. 5. Remove the IEEE 1394 card. ThinkPad s30, s31 41 - Lenovo ThinkPad S31 | ThinkPad S30, S31 Hardware Maintenance Manual (October 200 - Page 46
cable from the system board, then remove the cable. 3. Disconnect the card-to-system board cable from the system board, then remove the cable. 42 ThinkPad s30, s31 - Lenovo ThinkPad S31 | ThinkPad S30, S31 Hardware Maintenance Manual (October 200 - Page 47
1075 DIMM Card ASM v 1010 Battery ASM v 1020 Keyboard ASM To remove the memory card ASM: 1. Carefully release the latches on both sides of the memory card. 2. Gently remove the memory card. ThinkPad s30, s31 43 - Lenovo ThinkPad S31 | ThinkPad S30, S31 Hardware Maintenance Manual (October 200 - Page 48
.5 x 5L (1) Flat head, black 2.5 kgf-cm 1A M2.0 x 4L (1) Flat head, black 2.5 kgf-cm Note: Make sure you use the correct screw for replacement. 44 ThinkPad s30, s31 - Lenovo ThinkPad S31 | ThinkPad S30, S31 Hardware Maintenance Manual (October 200 - Page 49
the speakers. Size Step (Quantity) Head & Color Torque 2 M2.0 x 4L (4) Flat head, black 2.0 kgf-cm Note: Make sure you use the correct screw for replacement. ThinkPad s30, s31 45 - Lenovo ThinkPad S31 | ThinkPad S30, S31 Hardware Maintenance Manual (October 200 - Page 50
shown. Size Step (Quantity) Head & Color Torque 1 M2.0 x 2.5L (3) Flat head, silver 2.0 kgf-cm Note: Make sure you use the correct screw for replacement. 46 ThinkPad s30, s31 - Lenovo ThinkPad S31 | ThinkPad S30, S31 Hardware Maintenance Manual (October 200 - Page 51
thermal rubber. 2. Press the thermal rubber firmly in place on the fan ASM. 3. Remove the protective paper from the other side of the thermal rubber. ThinkPad s30, s31 47 - Lenovo ThinkPad S31 | ThinkPad S30, S31 Hardware Maintenance Manual (October 200 - Page 52
Protective paper Thermal rubber Size Step (Quantity) Head & Color Torque 1 M2.0 x 7L (3) Flat head, black 2.5 kgf-cm 1A M2.0 x 9L (1) Flat head, black 2.0 kgf-cm Note: Make sure you use the correct screw for replacement. 48 ThinkPad s30, s31 - Lenovo ThinkPad S31 | ThinkPad S30, S31 Hardware Maintenance Manual (October 200 - Page 53
cause a short or damage the connector. To remove the PCMCIA slots ASM: 1. Remove the three screws. A Note: The following steps 2 and 3 only apply to the s31 series. If you are servicing the s30 series, skip to step 4. 2. Remove the screw from the HDD/FPC bracket - Lenovo ThinkPad S31 | ThinkPad S30, S31 Hardware Maintenance Manual (October 200 - Page 54
M2.0 x 4L (1) Flat head, black 2.0 kgf-cm 2 M2.0 x 4L (1) Flat head, black 2.0 kgf-cm Note: Make sure you use the correct screw for replacement. 50 ThinkPad s30, s31 - Lenovo ThinkPad S31 | ThinkPad S30, S31 Hardware Maintenance Manual (October 200 - Page 55
system board. Size Step (Quantity) Head & Color Torque 1 M2.0 x 4L (1) Flat head, black 2.0 kgf-cm Note: Make sure you use the correct screw for replacement. ThinkPad s30, s31 51 - Lenovo ThinkPad S31 | ThinkPad S30, S31 Hardware Maintenance Manual (October 200 - Page 56
board. Size Step (Quantity) Head & Color Torque 1 M2.0 x 2.5L (2) Flat head, silver 2.0 kgf-cm Note: Make sure you use the correct screw for replacement. 52 ThinkPad s30, s31 - Lenovo ThinkPad S31 | ThinkPad S30, S31 Hardware Maintenance Manual (October 200 - Page 57
LCD bezel. Size Step (Quantity) Head & Color Torque 2 M2.5 x 3L (4) Flat head, black 2.5 kgf-cm Note: Make sure you use the correct screw for replacement. ThinkPad s30, s31 53 - Lenovo ThinkPad S31 | ThinkPad S30, S31 Hardware Maintenance Manual (October 200 - Page 58
Torque 1 M2.5 x 3L (2) Flat head, black 2.5 kgf-cm 2 2.0 M x 4L (1) Flat head, black 2.0 kgf-cm Note: Make sure you use the correct screw for replacement. 54 ThinkPad s30, s31 - Lenovo ThinkPad S31 | ThinkPad S30, S31 Hardware Maintenance Manual (October 200 - Page 59
inverter card. 2. Lift the two sides of the FPC connector as shown. 3. Disconect the FPC cable from the inverter card, then remove the inverter card. ThinkPad s30, s31 55 - Lenovo ThinkPad S31 | ThinkPad S30, S31 Hardware Maintenance Manual (October 200 - Page 60
ASM v 1155 LCD Rear Cover ASM To remove the LCD FPC ASM: Note: Steps 1 and 2 in the following procedure only apply to the s31 series. If you are servicing the s30 series, skip to step 3. 1. Remove the screw from the HDD/FPC bracket. 2. Remove the HDD/FPC bracket. 3. Disconnect the FPC connector - Lenovo ThinkPad S31 | ThinkPad S30, S31 Hardware Maintenance Manual (October 200 - Page 61
FPC ASM. Size Step (Quantity) Head & Color Torque 1 M2.0 x 4L (1) Flat head, black 2.0 kgf-cm Note: Make sure you use the correct screw for replacement. ThinkPad s30, s31 57 - Lenovo ThinkPad S31 | ThinkPad S30, S31 Hardware Maintenance Manual (October 200 - Page 62
panel. Size Step (Quantity) Head & Color Torque 1 M2.5 x 4L (4) Flat head, silver 2.0 kgf-cm Note: Make sure you use the correct screw for replacement. 58 ThinkPad s30, s31 - Lenovo ThinkPad S31 | ThinkPad S30, S31 Hardware Maintenance Manual (October 200 - Page 63
1185 Hinge ASM v 1010 Battery ASM v 1020 Keyboard ASM v 1080 Upper Cover ASM v 1150 LCD Bezel ASM v 1155 LCD Rear Cover ASM v 1160 LCD Inverter ASM v 1170 LCD FPC ASM v 1180 LCD Panel ASM To remove the hinge ASM: 1. Remove the three screws. 2. Remove the hinges. ThinkPad s30, s31 59 - Lenovo ThinkPad S31 | ThinkPad S30, S31 Hardware Maintenance Manual (October 200 - Page 64
Size Step (Quantity) Head & Color Torque 1 M2.5 x 5L (3) Flat head, black 2.5 kgf-cm Note: Make sure you use the correct screw for replacement. 60 ThinkPad s30, s31 - Lenovo ThinkPad S31 | ThinkPad S30, S31 Hardware Maintenance Manual (October 200 - Page 65
Inverter ASM v 1170 LCD FPC ASM v 1180 LCD Panel ASM To remove the hinge ASM: 1. Remove the three screws. 2. Remove the hinges. 3. Remove the tape. ThinkPad s30, s31 61 - Lenovo ThinkPad S31 | ThinkPad S30, S31 Hardware Maintenance Manual (October 200 - Page 66
4. Disconnect the cables from the wireless card. Size Step (Quantity) Head & Color Torque 1 M2.5 x 5L (3) Flat head, black 2.5 kgf-cm Note: Make sure you use the correct screw for replacement. 62 ThinkPad s30, s31 - Lenovo ThinkPad S31 | ThinkPad S30, S31 Hardware Maintenance Manual (October 200 - Page 67
LCD FPC ASM v 1180 LCD Panel ASM v 1185 Hinge ASM To remove the base ASM remove all the above FRUs, then replace the base ASM. ThinkPad s30, s31 63 - Lenovo ThinkPad S31 | ThinkPad S30, S31 Hardware Maintenance Manual (October 200 - Page 68
Computer Parts Listing For s30 and s31 a c b d Note: Each FRU is available for all types or models, unless specific types or models are given. Index a-d 1 2 Description See MISC PARTS list PALM REST ASM SPEAKER ASM FRU Number 26P9299 26P9412 26P9298 64 ThinkPad s30, s31 - Lenovo ThinkPad S31 | ThinkPad S30, S31 Hardware Maintenance Manual (October 200 - Page 69
s31 KEYBOARD ASM Traditional Chinese for s31 KEYBOARD ASM Korean for s31 HARD DISK DRIVE ASM 20 GB for s30 (includes HDD bracket, see MISC PARTS - b) HARD DISK DRIVE ASM 15 GB for s31 AC Adapter 56W (3 PIN) Delta for s31 AC Adapter 56W (3 PIN) Sanken for s31 SCREW KIT TELEPHONE CABLE US 32 MB DIMM - Lenovo ThinkPad S31 | ThinkPad S30, S31 Hardware Maintenance Manual (October 200 - Page 70
COMBO CABLE PACK (IEEE 1394 cable, card-to-system board cable) MISC PARTS (a) UPPER COVER (b) HDD BRACKET (c) HDD/FPC BRACKET for s31 (d) PCMCIA DUMMY (e) ANTENNA HOLDER - R (s30 only) (f) FPC HOLDER (upper) (g) FPC HOLDER (lower) (h) ANTENNA HOLDER - L (s30 only) SCREW SHEET (LCD) INSULATION SHEET - Lenovo ThinkPad S31 | ThinkPad S30, S31 Hardware Maintenance Manual (October 200 - Page 71
ASM INVERTER CARD ASM HINGE-L w/ antenna ASM (s30 only) HINGE-L w/o antenna ASM FRU Number 26P9299 26P9303 26P9509 26P9308 26P9306 05K9937 27L0693 26P9304 26P8050 26P9305 26P9307 ThinkPad s30, s31 67 - Lenovo ThinkPad S31 | ThinkPad S30, S31 Hardware Maintenance Manual (October 200 - Page 72
Kong XPHome for s31 46P6366 (2639-53B) Tri-Connector Wrap Plug 72X8546 PC Test Card 35G4703 Audio Wrap Cable 66G5180 Screwdriver Kit 95F3598 USB Parallel Test Cable 05K2580 Torque Screwdriver (U.S. only) 05K4695 5 mm Socket Wrench 05K4694 Screwdriver 27L8126 68 ThinkPad s30, s31 - Lenovo ThinkPad S31 | ThinkPad S30, S31 Hardware Maintenance Manual (October 200 - Page 73
IBM PS/2 ThinkPad TrackPoint TrackPoint IV The following terms are trademarks or service marks of other companies as follows: Intel Mylar PCMCIA Pentium Intel Corporation E.I. Du Pont de Nemours and Company Personal Computer Memory Card Interface Association Intel Corporation ThinkPad s30, s31
-
 1
1 -
 2
2 -
 3
3 -
 4
4 -
 5
5 -
 6
6 -
 7
7 -
8
-
9
-
10
-
11
-
12
-
13
-
14
-
15
-
16
-
17
-
18
-
19
-
20
-
21
-
22
-
23
-
24
-
25
-
26
-
27
-
28
-
29
-
30
-
31
-
32
-
33
-
34
-
35
-
36
-
37
-
38
-
39
-
40
-
41
-
42
-
43
-
44
-
45
-
46
-
47
-
48
-
49
-
50
-
51
-
52
-
53
-
54
-
55
-
56
-
57
-
58
-
59
-
60
-
61
-
62
-
63
-
64
-
65
-
66
-
67
-
68
-
69
-
70
-
71
-
72
-
73
 |
 |

ThinkPad s30, s31 Hardware
Maintenance Manual
±²³