Lenovo Y500 Hardware Maintenance Manual - Page 49
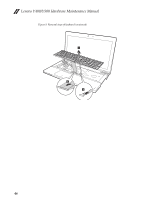
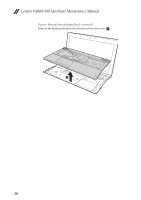
Removal steps of keyboard continued, Lift the keyboard
 |
View all Lenovo Y500 manuals
Add to My Manuals
Save this manual to your list of manuals |
Page 49 highlights
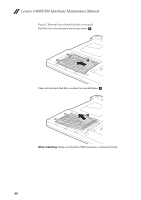
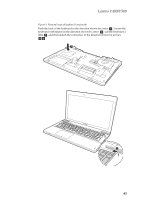
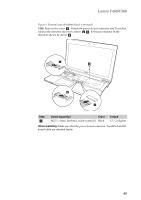
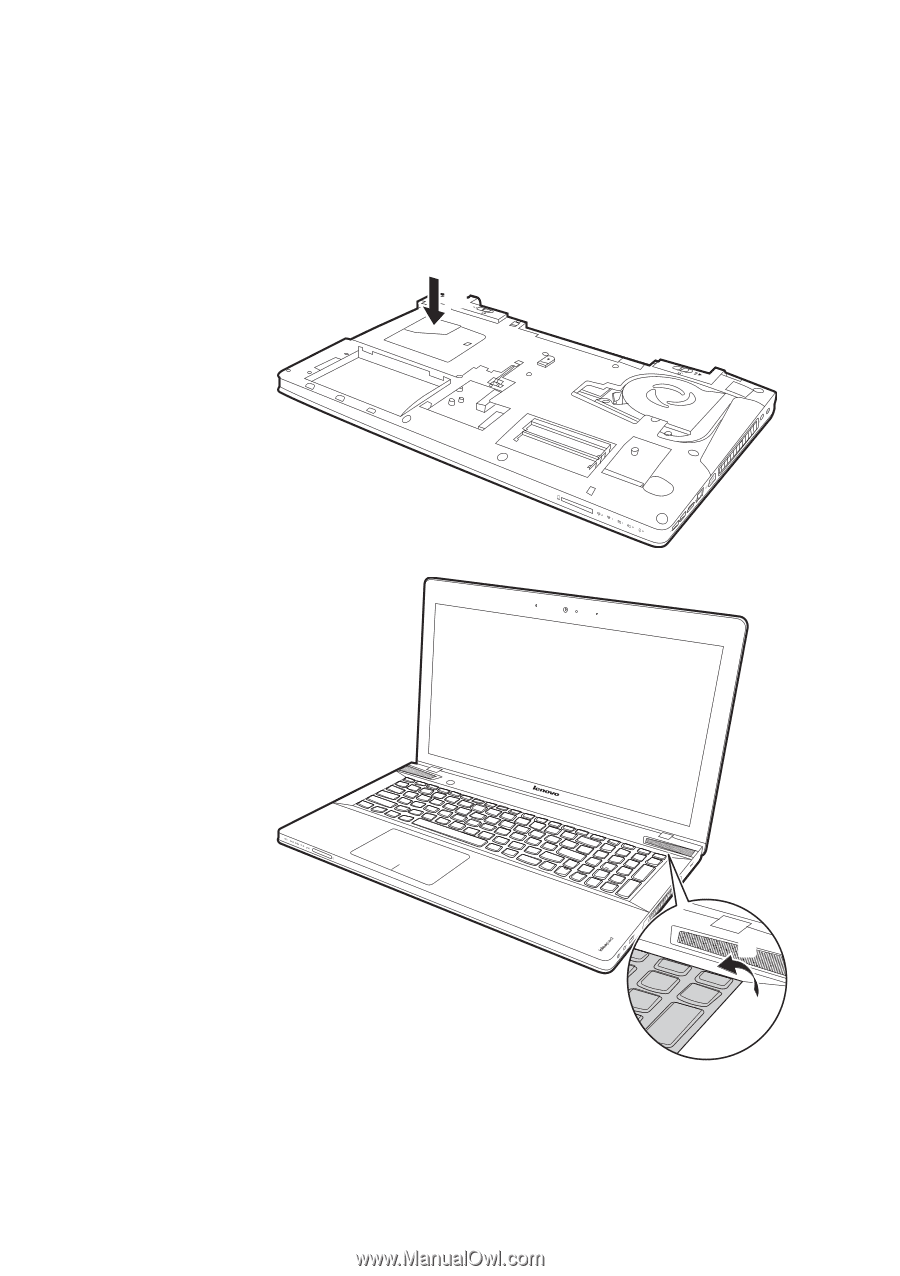
Lenovo Y400/Y500 Figure 8. Removal steps of keyboard (continued) Push the back of the keyboard in the direction shown by arrow a. Loosen the keyboard with fingers in the direction shown by arrow b. Lift the keyboard a little c, and then detach the connectors in the direction shown by arrows d e. a Y500 b 45
-
 1
1 -
2
-
3
-
4
-
5
-
6
-
7
-
8
-
9
-
10
-
11
-
12
-
13
-
14
-
15
-
16
-
17
-
18
-
19
-
20
-
21
-
22
-
23
-
24
-
25
-
26
-
27
-
28
-
29
-
30
-
31
-
32
-
33
-
34
-
35
-
36
-
37
-
38
-
39
-
40
-
41
-
42
-
43
-
 44
44 -
 45
45 -
 46
46 -
 47
47 -
 48
48 -
 49
49 -
 50
50 -
 51
51 -
 52
52 -
 53
53 -
 54
54 -
55
-
56
-
57
-
58
-
59
-
60
-
61
-
62
-
63
-
64
-
65
-
66
-
67
-
68
-
69
-
70
-
71
-
72
-
73
-
74
-
75
-
76
-
77
-
78
-
79
-
80
-
81
-
82
-
83
-
84
-
85
-
86
-
87
-
88
-
89
-
90
-
91
-
92
-
93
-
94
-
95
-
96
-
97
-
98
-
99
-
100
-
101
-
102
-
103
 |
 |
Lenovo Y400/Y500
45
Figure 8. Removal steps of keyboard (continued)
Push the back of the keyboard in the direction shown by arrow
. Loosen the
keyboard with fingers in the direction shown by arrow
. Lift the keyboard a
little
, and then detach the connectors in the direction shown by arrows
.
a
b
c
d
e
a
Y500
b