Lexmark 2470m Getting Started - Page 6
Print troubleshooting - printer cartridges
 |
UPC - 734646077842
View all Lexmark 2470m manuals
Add to My Manuals
Save this manual to your list of manuals |
Page 6 highlights
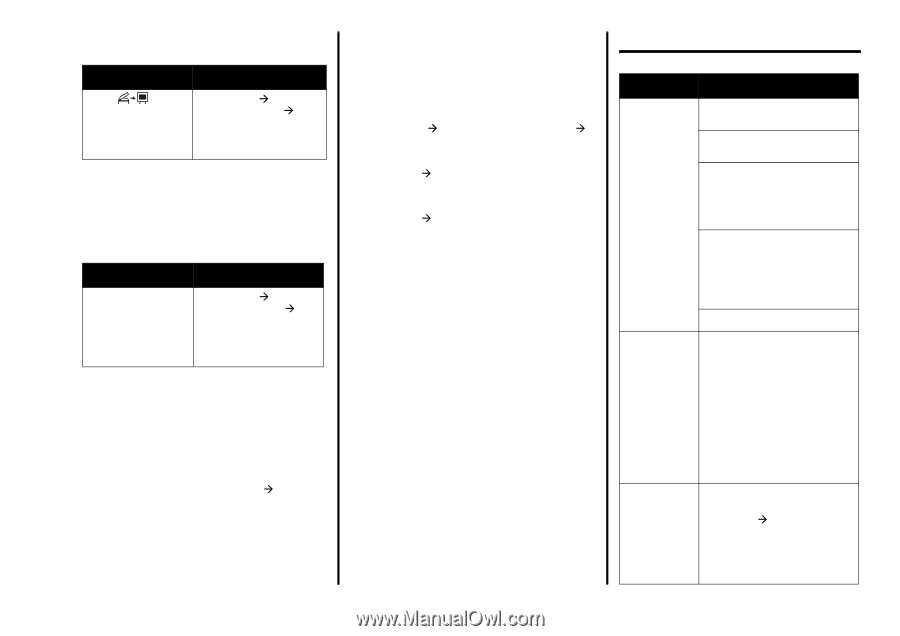
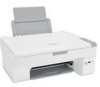
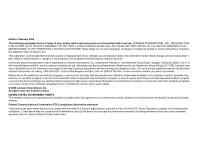
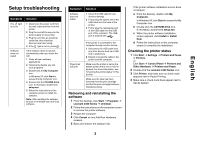
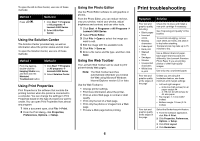
To open the All-In-One Center, use one of these methods: Method 1 Press . Method 2 1 Click Start Æ Programs or All programs Æ Lexmark 2400 Series. 2 Select All-In-One Center. Using the Solution Center The Solution Center provides help, as well as information about the printer status and ink level. To open the Solution Center, use one of these methods: Method 1 From the desktop, double-click the Imaging Studio icon, and then click the Maintain/ Troubleshoot button. Method 2 1 Click Start Æ Programs or All programs Æ Lexmark 2400 Series. 2 Select Solution Center. Using Print Properties Print Properties is the software that controls the printing function when the printer is connected to a computer. You can change the settings in Print Properties based on the type of project you want to create. You can open Print Properties from almost any program: 1 With a document open, click File Æ Print. 2 From the Print dialog, click Properties, Preferences, Options, or Setup. Using the Photo Editor Use the Photo Editor software to edit graphics or photos. From the Photo Editor, you can reduce red-eye, crop your photos, resize your photos, adjust brightness and contrast, and use other tools. 1 Click Start Æ Programs or All Programs Æ Lexmark 2400 Series. 2 Select Photo Editor. 3 Click File Æ Open to select the image you want to edit. 4 Edit the image with the available tools. 5 Click File Æ Save as. 6 Enter a file name and file type, and then click Save. Using the Web Toolbar The Lexmark Web Toolbar can be used to print printer-friendly Web pages. Note: The Web Toolbar launches automatically whenever you browse the Web using Microsoft Windows Internet Explorer version 5.5 or later. Use the Web Toolbar to: • Change printer settings. • Find more information about the printer. • Print an entire Web page in normal or draft quality. • Print only the text of a Web page. • Print only the photos or images from a Web page. • Preview a Web page before printing. 6 Print troubleshooting Symptom Solution Poor text and graphic quality, including: • Blank pages • Incorrect colors • Missing characters • Faded print • Dark print • Skewed lines • Smudges • Streaks • Unexpected characters • White lines in print Poor text and graphic quality at the edges of the page Poor text and graphic quality at the edges of the page Check the ink level, and install a new print cartridge if necessary. See "Improving print quality" in this booklet. To avoid ink smudging, remove each sheet as it exits, and allow it to dry before stacking. Transparencies may take up to 15 minutes to dry. Use a different brand of paper. Each paper brand accepts ink differently. Use Lexmark Premium Photo Paper if you are printing photos or other high-quality images. Use only new, unwrinkled paper. Unless you are using the borderless feature, use these minimum print margin settings: • Left and right margins: - 6.35 mm (0.25 inches) for all paper except A4 - 3.175 mm (0.125 inches) for A4 size paper • Top margin: 1.7 mm (0.067 inches) • Bottom margin: 19 mm (0.75 inches) Select the Borderless print feature. 1 From the software application, click File Æ Print. 2 Click Properties, Preferences, Options, or Setup. 3 Click Print Layout. 4 Click Borderless.
-
 1
1 -
 2
2 -
 3
3 -
 4
4 -
 5
5 -
 6
6 -
 7
7 -
 8
8 -
 9
9
 |
 |