Lexmark 2470m Getting Started - Page 7
Improving print quality - ink cartridges
 |
UPC - 734646077842
View all Lexmark 2470m manuals
Add to My Manuals
Save this manual to your list of manuals |
Page 7 highlights
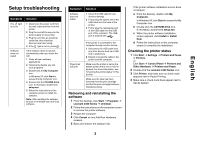
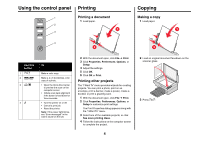
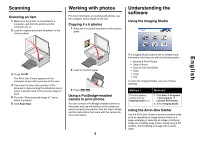
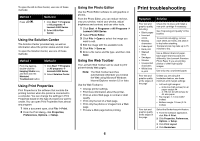
English Improving print quality If you are not satisfied with the print quality of a document, make sure you: • Use the appropriate paper for the document. Use Lexmark Premium Photo Paper if you are printing photos or other high-quality images. • Use a paper that is a heavier weight, bright white, or coated. • Select a higher print quality. If the document still does not have the print quality you want, align the print cartridge. Aligning the print cartridge using the computer For instructions on aligning the print cartridge without a computer, see the Setup sheet. 1 Load paper. 2 From the desktop, double-click the Imaging Studio icon. 3 Click the Maintain/Troubleshoot button. 4 Click Maintenance. 5 Click Align to fix blurry edges. 6 Click Print. An alignment page prints. 7 Follow the instructions on the computer screen. Cleaning the print cartridge nozzles 1 Load paper. 2 From the desktop, double-click the Imaging Studio icon. 3 Click the Maintain/Troubleshoot button. 4 Click Maintenance. 5 Click Clean to fix horizontal streaks. 6 Click Print. A page prints, forcing ink through the print cartridge nozzles to clean them. Wiping the print cartridge nozzles and contacts 1 Remove the print cartridge. 2 Dampen a clean, lint-free cloth with water. 3 Gently hold the cloth against the nozzles for about three seconds, and then wipe in the direction shown. 4 Using another clean section of the cloth, gently hold the cloth against the contacts for about three seconds, and then wipe in the direction shown. 5 With another clean section of the cloth, repeat steps 3 and 4. 6 Let the nozzles and contacts dry completely. 7 Reinsert the print cartridge. 8 Print the document again. 7
-
 1
1 -
 2
2 -
 3
3 -
 4
4 -
 5
5 -
 6
6 -
 7
7 -
 8
8 -
 9
9
 |
 |
