Lexmark 44J0000 User's Guide
Lexmark 44J0000 - J 110 Color Inkjet Printer Manual
 |
UPC - 734646207737
View all Lexmark 44J0000 manuals
Add to My Manuals
Save this manual to your list of manuals |
Lexmark 44J0000 manual content summary:
- Lexmark 44J0000 | User's Guide - Page 1
Lexmark J110 User's Guide July 2000 www.lexmark.com - Lexmark 44J0000 | User's Guide - Page 2
- Lexmark 44J0000 | User's Guide - Page 3
Evaluation and verification of operation in conjunction with other products, programs, or services, except those expressly designated by the manufacturer, are the user's responsibility. © Copyright 2000 Lexmark International, Inc. All rights reserved. UNITED STATES GOVERNMENT RESTRICTED RIGHTS This - Lexmark 44J0000 | User's Guide - Page 4
. PerfectFinish is a trademark of Lexmark International, Inc. PCL® is a registered trademark of the Hewlett-Packard Company. PCL is Hewlett-Packard Company's designation of a set of printer commands (language) and functions included in its printer products. This printer is intended to be compatible - Lexmark 44J0000 | User's Guide - Page 5
from Windows 2 Chapter 3: Printing from a Macintosh computer 4 Chapter 4: Using the printer operator panel 7 Operator panel buttons 7 Printer messages 8 Status messages 8 Attendance messages 8 Service messages 9 Chapter 5: Changing operator panel settings 10 Chapter 6: Printing on special - Lexmark 44J0000 | User's Guide - Page 6
alarm 33 Windows driver status window 33 MarkVision status window 34 Web page 34 Chapter 15: Replacing an ink cartridge 35 Chapter 16: Replacing PerfectFinish 38 Chapter 17: Replacing the printheads 42 Chapter 18: Aligning the printheads 47 Chapter 19: Cleaning the printheads 48 Chapter 20 - Lexmark 44J0000 | User's Guide - Page 7
66 Performance versus print quality 67 Printer maintenance 67 Supplies Menu 69 Black Cartridge/Cyan Cartridge/Magenta Cartridge/Yellow Cartridge ...... 69 Black Printhead/Color Printhead 69 PerfectFinish Cartridge 70 Tray 1/Tray 2 70 Color Menu ...71 Ink Saver 71 Normal ...71 Best ...71 - Lexmark 44J0000 | User's Guide - Page 8
Timeout 79 Auto Continue 79 Display Language 80 Alarm Control 80 Ink Low Alarm 80 Dry Time Delay 81 PCL Emul Menu 82 Font Panel Menus 89 Factory Defaults 89 Exit Config Menu 89 Chapter 25: Printer requirements 90 Windows system requirements 90 Macintosh system requirements 90 Chapter 26 - Lexmark 44J0000 | User's Guide - Page 9
93 Create a Desktop printer 93 Change the zone and printer name 93 Install MarkVision 93 Troubleshooting 94 Common solutions to network problems 94 Light patterns on the external print server 94 Error conditions 96 Lexmark customer support 97 Chapter 27: Using printer software and utilities - Lexmark 44J0000 | User's Guide - Page 10
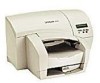
1 Overview Your Lexmark™ J110 printer is a compact color and monochrome printer with a PerfectFinish™ cartridge for printing great looking documents fast. Base printer Base printer with options Paper exit tray Holds up to 250 printed pages. Manual feeder Feeds a single sheet of media. MarkNet™ - Lexmark 44J0000 | User's Guide - Page 11
from Windows Your printer is set up, your Lexmark driver is installed - you are ready to print. Want to print transparencies, add a Do Not Copy watermark, make the colors on a chart more vibrant? It's easy to change printer settings for any job you print. -FOR EXAMPLELet's say your printer has plain - Lexmark 44J0000 | User's Guide - Page 12
The following table shows what printer settings are available from your driver: Choose this tab: Setup Print Style Watermark Printer Configuration To: Change print quality settings, adjust the color, select the number of copies, paper type, paper size, paper source, increase the dry time, or - Lexmark 44J0000 | User's Guide - Page 13
3 Printing from a Macintosh computer You installed your Lexmark driver - you're ready to print. Whether you are printing everyday documents, presentations or letters and envelopes, it's easy to change printer settings for any job you print. -FOR EXAMPLEYour printer has plain paper loaded in tray 1, - Lexmark 44J0000 | User's Guide - Page 14
Now print the envelope: 1 From the File Menu, select Page Setup. 2 From Paper Size select the size envelope you want. 3 Change Orientation to Landscape. 4 Click OK to close the Page Setup dialog box. 5 Go back to the File Menu and select Print. 6 From the pop-up menu, select Paper Handling. 7 From - Lexmark 44J0000 | User's Guide - Page 15
show what printer settings are available from your driver: Choose this option from the Page Setup dialog box: To: General Change page size, orientation or scaling. Watermark Print a watermark. Choose this option from the Print dialog box: General Paper Handling Paper Type/Quality Layout Color - Lexmark 44J0000 | User's Guide - Page 16
panel The operator panel has five buttons and one light. When the printer light is: • Off, the printer is off • On, the printer is on but idle • Blinking, the printer is on and busy processing or there is a printer error Operator panel buttons Menu Select Return Light Go Stop Press Go - Lexmark 44J0000 | User's Guide - Page 17
The operator panel displays three kinds of messages: status, attendance and service. For a complete list of messages, see PRINTER MESSAGES. Status messages Status messages tell you the current state of the printer. When Ready appears, the printer is ready to receive a job. When Busy appears, the - Lexmark 44J0000 | User's Guide - Page 18
Service messages A service error indicates a printer failure and may require a service call. Menu Select Return Go Stop 9 - Lexmark 44J0000 | User's Guide - Page 19
5 Changing operator panel settings Changing settings from the operator panel affects everyone who uses the printer. Changing settings from your software application or printer driver override everything except the Paper Size and Paper Type settings on the operator panel, but the new settings only - Lexmark 44J0000 | User's Guide - Page 20
is now configured for photo paper in the multipurpose feeder until you change it back to transparencies. To restore the printer to the default settings: 1 Press Menu> until Utilities Menu appears. 2 Press Select. 3 Press Menu> until Factory Defaults appears. 4 Press Select. =Restore appears. 5 Press - Lexmark 44J0000 | User's Guide - Page 21
great looking documents on a wide range of plain paper, you can also create posters, photo images for t-shirts, and photo cards. Click these topics for instructions on printing special media jobs: PRINTING A POSTER PRINTING IRON-ON TRANSFERS PRINTING PHOTO CARDS 12 - Lexmark 44J0000 | User's Guide - Page 22
will assemble. 1 Open the File Menu from your software application. 2 Choose Print (or Printer) Setup to open your Windows printer driver. 3 In the Print Setup dialog box, click Properties, Options, or Setup (depending click OK to print your job. This feature is not available for Macintosh users. 13 - Lexmark 44J0000 | User's Guide - Page 23
design from Lexmark Shop Deluxe or other iron-on software package: 1 Load one iron-on transfer with the blank side facing up into the manual feeder (or multipurpose feeder). 2 Open the File Menu from your software application. 3 Choose Print (or Printer) Setup to open your printer driver. 4 In the - Lexmark 44J0000 | User's Guide - Page 24
from Lexmark Shop Deluxe or other iron-on software package: 1 Load one iron-on transfer with the blank side facing up into the manual . 7 From the pop-up menu, select Paper Handling. 8 From Paper Source, select Manual Paper (or Multipurpose Feeder). 9 From the pop-up menu, select Paper Type/Quality. - Lexmark 44J0000 | User's Guide - Page 25
image you want to print: 1 Load one card into the manual feeder (or up to 50 if you are using the multipurpose feeder). 2 Open the File Menu from your software application. 3 Choose Print (or Printer) Setup to open your printer driver. 4 In the Print Setup dialog box, click Properties, Options, or - Lexmark 44J0000 | User's Guide - Page 26
From a Macintosh computer 1 Load one card into the manual feeder (or up to 50 if you are using the multipurpose feeder). 2 Open the File Menu from your software application. 3 Select Page Setup. 4 From Paper - Lexmark 44J0000 | User's Guide - Page 27
tray or feeder. • Do not remove a paper tray while the printer is printing or Busy is displayed on the operator panel. • Feed one sheet of media at a time when using the manual feeder. • Select the paper size and paper type from your printer driver. • If you are printing iron-on transfers, use media - Lexmark 44J0000 | User's Guide - Page 28
11 Loading media The following tables describe what kind of media, how much you can load, and which way it should face in the tray or feeder. Click the following paper sources for instructions on loading media: LOADING TRAY 1 OR TRAY 2 LOADING THE MANUAL FEEDER LOADING THE MULTIPURPOSE FEEDER 19 - Lexmark 44J0000 | User's Guide - Page 29
the removable strip facing the back of the tray. Remove each transparency as it exits the printer. 150 sheets of labels Print side is face down. Manual Feeder Do not use the manual feeder to print PerfectFinish jobs. 1 sheet of paper 1 sheet of letterhead 1 sheet of coated paper Recommended - Lexmark 44J0000 | User's Guide - Page 30
first, face up. Glossy side is face up. Removable strip is inserted first with the rough side face up. Remove transparencies as they exit the printer. Print side is face up. Index cards are inserted vertically with print side face up. Envelopes are inserted vertically with flap side down and stamp - Lexmark 44J0000 | User's Guide - Page 31
be sure to change the Paper Size and Paper Type settings in your printer driver and the operator panel before printing your job. Both tray 1 and in the manual feeder or multipurpose feeder. 1 Hold the tray tab and pull the tray completely out of the printer. 2 Squeeze the width guide and slide it - Lexmark 44J0000 | User's Guide - Page 32
paper in the tray, print side down. Do not exceed the paper stack height indicator on the right side of the tray. 6 Squeeze the width guide and slide it to the right until it is lightly touching the edge of the paper stack. 7 Reinstall the paper tray. 23 - Lexmark 44J0000 | User's Guide - Page 33
the length guide button to slide the guide against the bottom edge of the paper stack. The paper should lie flat (1) in the tray. If the length guide is pushed too tightly against the paper, the paper bends (2) against the paper supports, causing a jam as it is pulled into the printer. 1 Correct - Lexmark 44J0000 | User's Guide - Page 34
3 Squeeze the width guide and slide it to the right until it is lightly touching the edge of the paper stack. 4 Reinstall the paper tray. 5 Fully extend the paper stop. Otherwise, paper may back up into the printer and cause a paper jam. 6 Send your job to print. 25 - Lexmark 44J0000 | User's Guide - Page 35
right edge of the manual feeder. 2 Be sure to select the Paper Size and Paper Type settings in your printer driver before printing your job. guide lever and slide it until it is lightly touching the edge of the media. 3 Be sure to select the Paper Size and Paper Type settings in your printer driver - Lexmark 44J0000 | User's Guide - Page 36
release lever toward the media and hold it. 2 Pull the media straight up. Paper release Click the following printer messages for help solving media loading problems: MESSAGE: CHANGE MESSAGE: CHECK TRAY X CONNECTION MESSAGE: CHECK MPF CONNECTION MESSAGE: INSERT DUPLEX - Lexmark 44J0000 | User's Guide - Page 37
12 Manual duplex Printing on both sides of the paper reduces printing costs. When you select Duplex, your job is formatted to print every other page of - Lexmark 44J0000 | User's Guide - Page 38
open your printer driver. 3 In the Print Setup dialog box, click Properties, Options, or Setup (depending on the application). 4 From Paper Source, select Tray 1 or Tray 2. 5 From Paper Size, select Letter. 6 From the Print Style tab, select 2-sided Printing. 7 Select Print Duplexing Instructions to - Lexmark 44J0000 | User's Guide - Page 39
Plain Paper. 10 From the pop-up menu, select Layout. 11 From Advanced Layout, select Duplex Long Edge or Duplex Short Edge. 12 Select Print Instruction Sheet. 13 Click Print. 30 - Lexmark 44J0000 | User's Guide - Page 40
1 Page 3 Page 2 Page 4 Page 3 Page 4 Page 1 From Windows 1 Open the File Menu from your software application. 2 Choose Print (or Printer Setup) to open your printer driver. 3 In the Print Setup dialog box, click Properties, Options, or Setup (depending on the application). 4 From the Print Style - Lexmark 44J0000 | User's Guide - Page 41
From a Macintosh computer 1 Open the File Menu from your software application. 2 Select Page Setup. 3 From Paper Size, select the paper size you are using. 4 Click OK to close the Page Setup dialog box. 5 Go back to the File Menu and select Print. 6 From the pop-up menu, select Paper Handling. 7 - Lexmark 44J0000 | User's Guide - Page 42
window runs minimized at the bottom of your computer screen and alerts you when paper, ink cartridges, PerfectFinish cartridges, and printheads are low or need to be replaced. To use the status window, make sure bidirectional support is installed from the Drivers, MarkVision and Utilities CD. 33 - Lexmark 44J0000 | User's Guide - Page 43
operator panel, to monitor when supplies need to be replaced. Web page If your printer is connected to a network, you can view the menu settings page from your computer. From your Web browser, type your printer's IP address in the Address box and press Enter. This takes you to a Web page where - Lexmark 44J0000 | User's Guide - Page 44
from your computer screen. The status window alerts you when an ink cartridge is getting low. When a 89 Cartridge Empty message appears, the printer stops printing until you replace the indicated ink cartridge. 1 Open the printer front cover. The carrier moves to the load position at the far - Lexmark 44J0000 | User's Guide - Page 45
Remove the new ink cartridge from its packaging and pull off the tape. 4 Insert the ink cartridge into the corresponding printhead slot and push down on the cartridge until it is securely in place. Avoid touching the release tab on the cartridge or it will pop out of the printhead. 5 Close the front - Lexmark 44J0000 | User's Guide - Page 46
To read more about ink cartridge messages, just click the message: MESSAGE: 31 DEFECTIVE INK CARTRIDGE MESSAGE: 31 MISSING CARTRIDGE XXXX MESSAGE: 32 UNSUPPORTED CARTRIDGE MESSAGE: 88 CARTRIDGE LOW MESSAGE: 89 CARTRIDGE EMPTY MESSAGE: CARTRIDGE LIFE EXPIRED MESSAGE: CARTRIDGE LIFE WARNING 37 - Lexmark 44J0000 | User's Guide - Page 47
Empty message on the operator panel display (or, if you are using the status window or MarkVision, the message appears on your computer screen). The printer stops printing until you replace the PerfectFinish cartridge. 1 Remove the manual feeder (or multipurpose feeder if it is installed). 38 - Lexmark 44J0000 | User's Guide - Page 48
2 Grip the PerfectFinish cartridge and firmly pull it out of the printer. 3 Remove the new PerfectFinish cartridge from its packaging. 4 Remove the tape covering the valve. 39 - Lexmark 44J0000 | User's Guide - Page 49
5 Hold the PerfectFinish cartridge so that the valve is on the left side. Valve 6 Align the cartridge with the latches inside the printer. Latch Latch 40 - Lexmark 44J0000 | User's Guide - Page 50
latches snap over the cartridge as shown. 8 Reinstall the manual feeder (or multipurpose feeder). The printer requires several minutes to warm up. After it completes its internal tests, the Ready message appears on the operator panel. If you do not replace the PerfectFinish cartridge, you must press - Lexmark 44J0000 | User's Guide - Page 51
17 Replacing the printheads Your printer alerts you with a Cartridge Life Warning message on the operator panel display when the indicated printhead needs to be replaced. If you are using the status window or MarkVision, you can monitor printhead life from your computer screen. The status window - Lexmark 44J0000 | User's Guide - Page 52
handle to unlatch the printhead from the carrier. 8 Grip the the printhead and pull it up and out. 9 Discard both the printhead and the ink cartridge(s). Do not reuse the ink cartridges, even if they are only partially used. Your new printhead comes with fresh ink cartridges already installed. 10 - Lexmark 44J0000 | User's Guide - Page 53
11 Remove the plastic cushioning from the printhead. 12 Pull out the tape between the ink cartridge and the printhead. 13 Gently remove the plastic cap from the bottom of the printhead. 44 - Lexmark 44J0000 | User's Guide - Page 54
14 Hold the printhead as shown. 15 Insert the printhead tab under the small arrow on the carrier slot. 16 Rotate the printhead toward the back of the printer until it snaps into position. 45 - Lexmark 44J0000 | User's Guide - Page 55
17 Pull the carrier handle back down to lock in the printheads. 18 Close the front cover. Click the following printer messages for help solving printhead problems: MESSAGE: 31 MISSING PRINTHEAD MESSAGE: 32 UNSUPPORTED PRINTHEAD 46 - Lexmark 44J0000 | User's Guide - Page 56
18 Aligning the printheads Whenever you install a printhead, the printer automatically prints a test page of alignment patterns. There are eight patterns: A, B, C, D, E, F, G, alignment groups B, C, D, E, F, G, and H. Once you select the value for alignment group H, the printer returns to Ready. 47 - Lexmark 44J0000 | User's Guide - Page 57
cover. The carrier moves to the load position at the center of the printer. 6 Raise the carrier handle up and back down to reseat the printheads. 7 Close the cover. If this does not solve the problem, a printhead may be plugged with dried ink. Doing a Short Clean should fix most print quality - Lexmark 44J0000 | User's Guide - Page 58
. If you pressed Go for any of the color bars, the printer does another Long Clean. A Cleaning Printheads message appears on the display. After a few seconds the printer prints another test page with all four colors. 9 Because a Long Clean uses so much ink, we recommend not doing more than two. When - Lexmark 44J0000 | User's Guide - Page 59
11 Reinsert the printhead. 12 Close the cover. 13 Print your job. If the print quality is still not improved, your printer may require service. Contact Lexmark for more information. 50 - Lexmark 44J0000 | User's Guide - Page 60
printer driver. From Windows 1 Open the File Menu. 2 Choose Print (or Printer) Setup. 3 In the Print Setup dialog box, click the Properties button. 4 Click the Printer Configuration tab. (If you are using Windows NT or Windows 2000, go to Start, Settings, Printers, J110 bidirectional support, click - Lexmark 44J0000 | User's Guide - Page 61
occur for a variety of reasons: removing a tray to add paper while the printer is still printing, pushing the paper length guide too tightly against the paper or overfilling the tray. When a jam occurs, the printer stops and alerts you with a message on the operator panel display. After removing - Lexmark 44J0000 | User's Guide - Page 62
A 200, 201 or 209 Check Tray 1 message indicates the paper jammed from tray 1. 1 Remove tray 1 and look inside the opening for the paper jam. 2 Pull the jammed paper toward you and discard it. 3 Reinstall the tray and press Go to resume printing. 53 - Lexmark 44J0000 | User's Guide - Page 63
A 203, 204, 205 or 207 Open Cover/Move Media message indicates the paper is jammed inside the printer. 1 Open the cover. 2 Press Menu> continuously to advance the paper incrementally until you can reach the paper to pull it out. 3 If the paper does - Lexmark 44J0000 | User's Guide - Page 64
A 206, 208, 220, or 222 Check Tray 2 indicates the paper jammed from tray 2. 1 Remove tray 2 and look inside the opening for the paper jam. 2 Grasp the paper between your hands and gently pull the paper toward you. 3 Reinstall the tray and press Go to resume printing. A 221 Check Tray 2/Move Media - Lexmark 44J0000 | User's Guide - Page 65
If that does not clear the jam: 1 Turn off the printer. 2 Remove the printer from the 250-sheet drawer. 3 Removed the jammed paper and discard it. 4 Reinstall the printer on the 250-sheet drawer. 5 Turn on the printer. 6 Resend your print job. 56 - Lexmark 44J0000 | User's Guide - Page 66
A 250 Paper Jam indicates a jam in the multipurpose feeder. 1 Push the paper release lever toward the media and hold it. 2 Pull the media straight up. If that does not clear the jam: 1 Remove the multipurpose feeder. 2 Pull out the jammed paper. 3 Reinstall the multipurpose feeder and press Go to - Lexmark 44J0000 | User's Guide - Page 67
. Ink Cartridges 31 Missing Cartridge 31 Defective Ink Cartridge 32 Unsupported Cartridge 88 Cartridge Low 89 Cartridge Empty Cartridge Life Expired Cartridge Life Warning PerfectFinish 87 PerfectFinish Empty Printer Calibrating Printheads 31 Missing Printhead 32 Unsupported Printhead Paper - Lexmark 44J0000 | User's Guide - Page 68
reached its life expectancy and must be replaced. Message:32 Unsupported Cartridge The ink cartridge is not designed for your printer. Replace it with an ink cartridge that is made for your printer. Paper Message:Change Either the wrong paper type and/or size is - Lexmark 44J0000 | User's Guide - Page 69
Duplex Pages & Press Go The front side of the manual duplex job is printed. Remove the pages and reinsert Printer Calibrating This message appears whenever the PerfectFinish cartridge applicator is refilling. You may hear some clicking sounds as the cartridge applicator refills. Once the cartridge - Lexmark 44J0000 | User's Guide - Page 70
message indicates a color printhead (C=Cyan, M=Magenta or Y=Yellow) or a black printhead (K=Black) needs attention. Message:31 Missing Printhead A printhead is not detected. Install the printhead. If the printhead is already installed, check that it is positioned correctly in the printer. If that - Lexmark 44J0000 | User's Guide - Page 71
printer problems Some printer problems are easy to fix. If your printer is not responding, first make sure: • The printer is turned on • The power cord is plugged in • Other electrical equipment plugged into the outlet works • The printer cable is securely attached to the computer and the printer - Lexmark 44J0000 | User's Guide - Page 72
. 5 Turn the printer off and back on. 6 If this does not clear the message, try cleaning the copper contact area on the printheads. 7 If the 93x service errror remains, call for service. You get a PerfectFinish Empty message, even though you just installed a new cartridge. The cartridge is not - Lexmark 44J0000 | User's Guide - Page 73
. Increase the dry time setting from your printer driver: • From the Windows driver, go to the Setup tab. • From the Macintosh driver, go to Paper Handling. The entire page is white. Be sure you removed all tape from the printheads. You installed a new ink cartridge, but the print quality is not - Lexmark 44J0000 | User's Guide - Page 74
JAMS. Solutions to other paper feeding problems are listed below. Cause Solution You printer is printing. Refill the tray, reinsert it and press Go. The paper jams in tray 1 or tray 2. The paper length guide is pushed too tightly against the paper, causing it to bend against the paper supports - Lexmark 44J0000 | User's Guide - Page 75
from Normal (the default) to Ink Saver Color menu Menu Item Printer Setting Print Quality Ink Saver* Normal Best • Select N-UP PRINTING printing from your printer driver to save paper by printing multiple pages on one page or • Select MANUAL DUPLEX from your printer driver to print jobs on both - Lexmark 44J0000 | User's Guide - Page 76
print quality. Change the print quality setting to Best to get the best print quality, but print speed is slower. Printer maintenance Use these settings in the UTILITIES MENU to keep your printer running smoothly: • ALIGN PRINTHEADS • CLEAN PRINTHEADS • CHANGE INK CARTRIDGE • CHANGE PRINTHEAD 67 - Lexmark 44J0000 | User's Guide - Page 77
MENU Black Cartridge Cyan Cartridge Magenta Cartridge Yellow Cartridge Black Printhead Color Printhead PerfectFinish Tray 1 Tray 2 COLOR MENU Print Print Menus Align Printheads Clean Printheads Change Ink Cartridge Change Printhead Factory Defaults Hex Trace JOB MENU Reset Printer PARALLEL MENU - Lexmark 44J0000 | User's Guide - Page 78
display. BLACK CARTRIDGE/CYAN CARTRIDGE/MAGENTA CARTRIDGE/YELLOW CARTRIDGE BLACK PRINTHEAD/COLOR PRINTHEAD PERFECTFINISH CARTRIDGE TRAY 1/TRAY 2 Black Cartridge/Cyan Cartridge/Magenta Cartridge/Yellow Cartridge A Low, Empty or Refilled message indicates a color ink cartridge-C (Cyan), M (Magenta - Lexmark 44J0000 | User's Guide - Page 79
An Empty message indicates that the PerfectFinish cartridge needs to be replaced. See REPLACING PERFECTFINISH. PerfectFinish =Empty Tray 1/Tray 2 An Empty message indicates that the tray is out of paper or the tray - Lexmark 44J0000 | User's Guide - Page 80
Menu Use the Color Menu print quality settings to select the amount of ink used in your print jobs. This lets you reduce printing costs, increase the speed of your print jobs or print at the highest quality resolution. Ink Saver Use this setting to conserve ink when printing drafts. Normal Use this - Lexmark 44J0000 | User's Guide - Page 81
1, be sure to specify the correct source from the operator panel or your printer driver before printing your job. • PAPER SIZE • PAPER TYPE • CONFIGURE MP • Transparency • Labels • Iron On • Bond • Letterhead • Preprinted • Colored Paper • Plain Paper* • Coated Paper • Glossy Paper • Photo Paper • - Lexmark 44J0000 | User's Guide - Page 82
Letterhead • Preprinted • Colored Paper • Envelope* Configure MP Use Cassette, the default setting, to print continuously from the multipurpose feeder. If you manually feed single sheets, select Manual. If you keep paper in the multipurpose feeder and configure it as First, the printer always feeds - Lexmark 44J0000 | User's Guide - Page 83
Substitute Size The printer automatically prints letter-size jobs on A4-size paper and A4-size jobs on letter-size paper if the requested size is not loaded in - Lexmark 44J0000 | User's Guide - Page 84
pages, change this setting to Print. Menu item Blank Pages *Factory default Value =Do Not Print* =Print Separator Sheets If you are sharing your printer with other people in the area, you can separate your jobs with a blank page inserted between jobs. If you are printing transparencies, you can - Lexmark 44J0000 | User's Guide - Page 85
new ink cartridges or printheads or to troubleshoot printing problems. • PRINT MENUS • ALIGN PRINTHEADS • CLEAN PRINTHEADS • CHANGE INK CARTRIDGE • CHANGE PRINTHEAD • FACTORY DEFAULTS • HEX TRACE Print Menus Use this menu to print a menu settings page listing your current printer settings - Lexmark 44J0000 | User's Guide - Page 86
Change Ink Cartridge To replace an ink cartridge, you can either open the cover or select Change Ink Cartridge from the Utilities Menu. Menu item Change Ink Cartridge Value Press Select. You are prompted to open the cover. Change Printhead To move the carrier to the load position, select Change - Lexmark 44J0000 | User's Guide - Page 87
Job Menu Use this menu to reset the printer to the settings you defined. Make sure there are no other jobs waiting to print before pressing Reset Printer or you risk losing some or all of the jobs. Menu item Reset Printer Value Press Select to reset the printer settings. 78 - Lexmark 44J0000 | User's Guide - Page 88
ALARM CONTROL • INK LOW ALARM • DRY TIME DELAY Print Timeout Use the Print Timeout setting to set the number of seconds the printer waits before printing • 56 Std Parallel Port Disabled • 88 Cartridge Low If Auto Continue is disabled, the printer stops and waits for operator intervention. Menu - Lexmark 44J0000 | User's Guide - Page 89
=Finnish =Japanese Alarm Control Use the alarm to alert you when the printer needs intervention. Menu item Alarm Control *Default setting Value =Off =On* Ink Low Alarm Use the alarm to alert you when ink cartridges are running low. Menu item Ink Low Alarm *Default setting Value =Off =On* 80 - Lexmark 44J0000 | User's Guide - Page 90
Dry Time Delay If the media you are using is slow drying, you can increase the number of seconds the printer waits before printing the next page, either from your printer driver or from the operator panel. Menu item Dry Time Delay *Default setting Value =Disabled* =Auto =1..30 81 - Lexmark 44J0000 | User's Guide - Page 91
PCL Emul Menu Use this menu to change settings for jobs printed in PCL emulation printer language. • FONT NAME • POINT SIZE • PITCH • SYMBOL SET • ORIENTATION • LINES PER PAGE • AUTO CR AFTER LF • AUTO LF AFTER CR Font Name Select the font - Lexmark 44J0000 | User's Guide - Page 92
Per Page *Factory default Value =1...255 (US=60* / Non-US=64*) Auto CR After LF This setting determines how the printer formats the end of a line. Select whether the printer automatically performs a carriage return (CR) after a line feed (LF) control command. Menu item Auto CR After LF *Factory - Lexmark 44J0000 | User's Guide - Page 93
Auto LF After CR Like the setting above, this setting determines how the printer formats the end of a line. Select whether the printer automatically performs a line feed (LF) after a carriage return (CR) control command. Menu item Auto LF After CR *Factory default Value =Off* =On 84 - Lexmark 44J0000 | User's Guide - Page 94
• HONOR INIT • PARALLEL MODE 1 • PARALLEL MODE 2 NPA Mode When NPA Mode is enabled, your computer can send print jobs to the printer and query printer status information simultaneously. Menu item NPA Mode *Factory default Value =On =Off =Auto* Parallel Buffer You can configure the size of the - Lexmark 44J0000 | User's Guide - Page 95
=On* Protocol When the protocol is set to Fastbytes, the printer receives information at a much faster transmission rate, provided the host computer supports Fastbytes. When the protocol is set to Standard, the printer receives information at a normal transmission rate. Menu item Protocol *Factory - Lexmark 44J0000 | User's Guide - Page 96
strobe. If set to Off, the parallel port data is sampled on the trailing edge of strobe. This setting appears only if the Parallel Port supports this feature. Menu item Parallel Mode 2 *Factory default Value =Off =On* 87 - Lexmark 44J0000 | User's Guide - Page 97
Bus (USB) interface port. • NPA MODE • USB BUFFER NPA Mode When NPA Mode is enabled, your computer can send print jobs to the printer and query printer status information simultaneously. Menu item NPA Mode *Factory default Value =On =Off =Auto* USB Buffer You can configure the size of the USB - Lexmark 44J0000 | User's Guide - Page 98
panel menus. Menu item Panel Menus *Factory default Value =Disable =Enable* Factory Defaults If you select Restore All, all downloaded fonts, macros and symbol sets in printer memory are deleted and all menu settings return to their factory defaults except Display Language and all settings in the - Lexmark 44J0000 | User's Guide - Page 99
requirements Windows system requirements To use your printer with a PC, your system should have: • An monitor recommended • CD-ROM drive (2X or faster) recommended Macintosh system requirements To use your printer with a Macintosh computer, your system should have: • 32MB RAM • 6MB free hard disk - Lexmark 44J0000 | User's Guide - Page 100
the AppleTalk type The J110 printer requires that you change the AppleTalk type in order for you to print AppleTalk network print jobs. Before you change the setting Verify your printer hardware setup is complete. Refer to the printer setup guide for detailed instructions. Change the AppleTalk type - Lexmark 44J0000 | User's Guide - Page 101
manually assign an IP address using the printer operator panel (see SET THE IP ADDRESS USING THE PRINTER not work correctly with your J110 printer.) - Delete the Prefix and Drivers, MarkVision and Utilities CD. They are installed on your computer in a Lexmark Extras folder when you set up your printer - Lexmark 44J0000 | User's Guide - Page 102
page to verify the parameters are set as you intended. Create a Desktop printer Each Macintosh user on the AppleTalk network who wants to use the network printer should do the following steps. 1 In the Chooser, select the J110 printer. 2 If you have a routed network, there is a list of zones you can - Lexmark 44J0000 | User's Guide - Page 103
. 4 If you still don't see the printer in the Chooser, make sure AppleTalk is active on the workstation (look in the AppleTalk control panel). 5 If you are still having trouble with the hardware, contact Lexmark for help. See LEXMARK CUSTOMER SUPPORT. Light patterns on the external print server - Lexmark 44J0000 | User's Guide - Page 104
Four indicator lights Pattern binary 0 binary 1 binary 2 binary 3 binary 4 binary 5 binary 6 binary 7 binary 8 binary 9 binary 10 binary 11 binary 12 binary 13 binary 14 binary 15 95 - Lexmark 44J0000 | User's Guide - Page 105
. 1 Reset the print server. 2 If the problem reoccurs, call Customer Support. binary 9 (for 0.75 sec), binary 1 printer. • Change the serial port settings for either the print server or the printer so they match. The printer was turned off while the serial job was printing. 1 Turn the printer - Lexmark 44J0000 | User's Guide - Page 106
Lexmark customer support World Wide Web www.lexmark.com CompuServe Go Lexmark Internet ftp.lexmark.com U.S. and Canada, technical support and any other customer needs Lexmark phone numbers (worldwide) 1-800-LEXMARK On the Drivers, MarkVision and Utilities CD, click Contact Lexmark, Customer - Lexmark 44J0000 | User's Guide - Page 107
printer on the Drivers, MarkVision and Utilities CD. The MarkVision graphical user interface provides advanced, real-time, centralized management capabilities for Lexmark printers to maintain printer inventory, assign property tags, track page counts, and gather job statistics. - Download and manage - Lexmark 44J0000 | User's Guide - Page 108
management. • Proactive status alerts on Lexmark printers. • Tools that allocate printing expenses, balance workload, and access printing resources. MarkVision Simple Network Management Protocol (SNMP) Services let administrators manage popular multivendor printers. MarkVision for UNIX Networks and - Lexmark 44J0000 | User's Guide - Page 109
on the Drivers, MarkVision and Utilities CD. NetPnP automates the configuration and installation of Lexmark printers on a network. NetPnP senses when a new printer is attached to the network, automatically creates a shared printer object on a Windows NT 4.0 system, and notifies users via e-mail - Lexmark 44J0000 | User's Guide - Page 110
/IP. • Automates the setup of Lexmark network printers, eliminating more than a dozen steps in the process. • Distribution of drivers with custom settings to users. IT administrators can remotely install, update, and distribute drivers with custom settings to users on the network, eliminating time - Lexmark 44J0000 | User's Guide - Page 111
it came in. If the box is unavailable, find the closest equivalent. 1 If you are shipping the printer, remove the printheads and ink cartridges. For short moves, leave them in the printer. 2 Remove the multipurpose feeder and/or tray 2 if attached. 3 Unplug the power cord. 4 Unplug all cables. 5 if - Lexmark 44J0000 | User's Guide - Page 112
trays 1 and 2 20 Color Menu Best 71 Ink Saver 71 Normal 71 Color Printhead, Supplies Menu 69 Configuration Menu Exit Config Mode 89 Factory Defaults 89 Panel Menus 89 Configure MP, Paper Menu 73 customer support CompuServe 97 Internet 97 World Wide Web 97 Cyan Cartridge, Supplies Menu 69 D Display - Lexmark 44J0000 | User's Guide - Page 113
paper, loading manual feeder 20 multipurpose feeder 21 trays 1 and 2 20 Point Size, PCL Emul Menu 82 Print Menus, Utilities Menu 76 print quality problems, solving 64 Print Timeout, Setup Menu 79 printer messages attendance 8 ink cartridges 31 Defective Ink Cartridge 59 31 Missing Cartridge 59 32 - Lexmark 44J0000 | User's Guide - Page 114
feeding problems 65 status messages 8 Stop button 7 Substitute Size, Paper Menu 74 supplies replacing an ink cartridge 35 replacing printheads 42 replacing the PerfectFinish car- tridge 38 Supplies Menu Black Cartridge 69 Black Printhead 69 Color Printhead 69 Cyan Cartridge 69 Magenta Cartridge 69 - Lexmark 44J0000 | User's Guide - Page 115
106 - Lexmark 44J0000 | User's Guide - Page 116
Lexmark and Lexmark with diamond design are trademarks of Lexmark International, Inc., registered in the United States and/or other countries. © 2000 Lexmark International, Inc. 740 West New Circle Road Lexington, Kentucky 40550 www.lexmark.com
-
 1
1 -
 2
2 -
 3
3 -
 4
4 -
 5
5 -
 6
6 -
 7
7 -
8
-
9
-
10
-
11
-
12
-
13
-
14
-
15
-
16
-
17
-
18
-
19
-
20
-
21
-
22
-
23
-
24
-
25
-
26
-
27
-
28
-
29
-
30
-
31
-
32
-
33
-
34
-
35
-
36
-
37
-
38
-
39
-
40
-
41
-
42
-
43
-
44
-
45
-
46
-
47
-
48
-
49
-
50
-
51
-
52
-
53
-
54
-
55
-
56
-
57
-
58
-
59
-
60
-
61
-
62
-
63
-
64
-
65
-
66
-
67
-
68
-
69
-
70
-
71
-
72
-
73
-
74
-
75
-
76
-
77
-
78
-
79
-
80
-
81
-
82
-
83
-
84
-
85
-
86
-
87
-
88
-
89
-
90
-
91
-
92
-
93
-
94
-
95
-
96
-
97
-
98
-
99
-
100
-
101
-
102
-
103
-
104
-
105
-
106
-
107
-
108
-
109
-
110
-
111
-
112
-
113
-
114
-
115
-
116
 |
 |

www.lexmark.com
User’s Guide
July 2000
Lexmark J110