Lexmark 4600 T64x - User's Guide - Page 98
Clearing printer jams
 |
View all Lexmark 4600 manuals
Add to My Manuals
Save this manual to your list of manuals |
Page 98 highlights
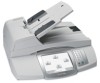
Clearing jams Clearing printer jams Although there are several places a jam can occur, clearing the paper path is fairly easy depending on the jam message or messages displayed on the operator panel. Paper jams can occur in four areas: the front of the printer, inside the printer, at the rear of the printer, and the scanner. Jams in the front of the printer occur in the input options or the duplex tray. Jams inside the printer occur in two locations and require the removal of the print cartridge. Jams can occur at the rear of the printer or in one of the output options. Scanner jams can occur as the paper enters the scanner or exits the scanner. Scanner jams can be cleared by opening the ADF cover or the document cover and removing the jam. Note: For more information on clearing printer paper jams, see Understanding jam messages located on the printer publications CD. For information on clearing scanner related paper jams, see Clearing scanner jams. Clearing scanner jams 290, 291, 292, and 294 Scanner Jams 1 Remove all original documents from the ADF. 2 Open the ADF cover, and carefully remove any jammed pages. If you cannot remove the jammed paper, close the ADF cover, and open the document cover. Carefully remove the jammed paper. 3 Close the document cover. Clearing printer jams 98
-
 1
1 -
2
-
3
-
4
-
5
-
6
-
7
-
8
-
9
-
10
-
11
-
12
-
13
-
14
-
15
-
16
-
17
-
18
-
19
-
20
-
21
-
22
-
23
-
24
-
25
-
26
-
27
-
28
-
29
-
30
-
31
-
32
-
33
-
34
-
35
-
36
-
37
-
38
-
39
-
40
-
41
-
42
-
43
-
44
-
45
-
46
-
47
-
48
-
49
-
50
-
51
-
52
-
53
-
54
-
55
-
56
-
57
-
58
-
59
-
60
-
61
-
62
-
63
-
64
-
65
-
66
-
67
-
68
-
69
-
70
-
71
-
72
-
73
-
74
-
75
-
76
-
77
-
78
-
79
-
80
-
81
-
82
-
83
-
84
-
85
-
86
-
87
-
88
-
89
-
90
-
91
-
92
-
 93
93 -
 94
94 -
 95
95 -
 96
96 -
 97
97 -
 98
98 -
 99
99 -
 100
100 -
 101
101 -
 102
102 -
 103
103 -
104
-
105
-
106
-
107
-
108
-
109
-
110
-
111
-
112
-
113
-
114
-
115
-
116
-
117
-
118
-
119
-
120
-
121
-
122
-
123
 |
 |
