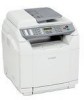
Lexmark 502n User's Guide
Lexmark 502n - X Color Laser Manual
 |
UPC - 734646054515
View all Lexmark 502n manuals
Add to My Manuals
Save this manual to your list of manuals |
Lexmark 502n manual content summary:
- Lexmark 502n | User's Guide - Page 1
X500n, X502n User's Guide April 2007 www.lexmark.com Lexmark and Lexmark with diamond design are trademarks of Lexmark International, Inc., registered in the United States and/or other countries. All other trademarks are the property of their respective owners. © 2007 Lexmark International, Inc. - Lexmark 502n | User's Guide - Page 2
- Lexmark 502n | User's Guide - Page 3
Installing a 530-sheet drawer...27 Securing the 530-sheet drawer to the printer 28 Attaching cables...29 Loading paper and specialty media 31 Loading trays... exit bin...37 Linking trays...38 Paper and specialty media guide 39 Paper guidelines...39 Paper characteristics ...39 Unacceptable paper - Lexmark 502n | User's Guide - Page 4
sizes, types, and weights 44 Supported paper sizes...44 Supported paper types ...45 Supported paper weights...46 Paper capacities ...46 Printing...48 Installing printer software...48 Printing a document from Windows 48 Printing a document from a Macintosh computer 48 Printing the configuration - Lexmark 502n | User's Guide - Page 5
...61 Sending a fax...61 Sending a fax using the ADF...61 Sending a fax using the scanner glass...62 Sending a broadcast fax...62 Canceling a broadcast fax...64 Understanding the fax receive modes ...64 Setting the fax receive mode ...64 Receiving a fax at the end of a conversation 64 Receiving - Lexmark 502n | User's Guide - Page 6
proof glass...101 Ordering supplies...106 Ordering toner cartridges...106 Ordering a fuser...107 Ordering a photodeveloper cartridge...107 Ordering a waste toner bottle ...107 Moving the printer...107 Before moving the printer ...107 Locking the scanner ...108 Removing the printer from the 530-sheet - Lexmark 502n | User's Guide - Page 7
Using the Embedded Web Server 116 Troubleshooting...117 Online customer support...117 Checking an unresponsive printer 117 Solving printing problems...117 Multiple-language PDFs do not print ...117 Control panel display is blank...117 Jobs do not print ...117 Job takes longer than expected to - Lexmark 502n | User's Guide - Page 8
margins...132 Skewed print...132 Blank pages...133 Clipped images...133 Solid color pages ...134 Paper curl ...134 Toner specks ...134 Toner rubs off ...135 FAQ about color printing...135 Contacting Customer Support...136 Notices...137 Edition notice...137 Power consumption...143 Index...146 8 - Lexmark 502n | User's Guide - Page 9
user documentation, to a professional service person. This product is designed, tested, and approved to meet strict global safety standards with the use of specific Lexmark components. The safety features of some parts may not always be obvious. Lexmark in your operating instructions that discusses - Lexmark 502n | User's Guide - Page 10
Basic model The following illustrations show the basic printer model. 1 Automatic Document Feeder (ADF) 2 Paper guides 3 ADF paper support 4 Scanner cover 5 Control panel 6 Paper support 7 Standard exit bin 8 Standard 250-sheet tray (Tray 1) 9 Scanner glass 10 Scanner lock 10 - Lexmark 502n | User's Guide - Page 11
11 Rear hinges 12 Power switch 13 Power supply port 14 Ethernet port 15 USB port 16 EXT port 17 LINE port 11 - Lexmark 502n | User's Guide - Page 12
Fully configured model The following illustration shows the fully configured printer model. The basic model can be fully configured by adding a 530-sheet drawer. The asterisk (*) indicates the drawer is optional. 1 Optional 530-sheet drawer (Tray 2)* 12 - Lexmark 502n | User's Guide - Page 13
up One Touch Button entries using the Embedded Web Server. 2 Redial / Pause • Dial the last fax number entered (redial). • Insert a three-second pause in the number to be dialed to wait for an outside line or get through an automated answering system. 3 Hook Toggle the phone line on (for manual - Lexmark 502n | User's Guide - Page 14
you want to access. Control panel item 12 Display 13 Keypad 14 Stop / Clear Description Shows messages describing the current state of the printer and indicating possible printer problems you must resolve In Copy mode: Enter the number of copies or prints you want to make. In Fax mode: • Enter fax - Lexmark 502n | User's Guide - Page 15
Control panel item 15 Black Start Description Start copying or scanning in black and white. 16 Color Start Start copying or scanning in color. 17 Select Accept menu selections and settings. 18 Navigation buttons • Press or to scroll through menu lists. • When Ready appears on the display, - Lexmark 502n | User's Guide - Page 16
storm. Do not set up this product or make any electrical or cabling connections, such as the power supply cord or telephone, during a lightning storm. Choosing a fax connection You can connect the printer with equipment such as a telephone, an answering machine, or a computer modem. Note: The - Lexmark 502n | User's Guide - Page 17
connect the equipment: 1 Remove the plug from the EXT port on the back of the printer. Note: Once this plug is removed, any country- or region-specific equipment you connect to the printer by the adapter, as shown, will not function properly. 2 Connect your telecommunications equipment directly to - Lexmark 502n | User's Guide - Page 18
Do not touch cables or the printer in the area shown while actively sending or printer. 2 Connect your telecommunications equipment directly to the EXT port on the back of the printer. Note: Once this plug is removed, any country- or region-specific equipment that you connect to the printer - Lexmark 502n | User's Guide - Page 19
jack to make copies or to send and receive faxes without using a computer. 1 Make sure you have a telephone cord and a telephone wall jack. 2 Connect one end of the telephone cord into the LINE port of the printer. 3 Connect the other end of the telephone cord into an active telephone wall jack. 19 - Lexmark 502n | User's Guide - Page 20
telephone to work properly. 1 Make sure you have a telephone cord (provided with the product) and a telephone wall jack. 2 Connect one end of the telephone cord into the LINE port of the printer. 3 Connect the other end of the telephone cord into the N slot of an active telephone wall jack. 4 If you - Lexmark 502n | User's Guide - Page 21
. Note: Setup steps may vary depending on your country or region. 1 Make sure you have the following: • A telephone • Two telephone cords • A telephone wall jack 2 Connect one telephone cord to the LINE port of the printer, and then plug it into an active telephone wall jack. 21 - Lexmark 502n | User's Guide - Page 22
. 4 Connect the other telephone cord to a telephone, and then plug it into the EXT port of the printer. Connecting to an answering machine Connect an answering machine to the printer to receive both incoming voice messages and faxes. Note: Setup steps may vary depending on your country or region - Lexmark 502n | User's Guide - Page 23
2 Connect one telephone cord into the LINE port of the printer, and then plug it into an active telephone wall jack. 3 Remove the protective plug from the EXT port of the printer. 4 Connect a second telephone cord from the telephone to the answering machine. 5 Connect a third telephone cord from the - Lexmark 502n | User's Guide - Page 24
. 1 Make sure you have the following: • A telephone • A computer with a modem • Three telephone cords • A telephone wall jack 2 Connect a telephone cord into the LINE port of the printer, and then plug it into an active telephone wall jack. 3 Remove the protective plug from the EXT port of the - Lexmark 502n | User's Guide - Page 25
third telephone cord from the computer modem to the EXT port of the printer. Setting the outgoing fax name and number To have the designated fax and then press . 6 Press or repeatedly until User Name appears, and then press . 7 Use the keypad to type the user name, and then press . 8 Press to return - Lexmark 502n | User's Guide - Page 26
3 Press or repeatedly until Date/Time Setup appears, and then press . 4 Press or repeatedly until Date Setting appears, and then press . 5 Press or repeatedly until Year, Month, Date, or Date Format appears, and then press . 6 Press or repeatedly, or use the keypad, to adjust the date item selected, - Lexmark 502n | User's Guide - Page 27
Installing options Installing a 530-sheet drawer The printer supports one optional drawer which allows an additional 530 sheets of paper to be loaded. CAUTION: If you are installing a 530-sheet drawer after setting up the printer, turn the printer off, and unplug the power cord before continuing. 1 - Lexmark 502n | User's Guide - Page 28
the 530-sheet drawer to the printer 1 Align one bracket with the hole on the right side of the printer as shown. Press the bracket flat against the printer, and then tighten the thumbscrew. 2 Starting at the front of the printer, push the right side cover onto the printer, fitting each slot on the - Lexmark 502n | User's Guide - Page 29
, fitting each slot on the cover over its corresponding tab on the drawer in order to cover the gap between the printer and the drawer. Attaching cables Connect the printer to the computer using a USB cable or an Ethernet cable. • A USB port requires a USB cable. Be sure to match the USB symbol - Lexmark 502n | User's Guide - Page 30
1 Ethernet port 2 USB symbol 3 USB port 30 - Lexmark 502n | User's Guide - Page 31
tray, and the optional 530-sheet tray (Tray 2), which is part of the 530-sheet drawer and fits into the support unit. Load the paper or specialty media used for the majority of print jobs in Tray 1. Proper paper loading prevents jams and facilitates trouble-free printing. Note: Tray 1 can be used as - Lexmark 502n | User's Guide - Page 32
. This second illustration shows the tabs and size indicators for the optional 530-sheet tray. 3 Squeeze the width guide tabs together as shown, and slide the width guide to the correct position for the paper size being loaded. Note: Notice the size indicators on the bottom left of the tray. Use - Lexmark 502n | User's Guide - Page 33
tabs, the size indicators, and the load line for the optional 530-sheet tray. 4 Flex the sheets back and forth to loosen them, and then fan them. Do not fold or crease the paper. Straighten the edges on a level surface. 5 Load the paper stack with the recommended print side faceup. Load - Lexmark 502n | User's Guide - Page 34
6 Align the tray, and insert it. Converting the standard tray to a legal-size tray The standard tray (Tray 1), also known as the 250-sheet tray, can be extended to make the 250-sheet legal-size tray (Tray 1). Note: Not all models come with a universal tray. You may need to purchase a legal-size tray - Lexmark 502n | User's Guide - Page 35
2 Using a coin or a flat head screwdriver, unlock the tray on each side. 3 Fully extend the tray until the locking tabs are in the LGL position. 4 Lock the tray on each side. 35 - Lexmark 502n | User's Guide - Page 36
5 Slide the paper guide to the legal position. 6 Attach the dust cover. 7 Load the paper stack with the recommended print side faceup, and close the dust cover. When loading preprinted letterhead, place the header toward the rear of the tray. 36 - Lexmark 502n | User's Guide - Page 37
8 Align the tray, and insert it. Setting the Paper Type 1 Make sure the printer is on and Ready appears. 2 From the control panel, press . 3 Press or exit bin collects every type of paper and specialty media the printer supports. To set up the standard exit bin: 1 Grasp the edges of the paper - Lexmark 502n | User's Guide - Page 38
is inclined so the paper now remains in a neater stack in the standard exit bin. Note: Do not leave the paper support inclined if you are printing transparencies. Doing so may cause creases in the transparencies. Linking trays Tray linking enables the automatic linking feature for trays - Lexmark 502n | User's Guide - Page 39
guide Paper guidelines When printing on specialty media, use the printer can cause paper feeding problems. Curl can occur after the paper passes through the printer, where it is exposed feeding problems. Smoothness Paper smoothness directly affects print quality. If paper is too rough, toner cannot - Lexmark 502n | User's Guide - Page 40
printer • Preprinted papers that can be affected by the temperature in the printer fuser part forms or documents Selecting paper Using appropriate paper prevents jams and helps ensure trouble are specifically User papers printed with heat-resistant inks designed for use in xerographic copiers. The ink - Lexmark 502n | User's Guide - Page 41
problems, avoid getting fingerprints on the transparencies. • Before loading transparencies, fan the stack to prevent sheets from sticking together. • We recommend Lexmark part number 12A8240 for letter-size and Lexmark part specifically for laser printers way - Have windows, holes, perforations, cutouts - Lexmark 502n | User's Guide - Page 42
• Adjust the width guide to fit the width of the envelopes. • Load only one size of envelope at area where the seams come together. For more information, see the following illustrations: 1 Envelope flap covering seams (supported Label Guide available on the Lexmark Web site at www.lexmark.com/ - Lexmark 502n | User's Guide - Page 43
specifically for laser printers the printer and the cartridge with adhesive, and could void the printer and cartridge warranties. driver edge, and use a non-oozing adhesive. • Portrait orientation works best, especially when printing bar codes jams or other paper handling problems. • Check with the - Lexmark 502n | User's Guide - Page 44
larger listed size. For information on card stock and labels, see the Card Stock & Label Guide Supported paper sizes Paper size Dimensions Standard 250-sheet 250-sheet letter-size tray legal-size tray (Tray by the software program. 3 Measurements apply to simplex (one-sided) printing only. 44 - Lexmark 502n | User's Guide - Page 45
legal-size tray based on which tray is installed, unless the size is specified by the software program. 3 Measurements apply to simplex (one-sided) printing only. Supported paper types Paper type Paper Standard 250-sheet 250-sheet legal-size letter-size tray (Tray 1) tray (Tray 1) Card stock - Lexmark 502n | User's Guide - Page 46
paper, we recommend grain long fibers. For papers heavier than 135 g/m2, we recommend grain short. 2 The pressure sensitive area must enter the printer first. 3 Vinyl labels are not supported. 4 Use sulfite, wood-free, or up to 100% cotton envelopes. 5 Maximum weight for 100% cotton envelopes is 90 - Lexmark 502n | User's Guide - Page 47
Paper type Standard 250-sheet letter-size tray (Tray 1) Optional 250-sheet legal-size tray (Tray 1) Optional 530-sheet tray (Tray 2) Labels 80 80 X Transparencies 50 50 X Envelopes 10 of Com 10 10 of Com 10 X 1 Based on 75 g/m2 (20 lb) paper. 2 30 sheets of 163 g/m2 (90 lb) card stock - Lexmark 502n | User's Guide - Page 48
media. Installing printer software A printer driver is software that lets the computer communicate with the printer. The printer software is typically installed during the initial printer setup. For more information, see the Setup sheet or Setup Guide that shipped with the printer or click Install - Lexmark 502n | User's Guide - Page 49
problems. 1 Make sure the printer is , part of the job may have already been transmitted to the printer buffer Mac OS 9 When you send a job to print, the printer icon for your selected printer appears on the desktop. 1 Double-click the printer icon. A list of print jobs appears in the printer window - Lexmark 502n | User's Guide - Page 50
3 Click the trash icon. Canceling a print job from Mac OS X 1 Choose Applications ΠUtilities, and then double-click Print Center or Printer Setup Utility. 2 Double-click the printer you are printing to. 3 From the printer window, select the job to cancel. 4 From the icon bar at the top of the - Lexmark 502n | User's Guide - Page 51
, photos, small items, transparencies, photo paper, or thin media (such as magazine clippings) into the ADF. Place these items on the scanner glass. 2 If you are loading a document into the ADF, adjust the paper guides. 3 From the control panel, press . 4 Use the keypad to enter the number of copies - Lexmark 502n | User's Guide - Page 52
Selecting a paper size for copies If you have more than one tray installed, you can load two different sizes of paper. This will allow you temporarily changed by pressing the Reduce / Enlarge button on the control panel. When the printer power is reset, the printer returns to the default settings. 52 - Lexmark 502n | User's Guide - Page 53
, photo paper, or thin media (such as magazine clippings) into the ADF. 2 Adjust the paper guides. 3 From the control panel, press . 4 Use the keypad to Image Quality button on the control panel. When the printer power is reset, the printer returns to the default settings. Making a copy lighter - Lexmark 502n | User's Guide - Page 54
clippings) into the ADF. Place these items on the scanner glass. 2 If you are loading a document into the ADF, adjust the paper guides. 3 From the : If the copy job continues to print, part of the job may have already been transmitted to the printer buffer before the stop command was sent. Cancel - Lexmark 502n | User's Guide - Page 55
ADF. Place these items on the scanner glass. 3 If you are loading a document into the ADF, adjust the paper guides. 4 Click Start ΠPrograms or All Programs ΠLexmark you are using the ADF, the Preview function is not supported. If you are using the scanner glass, you can preview one page at a time. - Lexmark 502n | User's Guide - Page 56
you are using the ADF, the Preview function is not supported. If you are using the scanner glass, you can preview one page at a time. ADF. Place these items on the scanner glass. 3 If you are loading a document into the ADF, adjust the paper guides. 4 Click Start ΠPrograms or All Programs ΠLexmark - Lexmark 502n | User's Guide - Page 57
ADF, the Preview function is not supported. If you are using the scanner glass, you can preview one page at a time. 7 If you want to scan only a portion of the document, click and drag the dotted line box to select a specific area preview window to select a specific area of the preview art printing (descreen). - Lexmark 502n | User's Guide - Page 58
function is not supported. If you are using the scanner glass, you can preview one page at a time. 7 Click the Advanced tab. 8 Select Moire Reduction. 9 Choose either Magazine, Newspaper, or Art Print, and then click Scan. Scanning to a computer over the network 1 Make sure the printer is connected - Lexmark 502n | User's Guide - Page 59
browser. 2 In the address bar, type the IP address of the printer, and then press Enter. If the Java applet screen appears, click the name you are searching for, and then press . Notes: • If you know the One Touch Button (1-20) assigned to the name, you can directly select the name using the quick - Lexmark 502n | User's Guide - Page 60
state. Note: Scan resolution can also be temporarily changed by pressing the Image Quality button on the control panel. When the printer power is reset, the printer returns to the default settings. Making a scanned image lighter or darker Adjusting the density setting makes scanned images lighter or - Lexmark 502n | User's Guide - Page 61
Zealand telecom users: If a charge for local calls is unacceptable, do not use the "Dial" button for local calls. Only the seven digits of the local number should be dialed from your telephone. Do not dial the area code digit or the "0" prefix. Sending a fax using the ADF 1 Make sure the printer is - Lexmark 502n | User's Guide - Page 62
one fax number. You can include Quick Dial numbers, Speed Dial numbers, and up to 50 manually dialed numbers in the same broadcast. 1 Make sure the printer is on and is connected to a working phone line. 2 Load an original document faceup, short edge first into the ADF or facedown on the scanner - Lexmark 502n | User's Guide - Page 63
On Hook Dial) The manual dialing feature lets you dial a fax number while listening to the call through a speaker on the printer. It is useful when clippings) into the ADF. Place these items on the scanner glass. 3 If you are loading a document into the ADF, adjust the paper guides. 4 Ask the other - Lexmark 502n | User's Guide - Page 64
Receiving a fax Understanding the fax receive modes Fax receive mode Fax Only Fax Tad Manual Description The printer automatically answers every call as a fax. Use this mode: • For dedicated fax lines fax machine, press . 3 Press 2 to receive the fax. 4 Replace the external telephone handset. 64 - Lexmark 502n | User's Guide - Page 65
code (51), the printer starts to receive the fax. Press 51 and wait for the beep or until Receiving appears on the display, and then hang up. Adjusting fax activity report settings The printer can be set to print an activity report automatically every 100 faxes (Auto Print), or manually after - Lexmark 502n | User's Guide - Page 66
8 Use the keypad to type the name, and then press . 9 Press to return to the Ready state. Note: You can edit or replace an existing Quick Dial name or number by following the same steps. Printing the Quick Dial list 1 From the control panel, press . 2 Press or repeatedly until Reports Print appears, - Lexmark 502n | User's Guide - Page 67
manually and the line is busy, press Redial / Pause, and then press to try again. Note: If you are sending a fax automatically and the line is busy, the printer will automatically redial one Ring Volume Line Mon. Vol Job End Tone Vol Job Error Tone Vol Alarm Volume Description Sets the volume of the - Lexmark 502n | User's Guide - Page 68
in Fax Only mode. If you have extension phones on the same line as the printer, or subscribe to the telephone company's Distinctive Ring service, keep the Ring Count Delay setting at 4. 1 From the control panel, press . 2 Press or repeatedly until Fax Settings appears, and then press . 3 Press - Lexmark 502n | User's Guide - Page 69
printer is on and is connected to a working phone line. 2 Load an original document faceup, short edge first into the ADF or facedown on the scanner glass ) into the ADF. Place these items on the scanner glass. 3 If you are loading a document into the ADF, adjust the paper guides. 4 From the - Lexmark 502n | User's Guide - Page 70
printer ordinarily scans the documents into the memory before sending them. As soon as the phone line is free, the printer starts dialing and sending. However, if the memory is full, the printer Auto Reduction enables the printer to automatically reduce an incoming fax to fit on one page of letter-, - Lexmark 502n | User's Guide - Page 71
can help you avoid jams: • Use only recommended paper or specialty media. For more information, see the Card Stock & Label Guide available on the Lexmark Web site at www.lexmark.com/publications. • Do not load too much paper. Make sure the stack height does not exceed the indicated maximum height - Lexmark 502n | User's Guide - Page 72
Jam message Area name 1 ADF Jam ADF door Open ADF Cover and Clear Jam 2 Paper Jam C Rear door (top) Open Rear Cover and Clear Jam 3 Paper Jam B Rear door (bottom) Open Rear Cover and Clear - Lexmark 502n | User's Guide - Page 73
-sheet legal-size tray. 1 Pull Tray 1 out. Remove the tray completely. 2 Remove the jam. The jam could be in the tray or behind the tray area. • Jams in the tray-Locate the single piece of paper lying on top of the stack. Pull it straight out. 73 - Lexmark 502n | User's Guide - Page 74
• Jams behind the tray area-Locate the jam on the bottom surface of the tray housing. You may have to reach far under the printer to locate the jam, as shown in the following illustration. Pull the jam straight out. 3 Insert the tray. 74 - Lexmark 502n | User's Guide - Page 75
2 Remove the jam. The jam could be in the tray or behind the tray area. • Jams in the tray-Locate the single piece of paper lying on top of the stack • Jams behind the tray area-Locate the jam on the bottom surface of the tray housing. You may have to reach far under the printer to locate the jam, as - Lexmark 502n | User's Guide - Page 76
door If the paper is jammed behind the rear door, Paper Jam appears. The affected area is indicated by the Jam message. A Paper Jam B message indicates the paper is jammed behind the rear door below the fuser. A Paper Jam C message indicates the paper is jammed behind the rear door above the - Lexmark 502n | User's Guide - Page 77
up and out. Note: Gently pull the paper out to avoid tearing it. Whenever possible, pull the paper towards the bottom of the printer to avoid contaminating the fuser. 5 Close the rear door. Paper jam in the ADF If the paper is jammed in the ADF, ADF Jam: Open ADF Cover and Clear Jam appears. 77 - Lexmark 502n | User's Guide - Page 78
lift the tension release lever that raises the pick roller assembly. Warning: Do not pull the jammed paper out from the bottom of the ADF. 1 Open the ADF cover. 2 Lift the tension release lever so that it is in the up position. Note: Do not completely remove the pick roller assembly. Doing - Lexmark 502n | User's Guide - Page 79
3 Firmly grasp the paper, and gently pull it out. 4 Lower the tension release lever back into place until it locks. 79 - Lexmark 502n | User's Guide - Page 80
5 Close the ADF cover. 6 Press . 80 - Lexmark 502n | User's Guide - Page 81
printer settings: Copy Settings Paper Select Sort Quality Density Reduce/Enlarge Machine Settings Speaker Volume Paper Settings Job Timeout Toner Saver Mode Supplies Info Scanner Carriage Network Settings Ethernet IP Configuration Reports Print Configuration Page Activity Report Memory List - Lexmark 502n | User's Guide - Page 82
Notes: • 100% is the factory default setting. • Choosing 4in1 A4-LTR-LGL or 2in1 A4-LTR-LGL specifies that multiple-page images be printed on one side of a sheet of paper. You can copy either four or two consecutive pages of a multiple-page document onto a single sheet of paper. • Multiple-page - Lexmark 502n | User's Guide - Page 83
, depending on the country code. Sets whether multiple pages are scanned when using the ADF. This mode supports the following file types: PDF and TIFF. Note: Yes is the factory default setting. Lets you scan two or more pages using the scanner - Lexmark 502n | User's Guide - Page 84
factory default setting for Density. • On is the factory default setting for Auto Redial. • Set Immediate TX to On to send faxes immediately, without using memory. • Changing the Density lightens or darkens the outgoing fax. 84 - Lexmark 502n | User's Guide - Page 85
Menu item RX Settings RX Mode Fax Only Manual FAX/TAD Auto Reduction Off On Ring Count Delay xx times F/T Ring Time xx sec Tray Settings Tray Use: Fax Auto Tray 1 Only Tray 2 Only Delete Document Memory Job Clear Clear Not Clear All Clear Clear Not Clear Description Sets the incoming fax - Lexmark 502n | User's Guide - Page 86
• Change the RX Speed to select the speed at which the printer starts receiving a fax. Specifies when a fax transmission report is printed Notes: • Error Only Img is the factory default setting for TX Report. • Dial number. Up to 20 names and numbers can be stored for one-touch Quick Dial access. 86 - Lexmark 502n | User's Guide - Page 87
Fax Name Entry Machine Settings menu Menu item Speaker Volume Keypad Volume 0-3 Ring Volume 0-3 Line Mon. Vol 0-3 Job End Tone Vol 0-3 Job Error Tone Vol 0-3 Alarm Volume 0-3 Paper Settings Paper Type Tray1 Paper Plain paper Thin paper Middle Thick Thick1 Thick2 Label Special paper Transparency - Lexmark 502n | User's Guide - Page 88
) is the factory default setting for LAN. • When the timer expires, any partially printed page still in the printer is printed, and then the printer checks to see if any new print jobs are waiting. Reduces the amount of toner used for graphics and images Note: Off is the factory default setting. 88 - Lexmark 502n | User's Guide - Page 89
Waste Toner Pack Waste Pack Life OPC Belt OPC Belt Life Replace OPC Belt Not Replaced Replaced Fuser Unit Fuser Unit Life Replace Fuser Not Replaced Replaced Scanner Carriage Move to Lock Not Execute Execute Description Displays the remaining life information for supplies, and allows supply life - Lexmark 502n | User's Guide - Page 90
IP Source. • IP Address, Subnet Mask, and Gateway are four-field IP addresses. Description Prints a configuration page with printer information, settings information, supply information, and network information Prints a Fax activity report Prints a memory status report Prints the Quick Dial list 90 - Lexmark 502n | User's Guide - Page 91
list Prints a log of all scan activity Prints a demo page Prints a maintenance page with printer statistics, maintenance information, and color quality troubleshooting Description Sets the date and time options Sets the user's name and fax number Sets the telephone line type Sets the network type of - Lexmark 502n | User's Guide - Page 92
in constant use. Under most circumstances, this keeps the printer ready to print with minimum warm-up time. Selects the language of the text appearing on the display Sets the country or region where the printer is being used Note: The Country Code must be set correctly for the fax function to work - Lexmark 502n | User's Guide - Page 93
Not Execute Execute Clear Fax Directory Not Execute Execute Clear Logs Not Execute Execute Admin Menu Lock Off On Password xxxx Description Sets the factory defaults for specific printer settings Note: Clear Menu Settings returns all settings to the factory default settings except the display - Lexmark 502n | User's Guide - Page 94
messages List of status and error messages Toner Empty: Replace Toner The specified toner cartridge is empty. Remove the specified cartridge, and then install a new one. Service Call: 1 Turn the printer off. 2 Unplug the power cord from the wall outlet. 3 Check all cable - Lexmark 502n | User's Guide - Page 95
OPC Cover The door (OPC Cover) under the scanner unit is open. Close the OPC door to clear the message. Cover Open: Close Rear Cover Close the rear door to clear the message. Communication Error A network communication error has occurred. Check network settings and connections. Dial Fail The printer - Lexmark 502n | User's Guide - Page 96
missing. Install the fuser unit. Missing: Install OPC Belt The photodeveloper cartridge is missing or not installed correctly. Install or reseat the photodeveloper cartridge. Missing: Install Toner The specified toner cartridge is missing. Install the specified toner cartridge. Missing: Install - Lexmark 502n | User's Guide - Page 97
includes the document glass and the ADF glass), and then reset the printer. If the message appears again, contact Customer Support, and report the message. Scan Lock Error: Unlock Scanner The scanner is locked. Open the scanner cover, and then unlock the scanner. Scan Memory Near Full There may be - Lexmark 502n | User's Guide - Page 98
has answered the call. Wait for the message to clear. Toner Error: Install Supported Toner Cartridge An invalid toner cartridge is installed. Remove the toner cartridge, and then install a supported one. Transmitting The printer has connected with the receiving fax machine and is sending a fax - Lexmark 502n | User's Guide - Page 99
storage area for the printer supplies. Store supplies right side up in their original packing until you are ready to use them. Do not expose supplies to: • Direct sunlight • Temperatures above 35°C (95°F) • High humidity above 80% • Salty air • Corrosive gases • Heavy dust Conserving toner Toner - Lexmark 502n | User's Guide - Page 100
to clean the interior may cause damage to your printer. 5 Make sure the paper support and paper exit tray are dry before beginning a new print job. Cleaning the scanner glass Clean the scanner glass if you encounter print quality problems, such as streaks on copied or scanned images. 1 Slightly - Lexmark 502n | User's Guide - Page 101
Cleaning the dust-proof glass Clean the dust-proof glass if you encounter print quality problems. 1 Turn the printer off. 2 Pull the front door release latch forward, and gently lower the front door. 3 Remove the toner cartridges one at a time. 101 - Lexmark 502n | User's Guide - Page 102
4 Open the top door. 5 Push the latches toward each other to release the photodeveloper cartridge. 102 - Lexmark 502n | User's Guide - Page 103
6 Grasp the handle, and pull the photodeveloper cartridge straight up and out. 7 Pull on the tabs to lift the dust-proof glass cover. 103 - Lexmark 502n | User's Guide - Page 104
8 Gently wipe the dust-proof glass using a clean, dry, lint-free cloth. 9 Push the dust-proof glass cover down. 104 - Lexmark 502n | User's Guide - Page 105
10 Replace the photodeveloper cartridge. 11 Push the latches away from each other to lock the photodeveloper cartridge into place. 12 Close the top door. 105 - Lexmark 502n | User's Guide - Page 106
the toner cartridges one at a time. 14 Close the front door. 15 Turn the printer on. Ordering supplies To order supplies in the U.S., contact Lexmark at 1-800-539-6275 for information about Lexmark authorized supplies dealers in your area. In other countries or regions, visit the Lexmark Web - Lexmark 502n | User's Guide - Page 107
documentation that came with the fuser. Part name Fuser Part number C500X28G (120 V/50-60 Hz) C500X29G (220-240 V/50-60 Hz) Ordering a photodeveloper cartridge When OPC Belt Life: Replace OPC appears, replace the photodeveloper cartridge (OPC belt) immediately. For installation information, see - Lexmark 502n | User's Guide - Page 108
from the wall outlet. - Disconnect all cords and cables from the printer. - Remove all printer options. Warning: Damage to the printer caused by improper moving is not covered by the printer warranty. Locking the scanner 1 From the control panel, press . 2 Press or repeatedly until Machine Settings - Lexmark 502n | User's Guide - Page 109
8 Move the Scanner lock switch to the locked position. 9 Close the scanner cover. Removing the printer from the 530-sheet drawer 1 Turn the printer off, and then unplug the power cord from the wall outlet. 2 Disconnect all cables from the back of the printer. 109 - Lexmark 502n | User's Guide - Page 110
of the four slots off of its matching tab as you work your way to the front of the printer. 4 Remove the left side cover by starting at the back of the printer and gently pulling each of the four slots off of its matching tab as you work your way to - Lexmark 502n | User's Guide - Page 111
the right thumbscrew, and remove the right bracket. 6 Loosen the left thumbscrew, and remove the left bracket. 7 Lift the printer off the drawer, and set the printer aside. CAUTION: The printer weighs 35 kg (77 lb), and requires at least three people to lift it safely. Use the handholds on the sides - Lexmark 502n | User's Guide - Page 112
these precautions: • Any cart used to move the printer must have a surface able to support the full footprint of the printer. Any cart used to move the options must have a surface able to support the dimensions of the options. • Keep the printer in an upright position. • Avoid severe jarring - Lexmark 502n | User's Guide - Page 113
1 50 cm (8.0 in.) 2 70 cm (28.0 in.) 3 20 cm (8.0 in.) 4 25 cm (10.0 in.) 5 304.8 mm (12.0 in.) 113 - Lexmark 502n | User's Guide - Page 114
administrator menus Since many people often use a printer, a support person may choose to lock the Admin Settings menu, Fax Directory menu, and Network Settings menu so that administrative settings cannot be changed from the control panel. 1 Make sure the printer is on and Ready appears. 2 From the - Lexmark 502n | User's Guide - Page 115
is turned on. • The Auto Clear setting times out. Note: Auto Clear is off by default. To set the Default mode: 1 Make sure the printer is on and Ready appears. 2 From the control panel, press . 3 Press or repeatedly until Admin Settings appears, and then press . 4 Press or repeatedly until Default - Lexmark 502n | User's Guide - Page 116
installed on a network, the Embedded Web Server can be used for the following functions: • Checking the status of the printer • Checking the status of the printer supplies • Setting up the scan directory • Setting up the fax Speed Dial list • Configuring network settings • Creating an Embedded Web - Lexmark 502n | User's Guide - Page 117
Troubleshooting Online customer support Customer support is available on the Lexmark Web site at www.lexmark.com Checking an unresponsive printer If your printer is not responding, make sure: • The power cord is plugged into the printer and a properly grounded electrical outlet. • The electrical - Lexmark 502n | User's Guide - Page 118
support person to make sure the network is functioning correctly. Copies of the printer software are also available on the Lexmark Web site at www.lexmark.com. Make sure you are using a recommended USB, serial, or Ethernet cable For more information, see the supplies section of the User's Guide - Lexmark 502n | User's Guide - Page 119
Copier does not respond These are possible solutions. Try one or more of the following: Are there any error messages on the display? Clear any error messages. Check the power Make sure the printer is plugged in, the power is on, and Ready appears. Scanner unit does not close Make sure there are no - Lexmark 502n | User's Guide - Page 120
the Image Quality button on the control panel. When the printer power is reset, the printer returns to the default settings. Check the quality of the loaded facedown on the scanner glass in the upper left corner. Partial document or photo copies These are possible solutions. Try one or more of the - Lexmark 502n | User's Guide - Page 121
Solving scan problems Scanner does not respond These are possible solutions. Try one or more of the following: Are there any error messages on the display? Clear any error messages. Check the power Make sure the printer is plugged in, the power is on, and Ready appears. Check the cable connections - Lexmark 502n | User's Guide - Page 122
connected to the computer and the printer. Solving fax problems Cannot send or receive a fax These are possible solutions. Try one or more of the following: Are there any error messages on the display? Clear any error messages. Check the power Make sure the printer is plugged in, the power is - Lexmark 502n | User's Guide - Page 123
If you hear a dial tone, connect the printer to that wall jack. Review this digital phone service checklist The fax modem is an analog device. Certain or router that will support analog use. For more information, contact your DSL provider. • If you are using a PBX telephone service, make sure you are - Lexmark 502n | User's Guide - Page 124
then press . b Press to return to the Ready state. 7 If you do not want to change the country code, press to return to the Ready state. Is the printer memory full? 1 Dial the fax number. 2 Scan the original document one page at a time. Can send but not receive faxes These are possible solutions. Try - Lexmark 502n | User's Guide - Page 125
to redistribute toner. 3 Reinsert the toner cartridge(s) and continue printing. Repeat this procedure multiple times until the print remains faded, and then replace the cartridge(s). Can receive but not send faxes These are possible solutions. Try one or more of the following: Is the printer in Fax - Lexmark 502n | User's Guide - Page 126
problems Option does not operate correctly or quits after it is installed These are possible solutions. Try one or more of the following: Reset the printer Turn the printer the program you are using, select the option. Mac OS 9 users should make sure the printer is set up in the Chooser. Drawers Make - Lexmark 502n | User's Guide - Page 127
the problem, call Customer Support. You may have a printer part that requires adjustment or replacement. Repeating defects These are possible solutions. Try one or more of the following: Check to see if marks occur repeatedly only in one color and multiple times on a page Replace the toner cartridge - Lexmark 502n | User's Guide - Page 128
or has been superimposed over another color area. • Remove and reinstall the toner cartridges. • Remove and reinstall the photodeveloper cartridge. Light colored line, white line, or incorrectly colored line These are possible solutions. Try one or more of the following: Clean the dust-proof glass - Lexmark 502n | User's Guide - Page 129
horizontal lines ABCDE ABCDE ABCDE These are possible solutions. Try one or more of the following: Is a toner cartridge defective or empty? Replace the toner cartridge causing the line. Is the fuser defective or worn? Replace the fuser. Streaked vertical lines ABCDE ABCDE ABCDE These are possible - Lexmark 502n | User's Guide - Page 130
to Windows users only. Check the Media Type setting From Print Properties, make sure the Media Type setting matches the paper loaded in the tray. Is the toner low? When Toner Low appears or when the print becomes faded, follow these steps to extend the life of the toner cartridge(s): 1 Remove - Lexmark 502n | User's Guide - Page 131
solution applies to Windows users only. Is a toner cartridge defective? Replace the toner cartridge. Transparency print quality is poor These are possible solutions. Try one or more of the following: Make sure the transparencies you are using meet the printer specifications Use only transparencies - Lexmark 502n | User's Guide - Page 132
ABCDE ABCDE These are possible solutions. Try one or more of the following: Is a toner cartridge defective? Replace the toner cartridge. Is the photodeveloper cartridge defective? Replace the photodeveloper cartridge. Ghost images These are possible solutions. Try one or more of the following: Is - Lexmark 502n | User's Guide - Page 133
. Remove the packaging materials from the toner cartridge and reinstall it For more information, see the setup documentation that came with the printer. Clipped images These are possible solutions. Try one or more of the following: Check the paper guides Move the guides in the tray to the correct - Lexmark 502n | User's Guide - Page 134
Solid color pages These are possible solutions. Try one or more of the following: Is a toner cartridge defective? Replace the toner cartridge. Does the printer need to be serviced? Contact Customer Support. Paper curl These are possible solutions. Try one or more of the following: Make sure the - Lexmark 502n | User's Guide - Page 135
to print? When a user prints a document, information describing the type and color of each object is sent to the printer. The color information is passed through color conversion tables that translate the color into appropriate amounts of cyan, magenta, yellow, and black toner needed to produce the - Lexmark 502n | User's Guide - Page 136
When you call Customer Support, describe the problem you are experiencing, the message on the display, and the troubleshooting steps you have already taken to find a solution. You need to know your printer model type and serial number. For more information, see the label on the inside top front - Lexmark 502n | User's Guide - Page 137
include technical inaccuracies or typographical errors. Changes are periodically made services, except those expressly designated by the manufacturer, are the user's responsibility. For Lexmark technical support, visit support.lexmark.com. For information on supplies and downloads, visit www.lexmark - Lexmark 502n | User's Guide - Page 138
area instructions part number 1021294 for USB attach. Use of a substitute cable not properly shielded and grounded may result in a violation of FCC regulations. Any questions regarding this compliance information statement should be directed to: Director of Lexmark Technology & Services Lexmark printer - Lexmark 502n | User's Guide - Page 139
by the CE marking. A declaration of conformity with the requirements of the directives is available from the Director of Manufacturing and Technical Support, Lexmark International, S. A., Boigny, France. This product satisfies the limits of EN 55022; safety requirements of EN 60950; and the EMC - Lexmark 502n | User's Guide - Page 140
www.lexmark.com for current values. Waste from Electrical and Electronic Equipment (WEEE) directive The WEEE logo signifies specific Service Order Code (USOC) jack. A plug and jack used to connect this equipment to the premises' wiring and telephone network must comply with the applicable FCC Part - Lexmark 502n | User's Guide - Page 141
. In most but not all areas, the sum of RENs should problem is resolved. This equipment contains no user serviceable parts. For repair and warranty information, contact Lexmark as one that users of the Canadian telephone network This product meets the applicable Industry Canada technical specifications - Lexmark 502n | User's Guide - Page 142
users of the New Zealand telephone network The following are special conditions for the Facsimile User Instructions specifications: • There shall be no more than 10 call attempts to the same number within any 30 minute period for any single manual end of one call attempt Lexmark part number 14B5109 - Lexmark 502n | User's Guide - Page 143
any human access to laser radiation above a Class I level during normal operation, user maintenance, or prescribed service condition. Laser advisory label A laser notice label may be affixed to this printer as shown: Power consumption Product power consumption The following table documents the - Lexmark 502n | User's Guide - Page 144
cartridges, programs, data, and removable storage media (unless directed otherwise by Lexmark). For further explanation of your warranty alternatives and the nearest Lexmark authorized servicer in your area contact Lexmark on the World Wide Web at http://support.lexmark.com. Remote technical support - Lexmark 502n | User's Guide - Page 145
authorized servicer -Operation of a product beyond the limit of its duty cycle -Use of printing media outside of Lexmark specifications -Refurbishment, repair, refilling or remanufacture by a third party of products, supplies or parts -Products, supplies, parts, materials (such as toners and inks - Lexmark 502n | User's Guide - Page 146
Communication Error 95 configuration page, printing 48 connecting using RJ11 adapter 16 connecting the printer to answering machine 22 computer modem 24 telephone 21 telephone wall jack 19 telephone wall jack in Germany 20 conserving toner 99 contacting Customer Support 136 control panel 13 locking - Lexmark 502n | User's Guide - Page 147
Settings 91 Missing: Install Fuser Unit 96 Missing: Install OPC Belt 96 Missing: Install Toner 96 Missing: Install Transfer Roller 96 moving the printer 107, 112 multiple pages on one sheet 53 N network information, printing 48 Network Settings menu 90 No Memory: Out of Memory 96 No Response 96 - Lexmark 502n | User's Guide - Page 148
: Replace Toner M 94 Memory Full 95 Memory Near Full 95 Missing: Install Fuser Unit 96 Missing: Install OPC Belt 96 Missing: Install Toner 96 Missing: Install Transfer Roller 96 No Memory: Out of Memory 96 No Response 96 OPC Belt Life: Replace OPC Belt 96 OPC Exhausted: Replace OPC Belt 96 Paper - Lexmark 502n | User's Guide - Page 149
Error 97 Scan Lock Error: Unlock Scanner 97 Scan Memory Near Full 97 Scan Network Disconnect 97 Scan USB Disconnect 97 Scanning Page 97 Send Email Notify: Send Email Notification 97 Sending File 97 Set Correct Paper 98 Sleep 98 TAD Answering 98 Toner error: Install supported toner cartridge 98 Toner - Lexmark 502n | User's Guide - Page 150
toner cartridges ordering 106 Toner error: Install supported toner cartridge 98 Toner Low 98 Touch Tone dialing mode 67 TR Belt Life: Replace Transfer Belt 98 TR Kit Life: Replace PQ Kit 98 Transmitting 98 transparencies guidelines 41 Tray 1 Missing: Insert Tray 98 Tray 1_2 Missing: Insert
-
 1
1 -
 2
2 -
 3
3 -
 4
4 -
 5
5 -
 6
6 -
 7
7 -
8
-
9
-
10
-
11
-
12
-
13
-
14
-
15
-
16
-
17
-
18
-
19
-
20
-
21
-
22
-
23
-
24
-
25
-
26
-
27
-
28
-
29
-
30
-
31
-
32
-
33
-
34
-
35
-
36
-
37
-
38
-
39
-
40
-
41
-
42
-
43
-
44
-
45
-
46
-
47
-
48
-
49
-
50
-
51
-
52
-
53
-
54
-
55
-
56
-
57
-
58
-
59
-
60
-
61
-
62
-
63
-
64
-
65
-
66
-
67
-
68
-
69
-
70
-
71
-
72
-
73
-
74
-
75
-
76
-
77
-
78
-
79
-
80
-
81
-
82
-
83
-
84
-
85
-
86
-
87
-
88
-
89
-
90
-
91
-
92
-
93
-
94
-
95
-
96
-
97
-
98
-
99
-
100
-
101
-
102
-
103
-
104
-
105
-
106
-
107
-
108
-
109
-
110
-
111
-
112
-
113
-
114
-
115
-
116
-
117
-
118
-
119
-
120
-
121
-
122
-
123
-
124
-
125
-
126
-
127
-
128
-
129
-
130
-
131
-
132
-
133
-
134
-
135
-
136
-
137
-
138
-
139
-
140
-
141
-
142
-
143
-
144
-
145
-
146
-
147
-
148
-
149
-
150
 |
 |

X500n, X502n
User's Guide
April 2007
www.lexmark.com
Lexmark and Lexmark with diamond design are trademarks of Lexmark International, Inc., registered in the United States and/or other countries.
All other trademarks are the property of their respective owners.
© 2007 Lexmark International, Inc.
All rights reserved.
740 West New Circle Road
Lexington, Kentucky 40550