Lexmark BDX5495HSN3 Fax Guide - Page 32
Setting Auto Answer to on, Setting up a fax header, Productivity Studio, Fax History and Settings
 |
UPC - 836367004401
View all Lexmark BDX5495HSN3 manuals
Add to My Manuals
Save this manual to your list of manuals |
Page 32 highlights
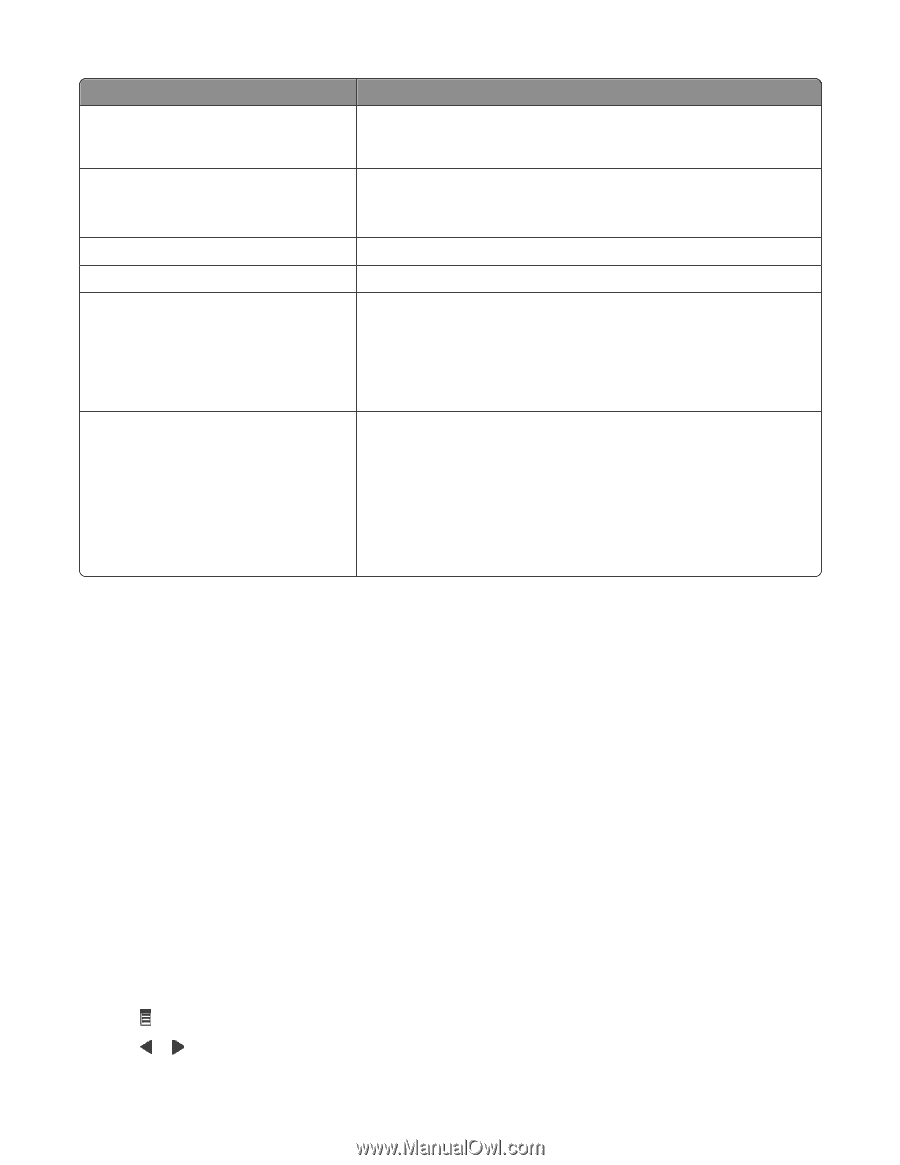
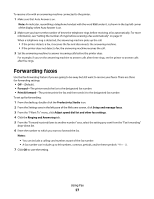
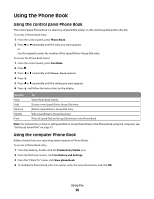
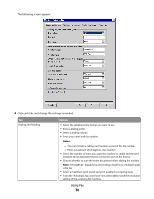
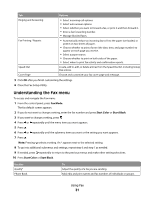
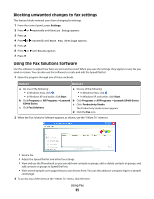
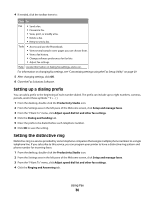
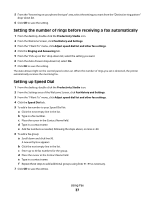
Use this On Hook Dial Delay Fax Auto Answer Lighter / Darker* Fax Setup Tools To Dial a telephone number while listening to the call through a speaker on the printer. This is useful when you must navigate an automated answering system before sending your fax. Enter a specific time to send a fax. Note: Make sure the date and time are entered correctly before setting a specific time to send a fax. Answer all incoming phone calls. Adjust the brightness of a fax you are sending. • Print fax history or transmission status reports. • Customize settings for receiving a fax. • Select fax printing options. • Customize settings for sending a fax. • Block faxes from the numbers you specify. • Maintenance - View ink levels. - Clean cartridges. - Align cartridges. - Print a test page. • Device Setup-Customize printer setup settings. • Defaults-Customize printer settings. Setting Auto Answer to on 1 From the desktop, double-click the Productivity Studio icon. 2 From the Welcome Screen, click Fax History and Settings. 3 From the "I Want To" menu, click Adjust speed dial list and other fax settings. 4 Click the Ringing and Answering tab. 5 From the Auto Answer drop-down list, select On. 6 Click OK to save the setting. The Auto Answer light on the control panel comes on. When the number of rings you set is detected, the printer automatically receives the incoming fax. Setting up a fax header During the initial setup of your printer, you were prompted to enter your name, fax number, date, and time. This information is used to create a fax header for faxes you send. If you have not entered this information: 1 From the control panel, press Fax Mode. 2 Press . 3 Press or repeatedly until Fax Setup appears. Using Fax 32
-
 1
1 -
2
-
3
-
4
-
5
-
6
-
7
-
8
-
9
-
10
-
11
-
12
-
13
-
14
-
15
-
16
-
17
-
18
-
19
-
20
-
21
-
22
-
23
-
24
-
25
-
26
-
 27
27 -
 28
28 -
 29
29 -
 30
30 -
 31
31 -
 32
32 -
 33
33 -
 34
34 -
 35
35 -
 36
36 -
 37
37 -
38
-
39
-
40
-
41
-
42
-
43
-
44
-
45
-
46
-
47
-
48
-
49
-
50
-
51
-
52
 |
 |