Lexmark C4342 Quick Reference - Page 5
Setting the size and type of the, specialty media, Updating firmware, Configuring Wi, Fi Direct
 |
View all Lexmark C4342 manuals
Add to My Manuals
Save this manual to your list of manuals |
Page 5 highlights
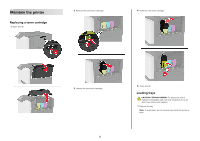
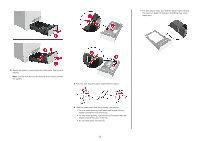
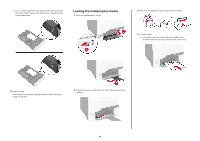
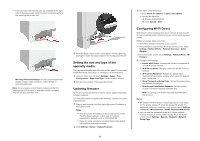
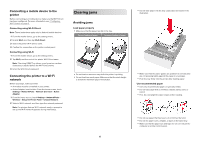
• Load envelope with the flap side up and against the right side of the paper guide. Load European envelopes with the flap entering the printer first. Warning-Potential Damage: Do not use envelopes with stamps, clasps, snaps, windows, coated linings, or self‑stick adhesives. Note: To avoid paper pick problems, make sure that the leading edge of the paper or specialty media is properly aligned with the separator dam. 5 From the Paper menu in the control panel, set the paper size and type to match the paper loaded in the multipurpose feeder. Setting the size and type of the specialty media The trays automatically detect the size of plain paper. For specialty media like labels, card stock, or envelopes, do the following: 1 From the home screen, touch Settings > Paper > Tray Configuration > Paper Size/Type > select a paper source. 2 Set the size and type of the specialty media. Updating firmware To enhance printer performance and fix issues, update the printer firmware regularly. For more information on updating the firmware, contact your sales representative. 1 Open a web browser, and then type the printer IP address in the address field. Notes: • View the printer IP address on the printer home screen. The IP address appears as four sets of numbers separated by periods, such as 123.123.123.123. • If you are using a proxy server, then temporarily disable it to load the web page correctly. 2 Click Settings > Device > Update Firmware. 5 3 Do either of the following: • Click Check for updates > I agree, start update. • Upload the flash file. a Browse to the flash file. b Click Upload > Start. Configuring Wi‑Fi Direct Wi-Fi Direct® allows wireless devices to connect directly to a WiFi Direct‑enabled printer without using an access point (wireless router). Before you begin, make sure that: • A wireless module is installed on your printer. • Active Adapter is set to Auto. From the home screen, touch Settings > Network/Ports > Network Overview > Active Adapter. 1 From the home screen, touch Settings > Network/Ports > WiFi Direct. 2 Configure the settings. • Enable Wi‑Fi Direct-Enables the printer to broadcast its own Wi‑Fi Direct network. • Wi‑Fi Direct Name-Assigns a name for the Wi‑Fi Direct network. • Wi‑Fi Direct Password-Assigns the password for negotiating the wireless security when using the peer‑topeer connection. • Show Password on Setup Page-Shows the password on the Network Setup Page. • Auto-Accept Push Button Requests-Lets the printer accept connection requests automatically. Note: Accepting push‑button requests automatically is not secured. Notes: • By default, the Wi-Fi Direct network password is not visible on the printer display. To show the password, enable the password peek icon. From the home screen, touch Settings > Security > Miscellaneous > Enable Password/PIN Reveal. • You can see the password of the Wi-Fi Direct network without showing it on the printer display. From the home screen, touch Settings > Reports > Network > Network Setup Page.
-
 1
1 -
 2
2 -
 3
3 -
 4
4 -
 5
5 -
 6
6 -
 7
7 -
 8
8 -
 9
9 -
 10
10
 |
 |
