Lexmark C544DTN Wireless Setup Guide
Lexmark C544DTN - Color Laser Printer 25/25 Ppm Duplex Networkfront Pic Manual
 |
UPC - 734646072472
View all Lexmark C544DTN manuals
Add to My Manuals
Save this manual to your list of manuals |
Lexmark C544DTN manual content summary:
- Lexmark C544DTN | Wireless Setup Guide - Page 1
Wireless Setup Guide © 2008 Lexmark International, Inc. All rights reserved. - Lexmark C544DTN | Wireless Setup Guide - Page 2
described may be made at any time. © 2008 Lexmark International, Inc. All rights reserved. UNITED STATES GOVERNMENT RIGHTS This software and any accompanying documentation provided under this agreement are commercial computer software and documentation developed exclusively at private expense. - Lexmark C544DTN | Wireless Setup Guide - Page 3
filtering 14 Connecting to a wireless network using Windows 16 Installing the printer on a wireless network (Windows 16 Connecting to a wireless network using Macintosh 18 Installing the printer on a wireless network (Macintosh 18 Troubleshooting wireless setup 21 Connecting using a USB - Lexmark C544DTN | Wireless Setup Guide - Page 4
4 - Lexmark C544DTN | Wireless Setup Guide - Page 5
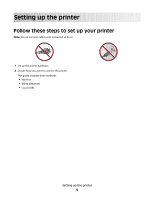
Setting up the printer Follow these steps to set up your printer Note: Do not connect cables until instructed to do so. 1 Set up the printer hardware. 2 Decide how you want to connect the printer. This guide includes three methods: • Wireless • Wired (Ethernet) • Local (USB) Setting up the printer 5 - Lexmark C544DTN | Wireless Setup Guide - Page 6
, cables, and CD. 21 kg (46.2 lbs.) Setup Guide (46.221lbksg.) September 2008 www.lexmark.com 5 1 4 2 3 When the printer is set up, allow clearance around it as shown. 1 304.8 mm (12.0 in.) 2 508 mm (20.0 in.) 3 304.8 mm (12.0 in.) 4 304.8 mm (12.0 in.) 5 - Lexmark C544DTN | Wireless Setup Guide - Page 7
, and then pull it toward you to open it. CAUTION-HOT SURFACE: The inside of the printer might be hot. To reduce the risk of injury from a hot component, allow the surface to cool before touching. K M C Y Open the top door. Y C M K Remove the right side cover. K M C Y Y C M K Setting up the - Lexmark C544DTN | Wireless Setup Guide - Page 8
Y C M K Y C M Remove the toner cartridges by lifting the handles, and then gently pulling away from the imaging kit. K M C Y K M C Y Setting up the printer 8 - Lexmark C544DTN | Wireless Setup Guide - Page 9
Remove the red packing material. Remove the packing rods and clips. Setting up the printer 9 - Lexmark C544DTN | Wireless Setup Guide - Page 10
Y C M K K M C Y Insert the toner cartridge into the imaging kit by aligning the rollers on the toner cartridge with the tracks. Push the toner cartridge until it clicks into place. Replace the right side cover. Y C M K K M C Y Close the front and top doors. Setting up the printer 10 - Lexmark C544DTN | Wireless Setup Guide - Page 11
, and then slide the width guides to the sides of the tray. Notice that the two width guides move in unison when you move just the right width guide. Squeeze the length guide tabs together as shown, and then slide the length guide to the correct position for the paper size being loaded. Flex the - Lexmark C544DTN | Wireless Setup Guide - Page 12
16 Load the paper stack with the recommended print side faceup. Make sure the paper guides are secure against the edges of the paper. Note: Make sure that side guides are placed tightly against the edges of the paper so that the image is registered properly on the page. Insert the tray. Setting up - Lexmark C544DTN | Wireless Setup Guide - Page 13
a connection method Note: Do not connect cables until instructed. Connect to a wireless network using Windows For detailed steps, see "Information you will need to set up the printer on a wireless network" on page 14 and "Installing the printer on a wireless network (Windows)" on page 16. Connect to - Lexmark C544DTN | Wireless Setup Guide - Page 14
you will need to set up the printer on a wireless network Note: Do not connect the installation or network cables until prompted to do so by the setup software. • SSID-The SSID is also referred to as the network name. • Wireless Mode (or Network Mode)-The mode will be either infrastructure - Lexmark C544DTN | Wireless Setup Guide - Page 15
format: 00:04:12:34:56:78 Note: Print a network setup page if you cannot locate the printer MAC address. It will appear on the network setup page. Refer to the User's Guide on the Software and Documentation CD for more information on printing a network setup page. Preparing to connect wirelessly 15 - Lexmark C544DTN | Wireless Setup Guide - Page 16
to the same wireless network where you want to set up the printer. 1 Connect the power cable, and then turn the printer on. 1 2 Make sure the printer and computer are fully on and ready. Do not connect the USB cable until instructed to do so on the screen. 2 Insert the Software and Documentation - Lexmark C544DTN | Wireless Setup Guide - Page 17
a USB cable between the computer on the wireless network and the printer. 1 2 Note: After the printer is configured, the software will instruct you to disconnect the temporary USB cable so you can print wirelessly. b If your printer has faxing capabilities, then connect the telephone cable - Lexmark C544DTN | Wireless Setup Guide - Page 18
Installing the printer on a wireless network (Macintosh) Prepare to configure the printer 1 Locate the printer MAC address on the sheet that shipped with the printer. Write the last six digits of the MAC address in the space provided below: MAC address 2 If your printer has faxing capabilities - Lexmark C544DTN | Wireless Setup Guide - Page 19
to use the printer wirelessly To print to a network printer, each Macintosh user must install a custom PostScript Printer Description (PPD) file and create a printer in the Print Center or Printer Setup Utility. 1 Install a PPD file on the computer: a Insert the Software and Documentation CD - Lexmark C544DTN | Wireless Setup Guide - Page 20
Go menu, choose Applications. 2 Double-click the Utilities folder. 3 Locate and double-click Print Center or Printer Setup Utility. 4 From the Printer List, choose Add. 5 Choose the Default Browser tab. 6 Click More Printers. 7 From the first pop-up menu, choose AppleTalk. 8 From the second pop-up - Lexmark C544DTN | Wireless Setup Guide - Page 21
the printer, including the IP address and MAC address. This information is very helpful when troubleshooting the network configuration of the printer. For more information on printing a network setup page, refer to the User's Guide on the installation software CD. Troubleshooting wireless setup 21 - Lexmark C544DTN | Wireless Setup Guide - Page 22
Cannot print over wireless network If you encountered problems while installing, or if your printer does not appear in the printers folder or as a printer option when sending a print job, you can try uninstalling and reinstalling the software. These are possible solutions. Try one or more of the - Lexmark C544DTN | Wireless Setup Guide - Page 23
address field of your Web browser and continue to Step 2. If you do not know the IP address of the wireless access point, then do the following: In Mac OS X version 10.5 a From the menu bar, click Apple menu ΠSystem Preferences. b Click Network. c Click AirPort. Troubleshooting wireless setup 23 - Lexmark C544DTN | Wireless Setup Guide - Page 24
contact the person who set up your wireless network. DISCONNECT FROM VPN SESSION When you are connected to another network through a VPN connection, you will not be able to access the printer over your wireless network. End your VPN session and try printing again. Troubleshooting wireless setup 24 - Lexmark C544DTN | Wireless Setup Guide - Page 25
attached Check the USB cable If the configuration software does not allow you to continue configuring your printer wirelessly after you attach the USB cable, there may be a problem with the cable. Try one or more the computer, and may be horizontal or vertical. Troubleshooting wireless setup 25 - Lexmark C544DTN | Wireless Setup Guide - Page 26
the printer. WEP key or WPA pre-shared key not valid ERROR MADE printer setup. NETWORK DOES NOT BROADCAST ITS SSID Some networks will not appear in the network list because they do not broadcast their SSIDs. 1 Select I want to enter a different network. 2 Click Next. Troubleshooting wireless setup - Lexmark C544DTN | Wireless Setup Guide - Page 27
on the wireless network, there is a problem with either the configuration of the computer or the wireless network. Contact your system support person, or Note: Changing the wireless channel that the access point broadcasts on can help resolve interference issues. Troubleshooting wireless setup 27 - Lexmark C544DTN | Wireless Setup Guide - Page 28
cable is plugged in to the printer and not the flattened, rectangular end. • Unplug the USB cable and plug it in again. • Try a different USB port on the computer. USB ports can be on the back or on the front of the computer. • Try a different USB cable. Troubleshooting wireless setup 28 - Lexmark C544DTN | Wireless Setup Guide - Page 29
than one instance of the printer installed, verify that the correct printer is selected. VERIFY THAT WINDOWS IS WORKING PROPERLY • Try restarting the computer. • Try installing the printer driver again. • Try uninstalling, and then reinstalling the printer driver. Troubleshooting wireless setup 29 - Lexmark C544DTN | Wireless Setup Guide - Page 30
is working properly. MAKE SURE THE PRINTER DRIVER IS INSTALLED ON THE PRINTER All computers that print to the wireless printer must first have the printer driver installed. • Insert the Software and Documentation CD and install the printer driver. Cannot print and there is a firewall on the computer - Lexmark C544DTN | Wireless Setup Guide - Page 31
, and then select the printer program folder from the list. 3 Click Wireless Setup Utility. Note: If the Wireless Setup Utility is not installed on the computer, insert the Software and Documentation CD and follow the wireless installation path. 4 Follow the instructions on the computer screen - Lexmark C544DTN | Wireless Setup Guide - Page 32
and the USB port on the back of the printer. 1 2 7 Connect the power cable to the printer and plug it into the wall. Turn on the printer. 1 2 Note: For information on telephone and fax setup, refer to the User's Guide on the Software and Documentation CD. Connecting using a USB cable 32 - Lexmark C544DTN | Wireless Setup Guide - Page 33
Connect the power cord to the printer and plug it into the wall. Turn on the printer. 1 2 8 Follow the on screen instructions to complete the wired configuration. Note: For information on telephone and fax setup, refer to the User's Guide on the Software and Documentation CD. Connecting using an - Lexmark C544DTN | Wireless Setup Guide - Page 34
wireless print server IP (Internet Protocol) address ipconfig MAC (Media Access Control) address MAC filtering network adapter/card network hub network name ping printer nickname router A setting for a wireless by the device. Basic Service Set describes the type of wireless network that you are - Lexmark C544DTN | Wireless Setup Guide - Page 35
as network name or BSS (Basic Service Set). An IP address assigned manually by you A device similar to a network hub that can connect different networks together An address assigned to a network printer or print server by the manufacturer. To find the UAA, print a network setup page and look for the - Lexmark C544DTN | Wireless Setup Guide - Page 36
to wireless network 22 printer does not print 29 wireless 30 S selecting connection type 13 setting up the printer 5 local connection 32 setup, hardware 6 steps setting up printer 5 T troubleshooting wireless network 21 troubleshooting, wireless network printer does not show up in printer selection
-
 1
1 -
 2
2 -
 3
3 -
 4
4 -
 5
5 -
 6
6 -
 7
7 -
8
-
9
-
10
-
11
-
12
-
13
-
14
-
15
-
16
-
17
-
18
-
19
-
20
-
21
-
22
-
23
-
24
-
25
-
26
-
27
-
28
-
29
-
30
-
31
-
32
-
33
-
34
-
35
-
36
 |
 |

Wireless Setup Guide
© 2008 Lexmark International, Inc.
All rights reserved.