Lexmark C544DTN Wireless Setup Guide - Page 11
position for the paper size being loaded., and then slide the length guide to the correct
 |
UPC - 734646072472
View all Lexmark C544DTN manuals
Add to My Manuals
Save this manual to your list of manuals |
Page 11 highlights
Install the dust cover. Pull the tray completely out. Squeeze the width guide tabs on the right guide as shown, and then slide the width guides to the sides of the tray. Notice that the two width guides move in unison when you move just the right width guide. Squeeze the length guide tabs together as shown, and then slide the length guide to the correct position for the paper size being loaded. Flex the sheets back and forth to loosen them, and then fan them. Do not fold or crease the paper. Straighten the edges on a level surface. Setting up the printer 11
-
 1
1 -
2
-
3
-
4
-
5
-
 6
6 -
 7
7 -
 8
8 -
 9
9 -
 10
10 -
 11
11 -
 12
12 -
 13
13 -
 14
14 -
 15
15 -
 16
16 -
17
-
18
-
19
-
20
-
21
-
22
-
23
-
24
-
25
-
26
-
27
-
28
-
29
-
30
-
31
-
32
-
33
-
34
-
35
-
36
 |
 |
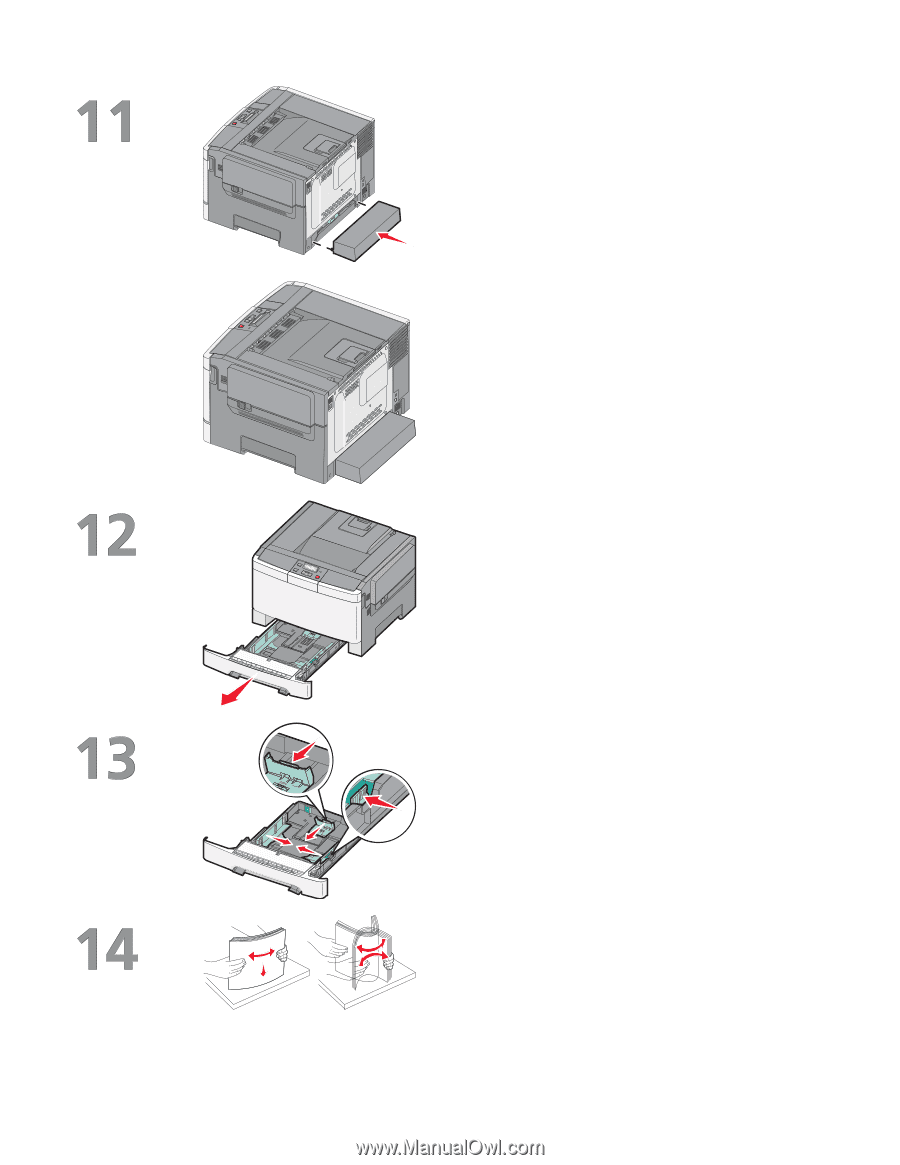
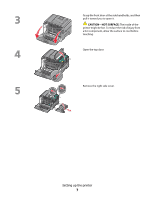
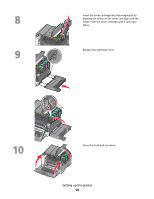
Install the dust cover.
Pull the tray completely out.
Squeeze the width guide tabs on the right guide as
shown, and then slide the width guides to the sides
of the tray. Notice that the two width guides move
in unison when you move just the right width guide.
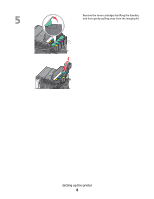
Squeeze the length guide tabs together as shown,
and then slide the length guide to the correct
position for the paper size being loaded.
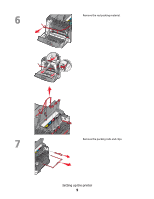
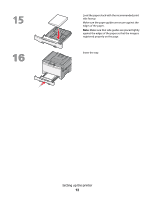
Flex the sheets back and forth to loosen them, and
then fan them. Do not fold or crease the paper.
Straighten the edges on a level surface.
Setting up the printer
11