Lexmark Multifunction Laser Clearing Jams Guide - Page 1
Lexmark Multifunction Laser Manual
 |
View all Lexmark Multifunction Laser manuals
Add to My Manuals
Save this manual to your list of manuals |
Page 1 highlights
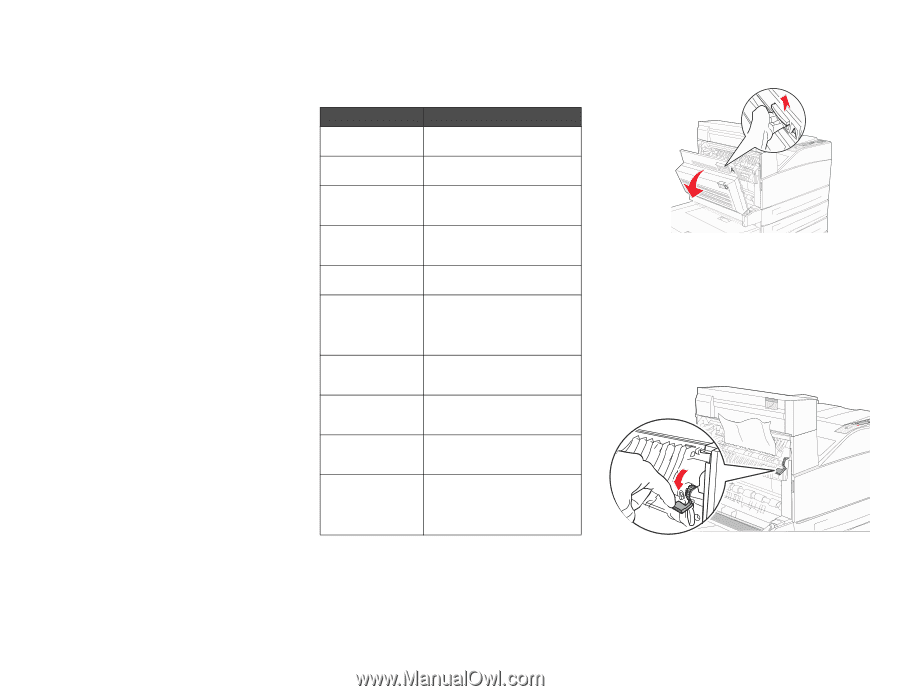
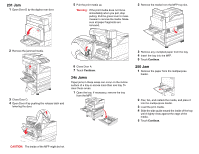
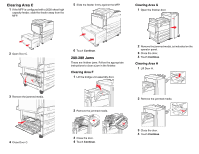
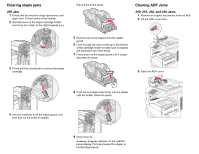
Lexmark™ X85x Clearing Jams Guide Avoiding jams The following hints can help you avoid jams: • Use only recommended print media. • Do not overload the print media sources. Make sure the stack height does not exceed the maximum height indicated by the stack line on the labels in the sources. • Do not load wrinkled, creased, damp, or curled print media. • Flex, fan, and straighten print media before you load it. If jams do occur with print media, try feeding one sheet at a time through the multipurpose feeder. • Do not use print media that you have cut or trimmed yourself. • Do not mix print media sizes, weights, or types in the same print media source. • Make sure the recommended print side is loaded in the source according to your simplex or duplex needs. • Keep print media stored in an acceptable environment. • Do not remove trays during a print job. • Push all trays in firmly after loading them. • Make sure the guides in the trays are properly positioned for the size of print media you have loaded. Make sure the guides are not placed too tightly against the stack of print media. Clearing Jams Understanding jam numbers Jam 200-202 Jams 203 Jam 230 Jam 231 Jam 24x Jams 250 Jam 280-288 Jams 289 Jam 290, 291, 292, and 294 Jams 293 Jam What to do Open Door A, and remove the jam. Open the Door A and Door E, and remove the jam. Open Door D, and remove the jam. Open the Door A and Door E, and remove the jam. Open Door D, and remove the jam. Open the Door A and Door E, and remove the jam. Open each tray, and remove any jammed media. Remove all media from the multipurpose feeder, flex and stack the media, reload the multipurpose feeder, and adjust the guide. As directed by the message, check area F, G, or H, then remove the jam. Remove the staple cartridge, then remove any jammed staples. Open the ADF cover and the scanner cover, and remove any jammed media. Select the location of your original document, finish your job without further scanning, restart scanning, or cancel the job and clear the message. 200-202 Jams 1 Open Door A by pushing the release latch and lowering the door. CAUTION: The inside of the MFP might be hot. 2 Pull the print media up and toward you. Warning: If the print media does not move immediately when you pull, stop pulling. Push down and pull the green lever to make it easier to remove the media. Make sure all paper fragments are removed. 3 Close Door A. 4 Touch Continue.
-
 1
1 -
 2
2 -
 3
3 -
 4
4 -
 5
5 -
 6
6 -
 7
7
 |
 |