Lexmark T612 Setup Guide (1.4 MB) - Page 22
Step 4, Attach Cables - parts -
 |
UPC - 000073504283
View all Lexmark T612 manuals
Add to My Manuals
Save this manual to your list of manuals |
Page 22 highlights
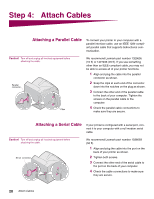
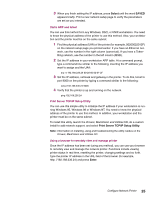
Step 4: Attach Cables Attaching a Parallel Cable To connect your printer to your computer with a parallel interface cable, use an IEEE 1284-compliant parallel cable that supports bidirectional communication. Caution! Turn off and unplug all involved equipment before attaching the cable. Parallel connector Clips We recommend Lexmark part number 1329605 (10 ft) or 1427498 (20 ft). If you use something other than an IEEE-compliant cable, you may not be able to access all of your printer functions. 1 Align and plug the cable into the parallel connector as shown. 2 Snap the clips at each end of the connector down into the notches on the plug as shown. 3 Connect the other end of the parallel cable to the back of your computer. Tighten the screws on the parallel cable to the computer. 4 Check the parallel cable connections to make sure they are secure. Attaching a Serial Cable If your printer is configured with a serial port, connect it to your computer with a null modem serial cable. Caution! Turn off and unplug all involved equipment before attaching the cable. Serial connector We recommend Lexmark part number 1038693 (50 ft). 1 Align and plug the cable into the port on the back of your printer as shown. 2 Tighten both screws. 3 Connect the other end of the serial cable to the port on the back of your computer. 4 Check the cable connections to make sure they are secure. 20 Attach Cables
-
 1
1 -
2
-
3
-
4
-
5
-
6
-
7
-
8
-
9
-
10
-
11
-
12
-
13
-
14
-
15
-
16
-
 17
17 -
 18
18 -
 19
19 -
 20
20 -
 21
21 -
 22
22 -
 23
23 -
 24
24 -
 25
25 -
 26
26 -
 27
27 -
28
-
29
-
30
-
31
-
32
-
33
-
34
-
35
-
36
-
37
 |
 |
