Lexmark X5075 User's Guide - Page 151
Memory Failure, PictBridge communications error, Scan Request Failed, Reduce memory use
 |
View all Lexmark X5075 manuals
Add to My Manuals
Save this manual to your list of manuals |
Page 151 highlights
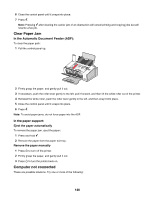
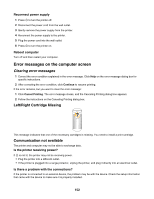
2 Adjust the paper guides on the ADF to rest against the edges of the paper. Note: You can load up to 30 sheets of an original document into the ADF. Memory Failure These are possible solutions. Try one or more of the following: Reduce memory use If applicable: • Print pending received faxes. • Send fewer pages. Select the After Dial setting 1 From the desktop, double-click the Productivity Studio icon. 2 From the Welcome Screen, click Fax History and Settings. 3 Click Adjust speed dial list and other fax settings. 4 Click the Dialing and Sending tab. 5 From the "Sending options" area, select After Dial from the "When to scan document" section. 6 Click OK. 7 Resend the fax. PictBridge communications error Remove and then reinsert the USB cable that came with the camera into the PictBridge port on the front of the printer. Scan Request Failed These are possible solutions. Try one or more of the following: Check your operating system The following operating systems are supported: Windows Vista, Windows XP, Windows 2000, and Mac OS X. Note: Windows 2000 users should use Service Pack 3 or later. Check computer connection Make sure your computer is connected to the printer and is turned on. 151
-
 1
1 -
2
-
3
-
4
-
5
-
6
-
7
-
8
-
9
-
10
-
11
-
12
-
13
-
14
-
15
-
16
-
17
-
18
-
19
-
20
-
21
-
22
-
23
-
24
-
25
-
26
-
27
-
28
-
29
-
30
-
31
-
32
-
33
-
34
-
35
-
36
-
37
-
38
-
39
-
40
-
41
-
42
-
43
-
44
-
45
-
46
-
47
-
48
-
49
-
50
-
51
-
52
-
53
-
54
-
55
-
56
-
57
-
58
-
59
-
60
-
61
-
62
-
63
-
64
-
65
-
66
-
67
-
68
-
69
-
70
-
71
-
72
-
73
-
74
-
75
-
76
-
77
-
78
-
79
-
80
-
81
-
82
-
83
-
84
-
85
-
86
-
87
-
88
-
89
-
90
-
91
-
92
-
93
-
94
-
95
-
96
-
97
-
98
-
99
-
100
-
101
-
102
-
103
-
104
-
105
-
106
-
107
-
108
-
109
-
110
-
111
-
112
-
113
-
114
-
115
-
116
-
117
-
118
-
119
-
120
-
121
-
122
-
123
-
124
-
125
-
126
-
127
-
128
-
129
-
130
-
131
-
132
-
133
-
134
-
135
-
136
-
137
-
138
-
139
-
140
-
141
-
142
-
143
-
144
-
145
-
 146
146 -
 147
147 -
 148
148 -
 149
149 -
 150
150 -
 151
151 -
 152
152 -
 153
153 -
 154
154 -
 155
155 -
 156
156 -
157
-
158
-
159
-
160
-
161
-
162
-
163
-
164
-
165
-
166
-
167
-
168
-
169
-
170
-
171
 |
 |