Lexmark X560n Quick Reference
Lexmark X560n Manual
 |
View all Lexmark X560n manuals
Add to My Manuals
Save this manual to your list of manuals |
Lexmark X560n manual content summary:
- Lexmark X560n | Quick Reference - Page 1
than 15 mm (.59 in.) high. The minimum paper size supported is 76.2 x 127 mm (3 x 5 in.). • Tray 1 (MPT) supports paper or specialty media within the following dimensions: 76.2 x 127 mm-220.0 x 355.6 mm (3 x 5 in.-.8.66 x 14 in.). • For duplex printing, you can load paper that is 64-163 g/m2. • Do - Lexmark X560n | Quick Reference - Page 2
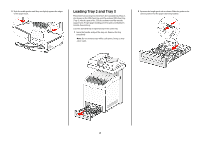
3 The printer has two trays to select from: the standard tray (Tray 2), also known as the 250-sheet tray, and the optional 550-sheet tray (Tray 3), which is part of the 550-sheet drawer and fits into the support unit. Proper paper loading prevents jams and facilitates trouble-free printing. Load - Lexmark X560n | Quick Reference - Page 3
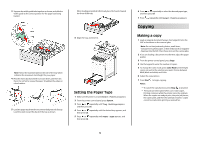
, press Stop at any time. • Print jobs are interrupted when users make copies. Printing continues while the printer scans the originals. When the copies are ready to print, the print job pauses, the copies print, and then the print job resumes. Copies cannot be made while printing a received fax. 3 - Lexmark X560n | Quick Reference - Page 4
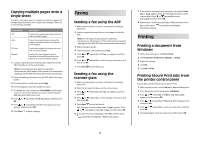
onto one side of a sheet of paper Manual Reduces the two original images as specified in Reduce/Enlarge, and prints them on one side of a sheet of paper 1 Load an original document faceup, short edge first into the ADF or facedown on the scanner glass. Note: Do not load postcards, photos, small - Lexmark X560n | Quick Reference - Page 5
cause damage to your printer. 5 Make sure the standard exit bin is dry before beginning a new print job. Cleaning the scanner glass Clean the scanner glass if you encounter print quality problems, such as streaks on copied or scanned images. 1 Slightly dampen a soft, lint-free cloth or paper towel
-
 1
1 -
 2
2 -
 3
3 -
 4
4 -
 5
5
 |
 |
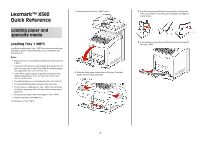
Lexmark™ X560
Quick Reference
Loading paper and
specialty media
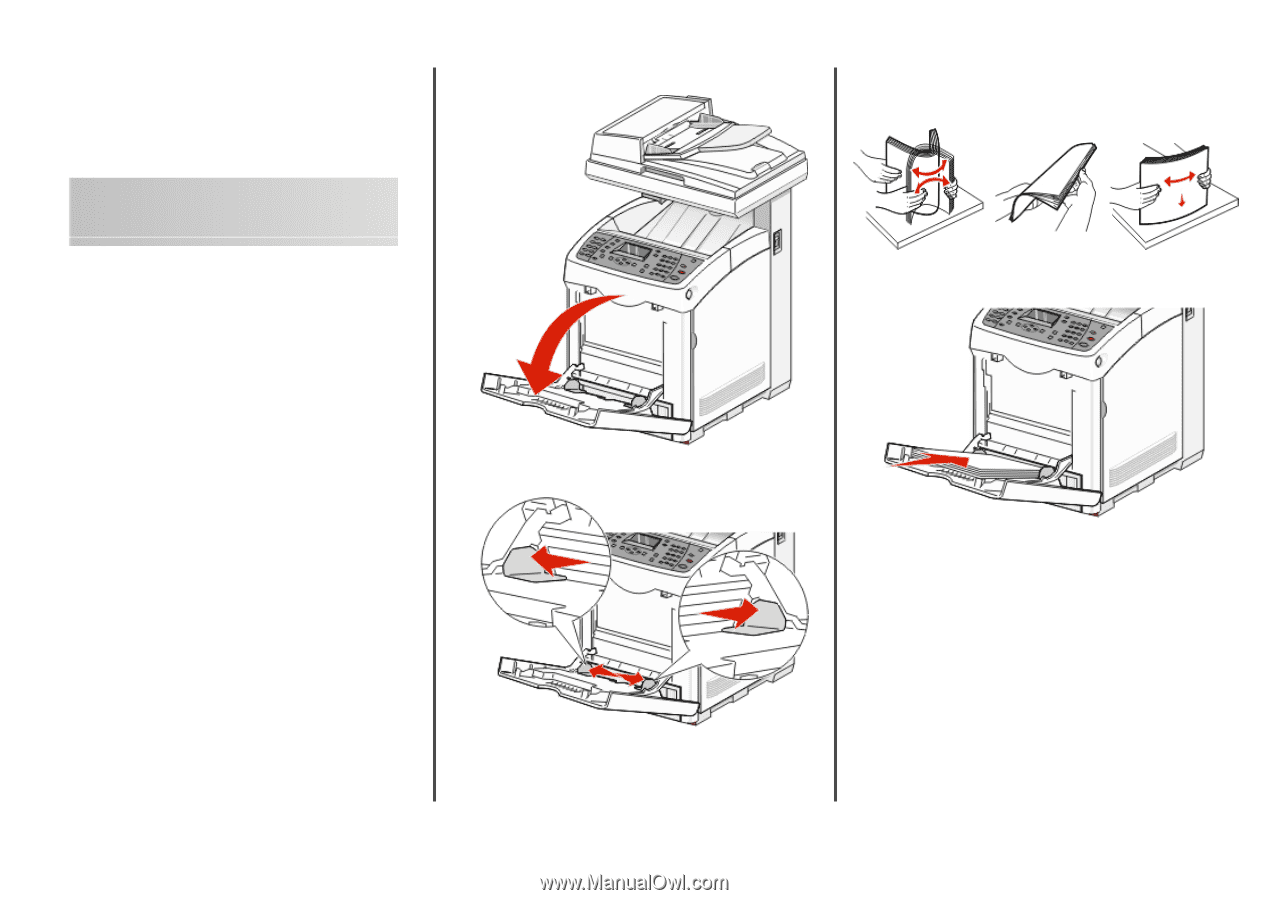
Loading Tray 1 (MPT)
In addition to plain paper, Tray 1 (MPT) can use various other sizes
and types of paper or specialty media, such as envelopes and
transparencies.
Notes:
•
Make sure Tray 2 is completely installed before opening Tray
1 (MPT).
•
Load up to 150 sheets or a stack of paper that weighs 60–216
g/m
2
and is less than 15 mm (.59 in.) high. The minimum paper
size supported is 76.2 x 127 mm (3 x 5 in.).
•
Tray 1 (MPT) supports paper or specialty media within the
following dimensions: 76.2 x 127 mm–220.0 x 355.6 mm
(3 x 5 in.–.8.66 x 14 in.).
•
For duplex printing, you can load paper that is 64–163 g/m
2
.
•
Do not load different types of paper at the same time.
•
Do not remove or add paper to Tray 1 (MPT) when printing,
or if there is any paper still in the tray. Doing so may cause a
paper jam.
•
Do not put any objects other than paper in Tray 1 (MPT).
•
Always load paper short edge first.
To load paper in Tray 1 (MPT):
1
Gently pull open the Tray 1 (MPT) cover.
2
Slide the width guides to the edges of the tray. The width
guides should be fully extended.
3
Flex the sheets back and forth to loosen them, and then fan
them. Do not fold or crease the paper. Straighten the edges on
a level surface.
4
Insert all paper or specialty media facedown and top edge first
into Tray 1 (MPT).
1