Lexmark X560n Quick Reference - Page 4
Faxing, Printing - manual
 |
View all Lexmark X560n manuals
Add to My Manuals
Save this manual to your list of manuals |
Page 4 highlights
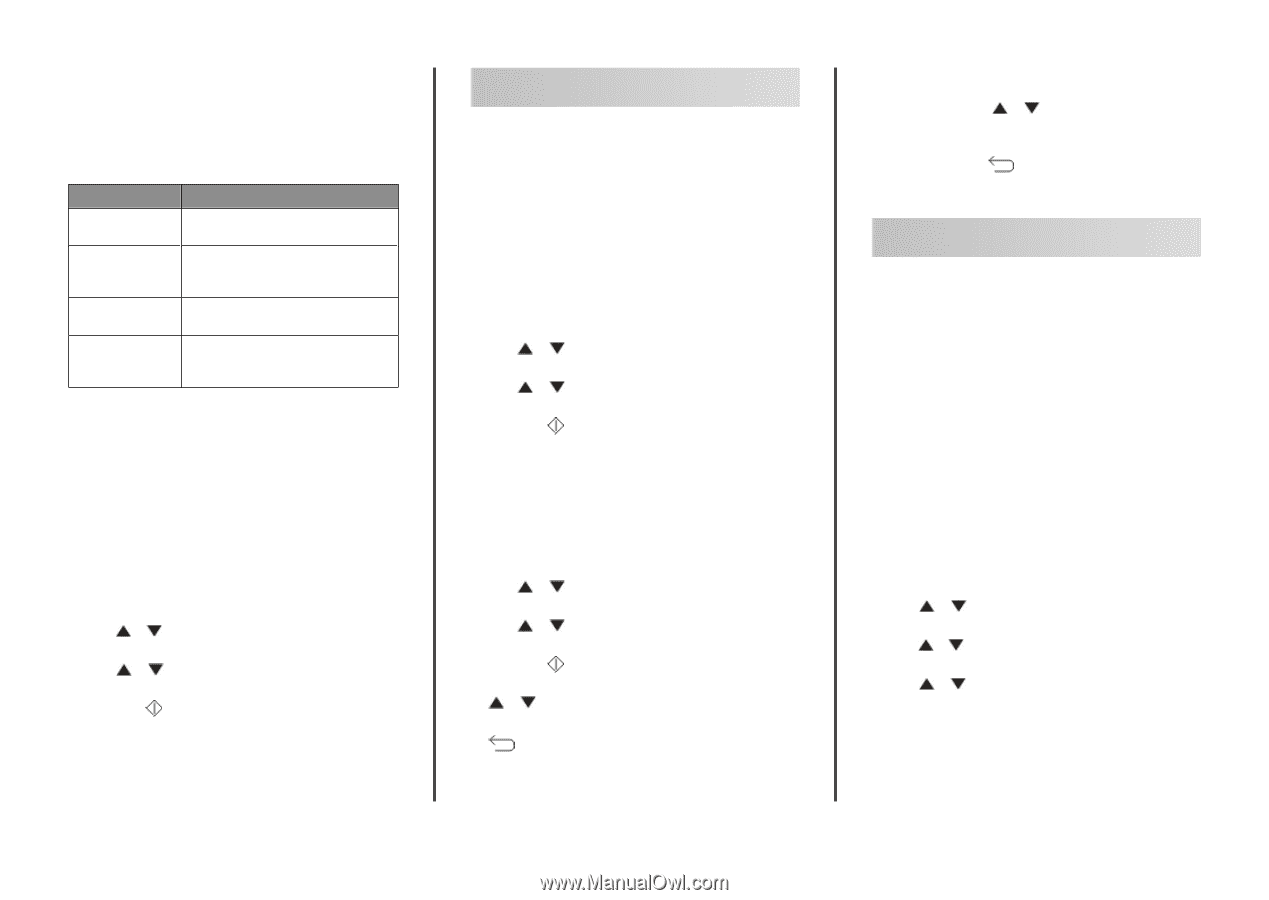
Copying multiple pages onto a single sheet In order to save paper, you can copy two consecutive pages of a multiple-page document onto a single sheet of paper. There are several settings available: N-Up setting Description Off Copies one original page image onto one side of a sheet of paper Auto Copies two original pages, reduces the images, and prints them on one side of a sheet of paper ID Copy Copies two original size images onto one side of a sheet of paper Manual Reduces the two original images as specified in Reduce/Enlarge, and prints them on one side of a sheet of paper 1 Load an original document faceup, short edge first into the ADF or facedown on the scanner glass. Note: Do not load postcards, photos, small items, transparencies, photo paper, or thin media (such as magazine clippings) into the ADF. Place these items on the scanner glass. 2 If you are loading a document into the ADF, adjust the paper guides. 3 From the printer control panel, press Copy. 4 Use the keypad to enter the number of copies. 5 To change the color mode, press Color Mode until the light comes on next to the selection you want. Choose between B&W (black and white) and Color. 6 Press or repeatedly until N-Up appears, and then press OK. 7 Press or repeatedly until the N-Up option you want appears, and then press OK. 8 Press Start to begin copying. Faxing Sending a fax using the ADF 1 Make sure the printer is on and is connected to a working phone line. 2 Load an original document faceup, short edge first into the ADF. Note: Do not load postcards, photos, small items, transparencies, photo paper, or thin media (such as magazine clippings) into the ADF. Place these items on the scanner glass. 3 Adjust the paper guides. 4 From the printer control panel, press Fax. 5 Press or press OK. repeatedly until Fax to appears, and then 6 Press or repeatedly to select the type of recipient, and then press OK. 7 Press Start to start the fax job. Sending a fax using the scanner glass 1 Make sure the printer is on and is connected to a working phone line. 2 Place the first page facedown on the scanner glass. 3 Press or press OK. repeatedly until Fax to appears, and then 4 Press or repeatedly to select the type of recipient, and then press OK. 5 Press Start to start the fax job. After the page is scanned, Another Page? appears. Press or repeatedly to select No or Yes, and then press OK. 6 If you want to send a single page, select No, and then press repeatedly until Select Function appears. 7 If you want to send more than one page, select Yes. Place Next Page appears. Place the next page facedown on the scanner glass. Press or repeatedly to select Continue, and then press OK. 8 Repeat step 7 for all necessary pages. When finished, choose No, and then press Function appears. repeatedly until Select Printing Printing a document from Windows 1 With a document open, click File ª Print. 2 Click Properties, Preferences, Options, or Setup. 3 Adjust the settings. 4 Click OK. 5 Click OK or Print. Printing Secure Print jobs from the printer control panel To print data stored in the printer by Secure Print: 1 Make sure the printer is on and Select Function appears. 2 From the printer control panel, press Job Status. 3 Press or repeatedly until Walk-Up Features appears, and then press OK. 4 Press or repeatedly until Secure Print appears, and then press OK. 5 Press or repeatedly to select your user name, and then press OK. 6 Using the keypad, enter the password, and then press OK. 4
-
 1
1 -
 2
2 -
 3
3 -
 4
4 -
 5
5
 |
 |