Lexmark X560n Quick Reference - Page 2
Loading Tray 2 and Tray 3 - parts
 |
View all Lexmark X560n manuals
Add to My Manuals
Save this manual to your list of manuals |
Page 2 highlights
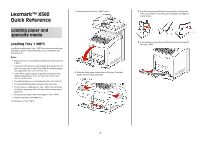
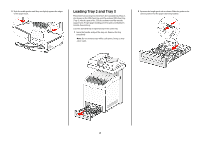
5 Slide the width guides until they rest lightly against the edges of the paper stack. Loading Tray 2 and Tray 3 The printer has two trays to select from: the standard tray (Tray 2), also known as the 250-sheet tray, and the optional 550-sheet tray (Tray 3), which is part of the 550-sheet drawer and fits into the support unit. Proper paper loading prevents jams and facilitates trouble-free printing. Load the standard tray or optional tray in the same way. 1 Grasp the handle, and pull the tray out. Remove the tray completely. Note: Do not remove trays while a job prints. Doing so may cause a jam. 2 Squeeze the length guide tab as shown. Slide the guide to the correct position for the paper size being loaded. 2
-
 1
1 -
 2
2 -
 3
3 -
 4
4 -
 5
5
 |
 |
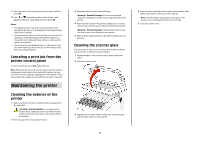
5
Slide the width guides until they rest lightly against the edges
of the paper stack.
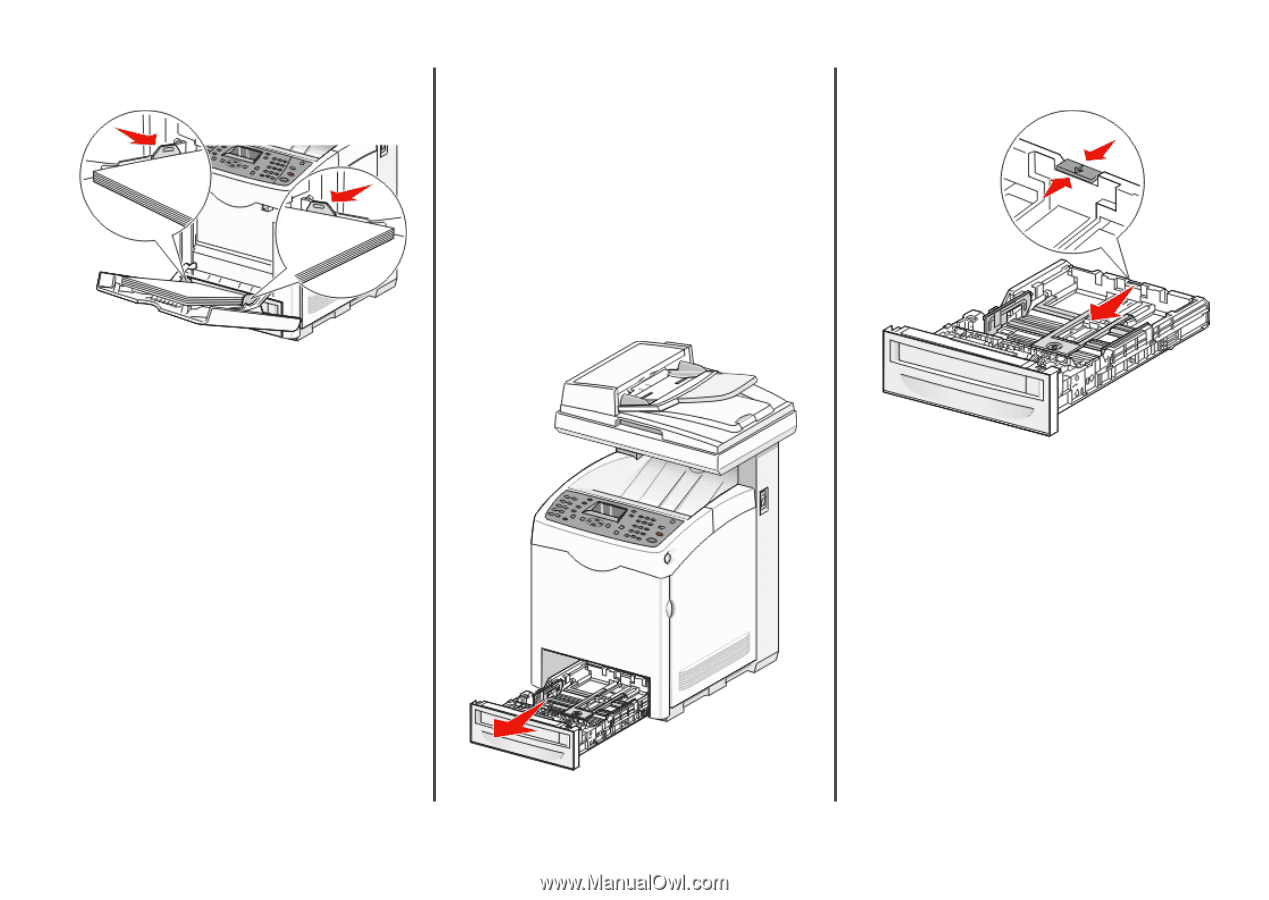
Loading Tray 2 and Tray 3
The printer has two trays to select from: the standard tray (Tray 2),
also known as the 250-sheet tray, and the optional 550-sheet tray
(Tray 3), which is part of the 550-sheet drawer and fits into the
support unit. Proper paper loading prevents jams and facilitates
trouble-free printing.
Load the standard tray or optional tray in the same way.
1
Grasp the handle, and pull the tray out. Remove the tray
completely.
Note:
Do not remove trays while a job prints. Doing so may
cause a jam.
2
Squeeze the length guide tab as shown. Slide the guide to the
correct position for the paper size being loaded.
2