Lexmark X560n Troubleshooting Guide - Page 1
Lexmark X560n Manual
 |
View all Lexmark X560n manuals
Add to My Manuals
Save this manual to your list of manuals |
Page 1 highlights
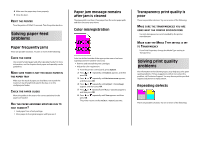
Lexmark™ X560 Troubleshooting Guide Solving printing problems Online customer support Customer support is available on the Lexmark Web site at www.lexmark.com Checking an unresponsive printer If your printer is not responding, make sure: • The power cord is plugged into the printer and a properly grounded electrical outlet. • The electrical outlet is not turned off by any switch or breaker. • The printer is not plugged into any surge protectors, uninterrupted power supplies, or extension cords. • Other electrical equipment plugged into the outlet is working. • The printer is turned on. • The printer cable is securely attached to the printer and the host computer, print server, option, or other network device. Once you have checked each of these possibilities, turn the printer off and then back on. This often fixes the problem. Multiple-language PDFs do not print The documents contain unavailable fonts. 1 Open the document you want to print in Adobe Acrobat. 2 Click the printer icon. The Print dialog appears. 3 Select Print as image. 4 Click OK. Printer control panel display is blank The printer self test failed. Turn the printer off, wait about 10 seconds, and then turn the printer back on. If Select Function does not appear, turn the printer off and contact Customer Support. Jobs do not print These are possible solutions. Try one or more of the following: MAKE SURE THE PRINTER IS READY TO PRINT Make sure Select Function appears on the display or the Wake Up light is on before sending a job to print. Press Wake Up to return the printer to Select Function. CHECK TO SEE IF THE PAPER TRAY IS EMPTY Load paper in the tray. MAKE SURE THE CORRECT PRINTER SOFTWARE IS INSTALLED • Verify that you are using the correct printer software. • If you are using a USB port, make sure you are running Windows 98/ME, Windows 2000, Windows XP, or Windows Server 2003 and using Windows 98/ME, Windows 2000, Windows XP, or Windows Server 2003 compatible printer software. MAKE SURE YOU ARE USING A RECOMMENDED USB, PARALLEL, OR ETHERNET CABLE For more information, see the supplies section of the User's Guide, or contact the place where you bought the printer. MAKE SURE PRINTER CABLES ARE SECURELY CONNECTED Check the cable connections to the printer and print server to make sure they are secure. For more information, see the setup documentation that came with the printer. Job takes longer than expected to print The job is too complex. Reduce the complexity of your print job by eliminating the number and size of fonts, the number and complexity of images, and the number of pages in the job. Tray linking does not work Make sure to do all of the following: • Load both Tray 2 and Tray 3 with the same paper size and type. • From Print Properties, change the Paper source to Auto select. • Set Tray Switching to Nearest Size: 1 From the printer control panel, press System. 2 Press or repeatedly until Admin Menu appears, and then press OK. 3 Press or repeatedly until System Settings appears, and then press OK. 4 Press or repeatedly until Tray Switching appears, and then press OK. 5 Press or repeatedly until Nearest Size appears, and then press OK. 6 Press repeatedly until Select Function appears. Unexpected page breaks occur 1 Make sure the printer is on and Select Function appears. 2 From the printer control panel, press System. 3 Press or repeatedly until Admin Menu appears, and then press OK.
-
 1
1 -
 2
2 -
 3
3 -
 4
4 -
 5
5 -
 6
6 -
 7
7 -
8
-
9
 |
 |