Lexmark X7550 User's Guide (Mac) - Page 110
Orange, Orange blinking, Green, Warning, Use
 |
View all Lexmark X7550 manuals
Add to My Manuals
Save this manual to your list of manuals |
Page 110 highlights
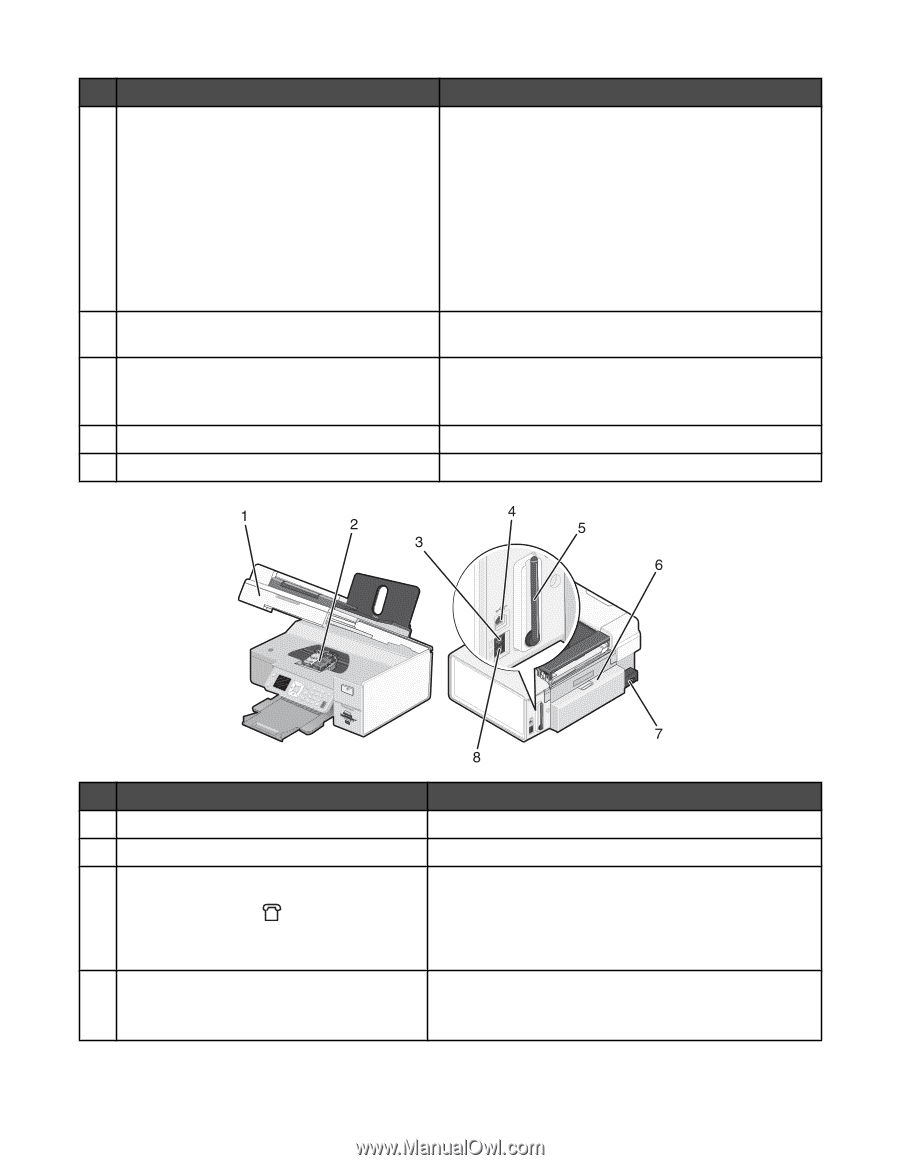
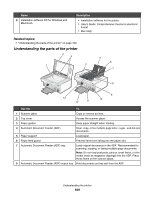
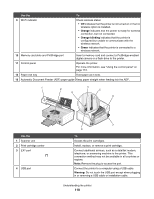
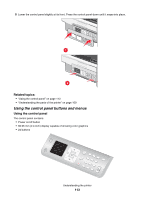
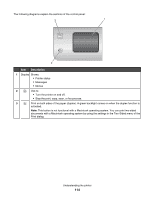
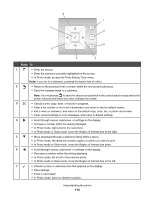
Use the To 9 Wi-Fi indicator Check wireless status: • Off indicates that the printer is not turned on or that no wireless option is installed. • Orange indicates that the printer is ready for wireless connection, but not connected. • Orange blinking indicates that the printer is configured but unable to communicate with the wireless network. • Green indicates that the printer is connected to a wireless network. 10 Memory card slots and PictBridge port Insert a memory card and connect a PictBridge-enabled digital camera or a flash drive to the printer. 11 Control panel Operate the printer. For more information, see "Using the control panel" on page 113. 12 Paper exit tray Hold paper as it exits. 13 Automatic Document Feeder (ADF) paper guide Keep paper straight when feeding into the ADF. Use the 1 Scanner unit 2 Print cartridge carrier 3 EXT port 4 USB port To Access the print cartridges. Install, replace, or remove a print cartridge. Connect additional devices, such as a data/fax modem, telephone, or answering machine to the printer. This connection method may not be available in all countries or regions. Note: Remove the plug to access the port. Connect the printer to a computer using a USB cable. Warning: Do not touch the USB port except when plugging in or removing a USB cable or installation cable. Understanding the printer 110
-
 1
1 -
2
-
3
-
4
-
5
-
6
-
7
-
8
-
9
-
10
-
11
-
12
-
13
-
14
-
15
-
16
-
17
-
18
-
19
-
20
-
21
-
22
-
23
-
24
-
25
-
26
-
27
-
28
-
29
-
30
-
31
-
32
-
33
-
34
-
35
-
36
-
37
-
38
-
39
-
40
-
41
-
42
-
43
-
44
-
45
-
46
-
47
-
48
-
49
-
50
-
51
-
52
-
53
-
54
-
55
-
56
-
57
-
58
-
59
-
60
-
61
-
62
-
63
-
64
-
65
-
66
-
67
-
68
-
69
-
70
-
71
-
72
-
73
-
74
-
75
-
76
-
77
-
78
-
79
-
80
-
81
-
82
-
83
-
84
-
85
-
86
-
87
-
88
-
89
-
90
-
91
-
92
-
93
-
94
-
95
-
96
-
97
-
98
-
99
-
100
-
101
-
102
-
103
-
104
-
 105
105 -
 106
106 -
 107
107 -
 108
108 -
 109
109 -
 110
110 -
 111
111 -
 112
112 -
 113
113 -
 114
114 -
 115
115 -
116
-
117
-
118
-
119
-
120
-
121
-
122
-
123
-
124
-
125
-
126
-
127
-
128
-
129
-
130
-
131
-
132
-
133
-
134
-
135
-
136
-
137
-
138
-
139
-
140
-
141
-
142
-
143
-
144
-
145
-
146
-
147
-
148
-
149
-
150
-
151
-
152
-
153
-
154
-
155
-
156
-
157
-
158
-
159
-
160
-
161
-
162
-
163
-
164
-
165
-
166
-
167
-
168
-
169
-
170
-
171
-
172
-
173
-
174
-
175
-
176
-
177
-
178
-
179
-
180
-
181
-
182
-
183
-
184
-
185
-
186
-
187
-
188
-
189
-
190
-
191
-
192
-
193
-
194
-
195
-
196
-
197
-
198
-
199
-
200
-
201
-
202
-
203
-
204
-
205
-
206
-
207
-
208
-
209
-
210
-
211
-
212
-
213
-
214
-
215
-
216
-
217
-
218
-
219
-
220
-
221
-
222
-
223
-
224
-
225
-
226
-
227
 |
 |