Lexmark X782e Clearing Jams Guide
Lexmark X782e Manual
 |
View all Lexmark X782e manuals
Add to My Manuals
Save this manual to your list of manuals |
Lexmark X782e manual content summary:
- Lexmark X782e | Clearing Jams Guide - Page 1
Lexmark™ X782 Clearing Jams Guide Clearing jams Understanding jam messages Message 200 Paper Jam 201 Paper Jam and then close tray 1. 2 Remove all visible paper. Remove any torn paper from the printer. 3 Close the door. 4 Open Tray 1, and make sure the entire paper stack is pushed all the way down - Lexmark X782e | Clearing Jams Guide - Page 2
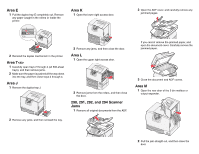
. Area K 1 Open the lower right access door. 2 Open the ADF cover, and carefully remove any jammed pages. 2 Reinstall the duplex mechanism in the printer. Area T 1 Carefully open trays 2 through 4 (all 500-sheet trays), and then remove jams. 2 Make sure the paper is pushed all the way down - Lexmark X782e | Clearing Jams Guide - Page 3
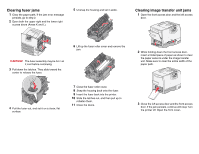
, and set it on a clean, flat surface. 7 Close the fuser roller cover. 8 Snap the housing back onto the fuser. 9 Insert the fuser back into the printer. 10 Slide the latches out, and then pull up to refasten them. 11 Close the doors. 2 While holding down the front access door, insert a folded - Lexmark X782e | Clearing Jams Guide - Page 4
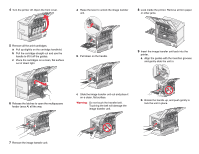
the cartridges on a clean, flat surface out of direct light. b Pull down on the handle. 9 Insert the image transfer unit back into the printer. a Align the guides with the insertion grooves and gently slide the unit in. 6 Release the latches to open the multipurpose feeder (area A) all the way - Lexmark X782e | Clearing Jams Guide - Page 5
the multipurpose feeder to its working position. Reinstall all the print cartridges. 11 Close the printer door. 12 Turn the printer on. The printer returns to a Ready state. If you still need help 1 Turn the printer off and then back on. 2 Contact your administrator or Help desk if you need more
-
 1
1 -
 2
2 -
 3
3 -
 4
4 -
 5
5
 |
 |
Lexmark™ X782
Clearing Jams
Guide
Clearing jams
Understanding jam messages
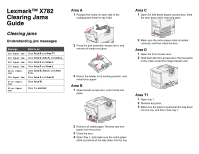
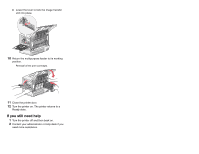
Area A
1
Release the levers on each side of the
multipurpose feeder to lay it flat.
2
Press the pick assembly release lever, and
remove all media and jams.
3
Return the feeder to its working position, and
reload your paper.
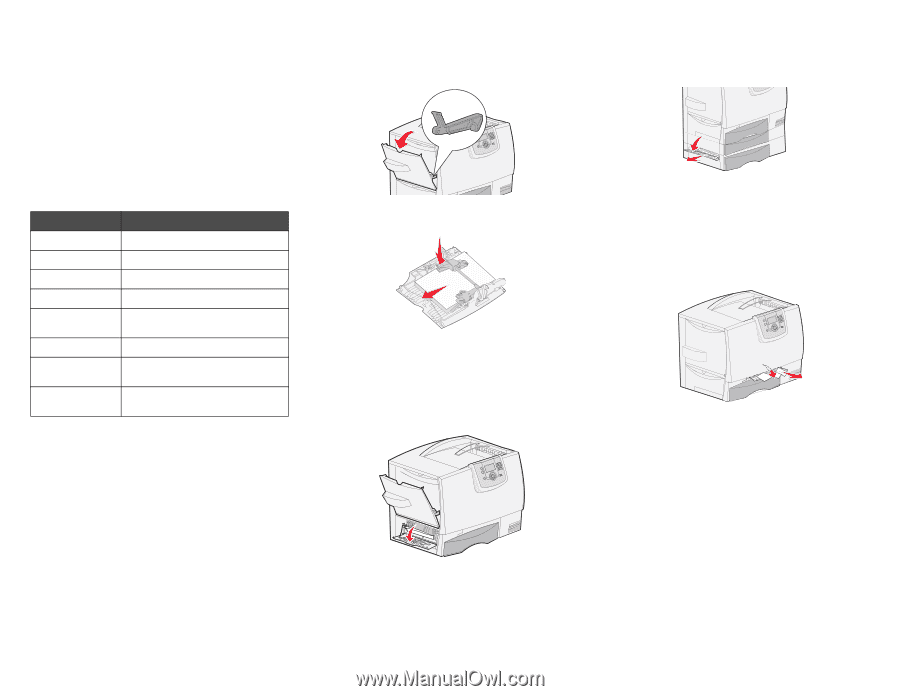
Area B
1
Open the left access door until it clicks into
place.
2
Remove all visible paper. Remove any torn
paper from the printer.
3
Close the door.
4
Open Tray 1, and make sure the entire paper
stack is pushed all the way down into the tray.
Area C
1
Open the 500-sheet drawer access door. Hold
the door down while removing jams.
2
Make sure the entire paper stack is loaded
correctly, and then close the door.
Area D
1
Open the front access door.
2
Hold down the front access door. Remove jams
in the rollers under the image transfer unit.
Area T1
1
Open tray 1.
2
Remove any jams.
3
Make sure the paper is pushed all the way down
into the tray, and then close tray 1.
Message
What to do
200 Paper Jam
Clear
Area B
and
Area T1
.
201 Paper Jam
Clear
Area D
,
Area K
, and
Area L
.
202 Paper Jam
Clear
Area K
and
Area L
.
230 Paper Jam
Clear
Area E
and
Area J
.
24<x> Paper
Jam
Clear
Area B, Area C
, and
Area
T<x>
.
250 Paper Jam
Clear
Area A
and
Area D
.
27<x> Paper
Jam
Clear
Area M
.
29<x> Paper
Jam
Clear the
scanner
.