Lexmark X782e Clearing Jams Guide - Page 2
Area E, Area T<x>, Area J, Area K, Area L, 291, 292, and 294 Scanner, Area M
 |
View all Lexmark X782e manuals
Add to My Manuals
Save this manual to your list of manuals |
Page 2 highlights
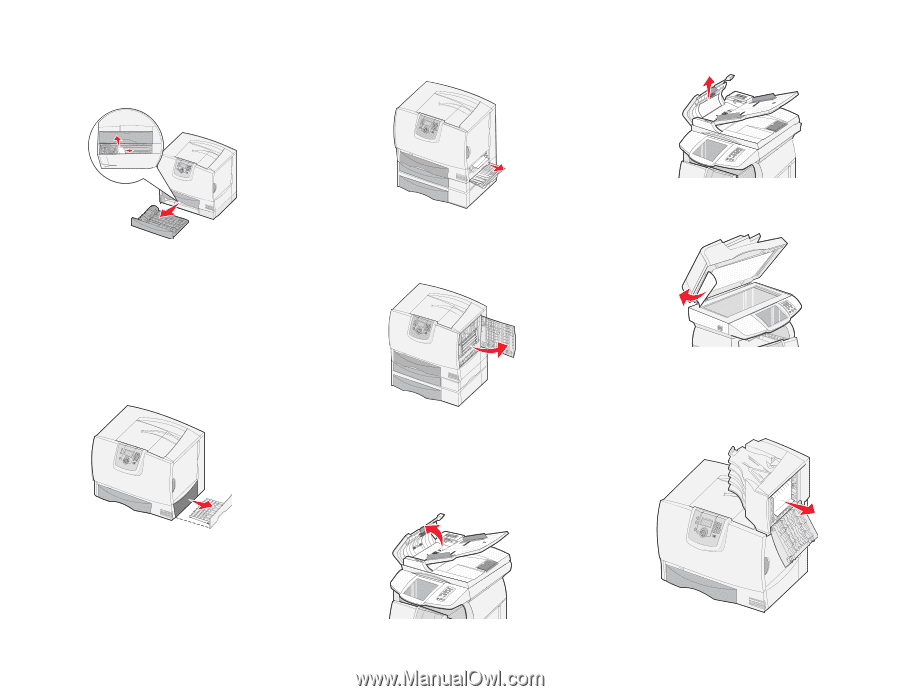
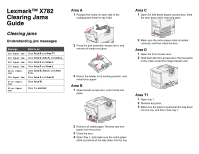
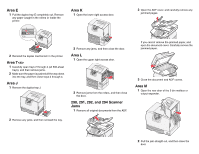
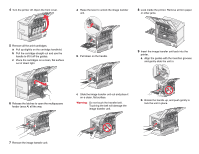
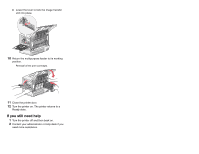
Area E 1 Pull the duplex tray E completely out. Remove any paper caught in the rollers or inside the printer. Area K 1 Open the lower right access door. 2 Open the ADF cover, and carefully remove any jammed pages. 2 Reinstall the duplex mechanism in the printer. Area T 1 Carefully open trays 2 through 4 (all 500-sheet trays), and then remove jams. 2 Make sure the paper is pushed all the way down into the tray, and then close trays 2 through 4. Area J 1 Remove the duplex tray J. 2 Remove any jams, and then close the door. Area L 1 Open the upper right access door. 2 Remove jams from the rollers, and then close the door. 290, 291, 292, and 294 Scanner Jams 1 Remove all original documents from the ADF. 2 Remove any jams, and then reinstall the tray. If you cannot remove the jammed paper, and open the document cover. Carefully remove the jammed paper. 3 Close the document and ADF covers. Area M 1 Open the rear door of the 5-bin mailbox or output expander. 2 Pull the jam straight out, and then close the door.
-
 1
1 -
 2
2 -
 3
3 -
 4
4 -
 5
5
 |
 |