Lexmark X782e Clearing Jams Guide - Page 1
Lexmark X782e Manual
 |
View all Lexmark X782e manuals
Add to My Manuals
Save this manual to your list of manuals |
Page 1 highlights
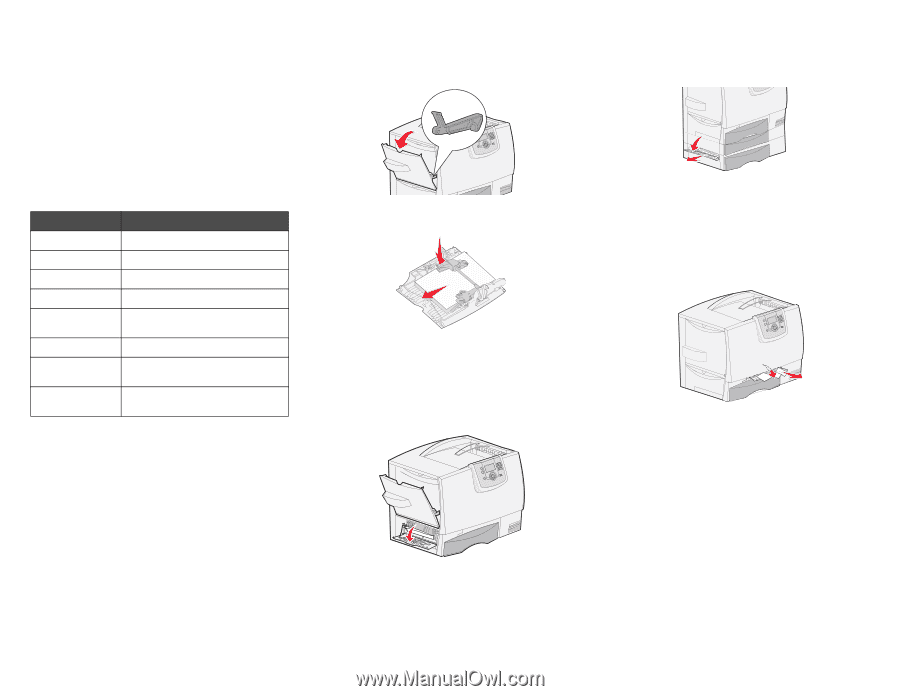
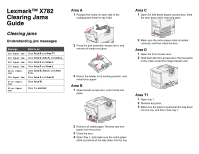
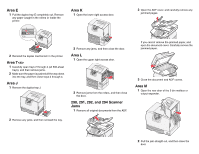
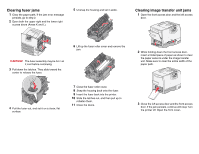
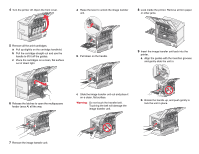
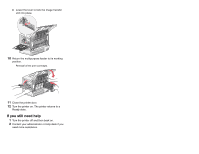
Lexmark™ X782 Clearing Jams Guide Clearing jams Understanding jam messages Message 200 Paper Jam 201 Paper Jam 202 Paper Jam 230 Paper Jam 24 Paper Jam 250 Paper Jam 27 Paper Jam 29 Paper Jam What to do Clear Area B and Area T1. Clear Area D, Area K, and Area L. Clear Area K and Area L. Clear Area E and Area J. Clear Area B, Area C, and Area T. Clear Area A and Area D. Clear Area M. Clear the scanner. Area A 1 Release the levers on each side of the multipurpose feeder to lay it flat. 2 Press the pick assembly release lever, and remove all media and jams. 3 Return the feeder to its working position, and reload your paper. Area B 1 Open the left access door until it clicks into place. Area C 1 Open the 500-sheet drawer access door. Hold the door down while removing jams. 2 Make sure the entire paper stack is loaded correctly, and then close the door. Area D 1 Open the front access door. 2 Hold down the front access door. Remove jams in the rollers under the image transfer unit. Area T1 1 Open tray 1. 2 Remove any jams. 3 Make sure the paper is pushed all the way down into the tray, and then close tray 1. 2 Remove all visible paper. Remove any torn paper from the printer. 3 Close the door. 4 Open Tray 1, and make sure the entire paper stack is pushed all the way down into the tray.
-
 1
1 -
 2
2 -
 3
3 -
 4
4 -
 5
5
 |
 |