Lexmark X782e Clearing Jams Guide - Page 3
Clearing fuser jams, Clearing image transfer unit jams
 |
View all Lexmark X782e manuals
Add to My Manuals
Save this manual to your list of manuals |
Page 3 highlights
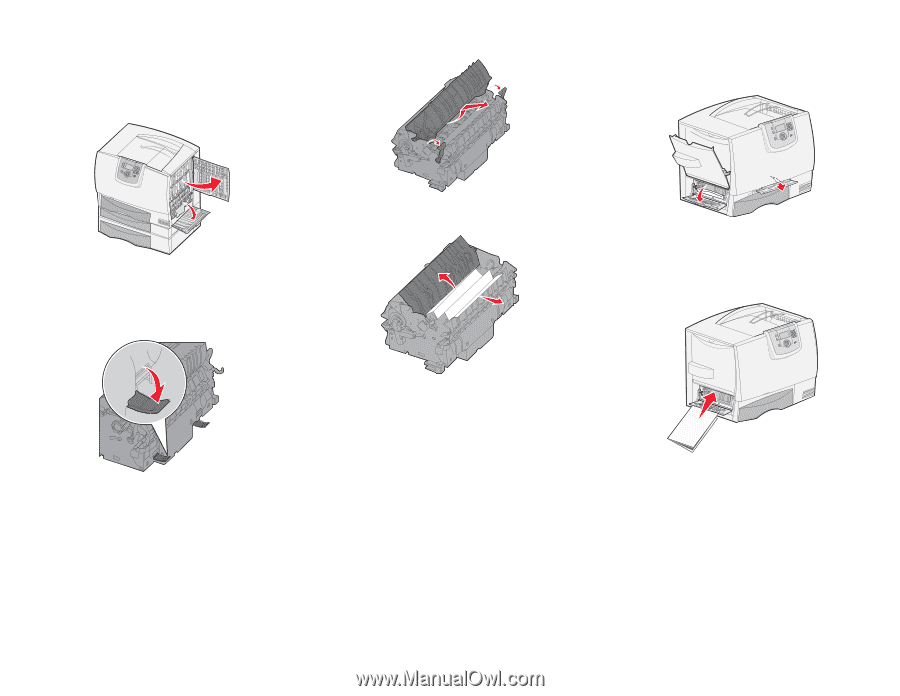
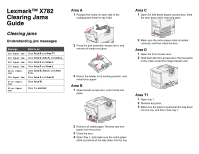
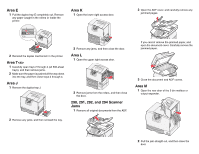
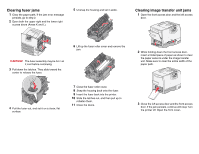
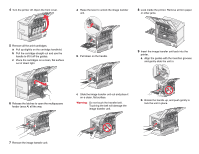
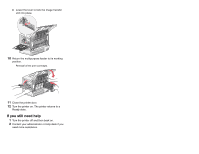
Clearing fuser jams 1 Clear the paper path. If the jam error message persists, go to step 2. 2 Open both the upper right and the lower right access doors (Areas K and L). 5 Unsnap the housing and set it aside. Clearing image transfer unit jams 1 Open the front access door and the left access door. 6 Lift up the fuser roller cover and remove the jam. CAUTION: The fuser assembly may be hot. Let it cool before continuing. 3 Pull down the latches. They slide toward the center to release the fuser. 4 Pull the fuser out, and set it on a clean, flat surface. 7 Close the fuser roller cover. 8 Snap the housing back onto the fuser. 9 Insert the fuser back into the printer. 10 Slide the latches out, and then pull up to refasten them. 11 Close the doors. 2 While holding down the front access door, insert a folded piece of paper as shown to clear the paper sensors under the image transfer unit. Make sure to clear the entire width of the paper path. 3 Close the left access door and the front access door. If the jam persists, continue with step Turn the printer off. Open the front cover..
-
 1
1 -
 2
2 -
 3
3 -
 4
4 -
 5
5
 |
 |