Lexmark X782e Troubleshooting Guide - Page 5
Solving copy quality, problems - printer scanner
 |
View all Lexmark X782e manuals
Add to My Manuals
Save this manual to your list of manuals |
Page 5 highlights
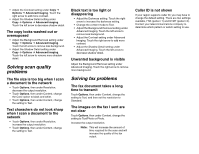
- 97 mm (3.8 in.) Marks occur down the page repeatedly in all colors: • Replace the transfer roll if the defects occur every 60 mm (2.4 in.) • Check the first transfer bellcranks and springs or replace the image transfer unit if the defects occur every 101 mm (4 in.) • Replace the fuser if the defects occur every 148 mm (5.8 in.) Marks occur on every third or sixth page in any color: Replace the image transfer unit. White or colored lines 1 Replace the color print cartridge that is causing the line. 2 If you still have the problem, replace the image transfer unit and transfer roller. 3 If you still have the problem, replace the fuser. Streaked horizontal lines Replace the print cartridge, the transfer roller, the image transfer unit, or fuser as needed. From the printer operator panel, print the repetitive defects guide to determine which component needs to be replaced. Streaked vertical lines • If paper is stiff, try feeding from another tray. • Replace the print cartridge that corresponds to the color displayed on the control panel. Print irregularities • Load paper from a fresh package in the paper tray. • Avoid textured paper with rough finishes. • Make sure the printer paper type, paper texture, and paper weight settings match the type of paper you are using. • Replace the image transfer unit and transfer roller. • Replace the fuser. Print too light • Make sure the printer paper type, paper texture, and paper weight settings match the type of paper you are using. • The default Paper Weight setting in the Paper Menu is Normal. For paper less than 20 lb bond (75 g/m2 ), choose the Light setting. For 28 lb bond to 47 lb bond (105 g/m2 to 175 g/m2 ), choose the Heavy setting. • Select a different Toner Darkness setting from the printer driver before sending the job to print. • Scroll to the Color Adjust setting in the Quality Menu and press Select to adjust the color. • Load paper from a new package. • Avoid textured paper with rough finishes. • Make sure the paper you load in the trays is not damp. • Shake the specified print cartridge to utilize the remaining toner. • Replace the print cartridge that corresponds to the color displayed on the control panel. Print too dark • Select a different Toner Darkness setting from the printer driver before sending the job to print. • Scroll to the Color Adjust setting in the Quality Menu and press Select to adjust the color. • Replace the print cartridge that corresponds to the color displayed on the control panel. Transparency print quality is poor • Use only transparencies recommended by the printer's manufacturer. • Make sure the Paper Type setting is set to Transparency. Toner specks • Replace the print cartridge that corresponds to the color displayed on the control panel. • Replace the transfer roller. • Replace the image transfer unit. • Replace the fuser. • Call for service. Solving copy quality problems Unwanted background is visible Adjust the Background Removal setting under Copy Options Advanced Imaging. Touch the right arrow to remove more background. Unwanted patterns (Moire) appear when a document is copied using Photograph mode Change the content mode to Printed Image under Copy Options Content. Vertical or horizontal lines are noticed on copied pages Clean the ADF scanner glass and backing material. Black text is too light or disappearing • Adjust the Darkness setting under the Copy menu. Touch the right arrow to increase the darkness setting. • Change the content mode to Text under Copy Options Content. • Adjust the Background Removal setting under Copy Options Advanced Imaging. Touch the left arrow to remove less background.
-
 1
1 -
 2
2 -
 3
3 -
 4
4 -
 5
5 -
 6
6
 |
 |
