Lexmark XC4342 Quick Reference
Lexmark XC4342 Manual
 |
View all Lexmark XC4342 manuals
Add to My Manuals
Save this manual to your list of manuals |
Lexmark XC4342 manual content summary:
- Lexmark XC4342 | Quick Reference - Page 1
mail. 3 From the E‑mail Setup section, configure the settings. Notes: • For more information on the password, see the list of e‑mail service providers. • For e‑mail service providers that are not on the list, contact your provider and ask for the settings. 4 Click Save. Using the Settings menu in the - Lexmark XC4342 | Quick Reference - Page 2
Credentials Device UserID Your e‑mail address Device Password Account password NetEase Mail (mail.126.com) Note: Make sure that the SMTP service is enabled on your account. To enable the service, from the NetEase Mail home page, click Settings > POP3/SMTP/IMAP, and then enable either IMAP/SMTP - Lexmark XC4342 | Quick Reference - Page 3
Device UserID Your e‑mail address Setting Device Password Value Authorization password Note: The authorization password is provided when IMAP/SMTP service or POP3/SMTP service is enabled. Outlook Live or Microsoft 365 These settings apply to outlook.com and hotmail.com e‑mail domains, and - Lexmark XC4342 | Quick Reference - Page 4
Use Device SMTP Credentials Your e‑mail address Device Password Independent password Note: The independent password is provided when IMAP/SMTP service or POP3/SMTP service is enabled. Yahoo! Mail Setting Value Primary SMTP Gateway smtp.mail.yahoo.com Primary SMTP 587 Gateway Port Use SSL - Lexmark XC4342 | Quick Reference - Page 5
up the fax function using fax server Notes: • This feature lets you send fax messages to a fax service provider that supports e‑mail receiving. • This feature supports outgoing fax messages only. To support fax receive, make sure that you have a device‑based fax, such as analog fax, etherFAX, or Fax - Lexmark XC4342 | Quick Reference - Page 6
sure that the fax driver is installed. For more information, see "Installing the fax driver" on page 11. For to the same subnet. 6 • This application is supported only in some Apple devices. 1 From your mobile Wi‑Fi Direct® Wi‑Fi Direct® is a printing service that lets you print to any Wi‑Fi Direct‑ - Lexmark XC4342 | Quick Reference - Page 7
the print job. Touch Held jobs > select your computer name > Confidential > enter the PIN > select the print job > Print. Using the print driver 1 With a document open, choose File > Print. 2 Select a printer, and then from the drop-down menu following the Orientation menu, choose Print and Hold - Lexmark XC4342 | Quick Reference - Page 8
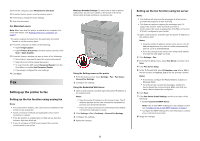
cartridge 1 Open door B. 2 Remove the used toner cartridge. 4 Insert the new toner cartridge. 3 Unpack the new toner cartridge. 8 5 Close door B. Loading trays CAUTION-TIPPING HAZARD: To reduce the risk of equipment instability, load each tray separately. Keep all other trays closed until - Lexmark XC4342 | Quick Reference - Page 9
match the size of the paper that you are loading. Note: Use the indicators on the bottom of the tray to position the guides. 3 Flex, fan, and align the paper edges before loading. 4 Load the paper stack with the printable side faceup. • For one‑sided printing, load letterhead faceup - Lexmark XC4342 | Quick Reference - Page 10
entering the printer first. 5 Insert the tray. If necessary, set the paper size and type to match the paper loaded in the tray. 2 Adjust the guide to match the size of the paper that you are loading. 10 - Lexmark XC4342 | Quick Reference - Page 11
guide. Load European envelopes with the flap entering the printer first. Warning-Potential Damage: Do not use envelopes with stamps, clasps, snaps, windows, coated linings, or self‑stick adhesives. Note: To avoid paper pick problems the instructions on the computer screen. Installing the fax driver 1 - Lexmark XC4342 | Quick Reference - Page 12
, take note of the eight-digit PIN of the printer. 4 Enter the PIN on the computer. Note: If the print driver is not already installed, then Windows downloads the appropriate driver. For Macintosh users 1 Click the wireless icon, and then select the printer Wi‑Fi Direct name. Note: The string DIRECT - Lexmark XC4342 | Quick Reference - Page 13
Connecting using Wi‑Fi Direct Note: These instructions apply only to Android mobile devices. 1 From the set to On or Auto, the printer reprints jammed pages. • Make sure that the paper guides are positioned correctly and are not pressing tightly against the paper or envelopes. • Push the tray - Lexmark XC4342 | Quick Reference - Page 14
Jam locations 1 ADF 2 Standard bin Jam locations 3 Door A 4 Multipurpose feeder 5 Trays Paper jam in trays 1 Remove the tray. Warning-Potential Damage: A sensor inside the optional tray is easily damaged by static electricity. Touch a metal surface before removing the jammed paper in the tray. 2 - Lexmark XC4342 | Quick Reference - Page 15
CAUTION-HOT SURFACE: The inside of the printer might be hot. To reduce the risk of injury from a hot component, allow the surface to cool before touching it. 3 Open door A1. 4 Insert the tray. Paper jam in the standard bin Remove the jammed paper. Note: Make sure that all paper fragments are - Lexmark XC4342 | Quick Reference - Page 16
2 Open the isolation unit door. 5 Close door A. Paper jam in the duplex area 1 Open door A. CAUTION-HOT SURFACE: The inside of the printer might be hot. To reduce the risk of injury from a hot component, allow the surface to cool before touching it. 6 Close and latch the fuser access door. 7 Close - Lexmark XC4342 | Quick Reference - Page 17
2 Open the duplex cover. Paper jam in the automatic document feeder 1 Remove all original documents from the ADF tray. 2 Open door C. 3 Remove the jammed paper. Note: Make sure that all paper fragments are removed. 3 Remove the jammed paper. Note: Make sure that all paper fragments are removed.
-
 1
1 -
 2
2 -
 3
3 -
 4
4 -
 5
5 -
 6
6 -
 7
7 -
8
-
9
-
10
-
11
-
12
-
13
-
14
-
15
-
16
-
17
 |
 |
Quick Reference
Copy
Making copies
1
Load an original document into the ADF tray or on the scanner
glass.
Note:
To avoid a cropped image, make sure that the original
document and output have the same paper size.
2
From the home screen, touch
Copy
, and then specify the
number of copies.
If necessary, adjust the copy settings.
3
Copy the document.
Note:
To make a quick copy, from the home screen, touch
.
Copying on both sides of the paper
1
Load an original document into the ADF tray or on the scanner
glass.
2
From the home screen, touch
Copy
>
Sides
.
3
Touch
1 sided to 2 sided
or
2 sided to 2 sided
.
4
Copy the document.
Copying multiple pages onto a single
sheet
1
Load an original document into the ADF tray or on the scanner
glass.
2
From the home screen, touch
Copy
>
Pages per Side
.
3
Adjust the settings.
4
Copy the document.
E-mail
Configuring the e
‑
mail SMTP settings
Configure the Simple Mail Transfer Protocol (SMTP) settings to
send a scanned document through e-mail. The settings vary with
each e
‑
mail service provider.
Before you begin, make sure that the printer is connected to a
network and that the network is connected to the Internet.
Using the Embedded Web Server
1
Open a web browser, and then type the printer IP address in
the address field.
Notes:
•
View the printer IP address on the printer home screen.
The IP address appears as four sets of numbers
separated by periods, such as 123.123.123.123.
•
If you are using a proxy server, then temporarily disable
it to load the web page correctly.
2
Click
Settings
>
E
‑
mail
.
3
From the E
‑
mail Setup section, configure the settings.
Notes:
•
For more information on the password, see the list of
e
‑
mail service providers
.
•
For e
‑
mail service providers that are not on the list,
contact your provider and ask for the settings.
4
Click
Save
.
Using the Settings menu in the printer
1
From the home screen, touch
Settings
>
E
‑
mail
>
E
‑
mail Setup
.
2
Configure the settings.
Notes:
•
For more information on the password, see the list of
e
‑
mail service providers
.
•
For e
‑
mail service providers that are not on the list,
contact your provider and ask for the settings.
E
‑
mail service providers
•
AOL Mail
•
Comcast Mail
•
Gmail
•
iCloud Mail
•
Mail.com
•
NetEase Mail (mail.126.com)
•
NetEase Mail (mail.163.com)
•
NetEase Mail (mail.yeah.net)
•
Outlook Live or Microsoft 365
•
QQ Mail
•
Sina Mail
•
Sohu Mail
•
Yahoo! Mail
•
Zoho Mail
Notes:
•
If you encounter errors using the settings provided, then
contact your e
‑
mail service provider.
•
For e
‑
mail service providers that are not on the list, contact
your provider.
AOL Mail
Setting
Value
Primary SMTP
Gateway
smtp.aol.com
Primary SMTP
Gateway Port
587
Use SSL/TLS
Required
Require Trusted
Certificate
Disabled
Reply Address
Your e
‑
mail address
SMTP Server
Authentication
Login / Plain
Device
‑
Initiated E
‑
mail
Use Device SMTP Credentials
Device UserID
Your e
‑
mail address
Device Password
App password
Note:
To create an app password,
go to the
AOL Account Security
page, log in to your account, and
then click
Generate app password
.
1