Lexmark XC4342 Quick Reference - Page 4
Sending an e-mail, Scanning to a computer
 |
View all Lexmark XC4342 manuals
Add to My Manuals
Save this manual to your list of manuals |
Page 4 highlights
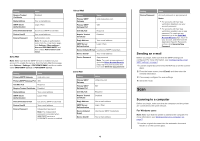
Setting Require Trusted Certificate Reply Address SMTP Server Authentication Device‑Initiated E‑mail Device UserID Device Password Value Disabled Your e‑mail address Login / Plain Use Device SMTP Credentials Your e‑mail address Authorization code Note: To create an authorization code, from the e‑mail home page, click Settings > More settings > User‑end POP/IMAP/SMTP, and then enable Authorization code status. Sohu Mail Note: Make sure that the SMTP service is enabled on your account. To enable the service, from the Sohu Mail home page, click Options > Settings > POP3/SMTP/IMAP, and then enable either IMAP/SMTP service or POP3/SMTP service. Setting Value Primary SMTP Gateway smtp.sohu.com Primary SMTP Gateway Port 465 Use SSL/TLS Required Require Trusted Certificate Disabled Reply Address Your e‑mail address SMTP Server Authentication Login / Plain Device‑Initiated E‑mail Device UserID Use Device SMTP Credentials Your e‑mail address Device Password Independent password Note: The independent password is provided when IMAP/SMTP service or POP3/SMTP service is enabled. Yahoo! Mail Setting Value Primary SMTP Gateway smtp.mail.yahoo.com Primary SMTP 587 Gateway Port Use SSL/TLS Required Require Trusted Certificate Disabled Reply Address Your e‑mail address SMTP Server Authentication Login / Plain Device‑Initiated E‑mail Use Device SMTP Credentials Device UserID Your e‑mail address Device Password App password Note: To create an app password, go to the Yahoo Account Security page, log in to your account, and then click Generate app password. Zoho Mail Setting Primary SMTP Gateway Primary SMTP Gateway Port Use SSL/TLS Require Trusted Certificate Reply Address SMTP Server Authentication Device‑Initiated E‑mail Device UserID Value smtp.zoho.com 587 Required Disabled Your e‑mail address Login / Plain Use Device SMTP Credentials Your e‑mail address 4 Setting Device Password Value Account password or app password Notes: • For accounts with two‑step verification disabled, use your account password. • For accounts with two‑step verification enabled, use an app password. To create an app password, go to the Zoho Mail Account Security page, log in to your account, and then from the Application‑Specific Passwords section, click Generate New Password. Sending an e-mail Before you begin, make sure that the SMTP settings are configured. For more information, see "Configuring the e‑mail SMTP settings" on page 1. 1 Load an original document into the ADF tray or on the scanner glass. 2 From the home screen, touch E-mail, and then enter the needed information. 3 If necessary, configure the scan settings. 4 Send the e-mail. Scan Scanning to a computer Before you begin, make sure that the computer and the printer are connected to the same network. For Windows users Note: Make sure that the printer is added to the computer. For more information, see "Adding printers to a computer" on page 11. 1 Load an original document into the automatic document feeder or on the scanner glass.
-
 1
1 -
 2
2 -
 3
3 -
 4
4 -
 5
5 -
 6
6 -
 7
7 -
 8
8 -
 9
9 -
 10
10 -
11
-
12
-
13
-
14
-
15
-
16
-
17
 |
 |
