Lexmark Z647 User's Guide for Windows - Page 32
Printing iron-on transfers, Step 1: Load the iron-on transfers
 |
View all Lexmark Z647 manuals
Add to My Manuals
Save this manual to your list of manuals |
Page 32 highlights
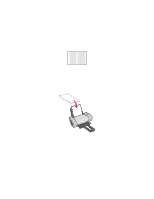
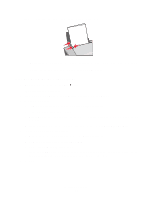
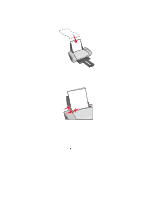
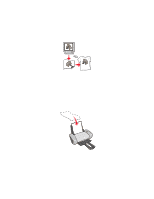
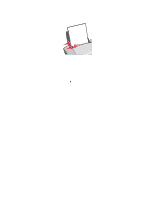
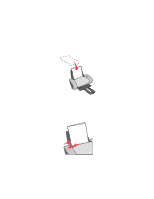
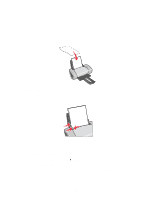
2 Arrange the pages so that every trimmed edge overlaps an untrimmed edge (the white edge). 3 Tape the backs of the pages together. 4 To complete your poster, trim any remaining white edges. Printing iron-on transfers You can load up to 100 iron-on transfers at a time, depending on the thickness of the transfers. You may want to print on plain paper before loading your iron-on transfers. Note: For best results, load one iron-on transfer at a time. Step 1: Load the iron-on transfers • If your iron-on transfers include instructions, read them carefully. • Load the iron-on transfers vertically against the right side of the paper support. • Make sure the print side (blank side) is facing you. • Do not force the iron-on transfers into the printer. Printing iron-on transfers 32
-
 1
1 -
2
-
3
-
4
-
5
-
6
-
7
-
8
-
9
-
10
-
11
-
12
-
13
-
14
-
15
-
16
-
17
-
18
-
19
-
20
-
21
-
22
-
23
-
24
-
25
-
26
-
 27
27 -
 28
28 -
 29
29 -
 30
30 -
 31
31 -
 32
32 -
 33
33 -
 34
34 -
 35
35 -
 36
36 -
 37
37 -
38
-
39
-
40
-
41
-
42
-
43
-
44
-
45
-
46
-
47
-
48
-
49
-
50
-
51
-
52
-
53
-
54
-
55
-
56
-
57
-
58
-
59
-
60
-
61
-
62
-
63
-
64
-
65
-
66
-
67
-
68
-
69
 |
 |
