LiftMaster GH GH LOGIC VERSION 1 Manual - Page 14
OPTIONAL CONTROL SETTINGS, Set Timer to Close NOTE: Requires P/N 1A4811 CPSII
 |
View all LiftMaster GH manuals
Add to My Manuals
Save this manual to your list of manuals |
Page 14 highlights
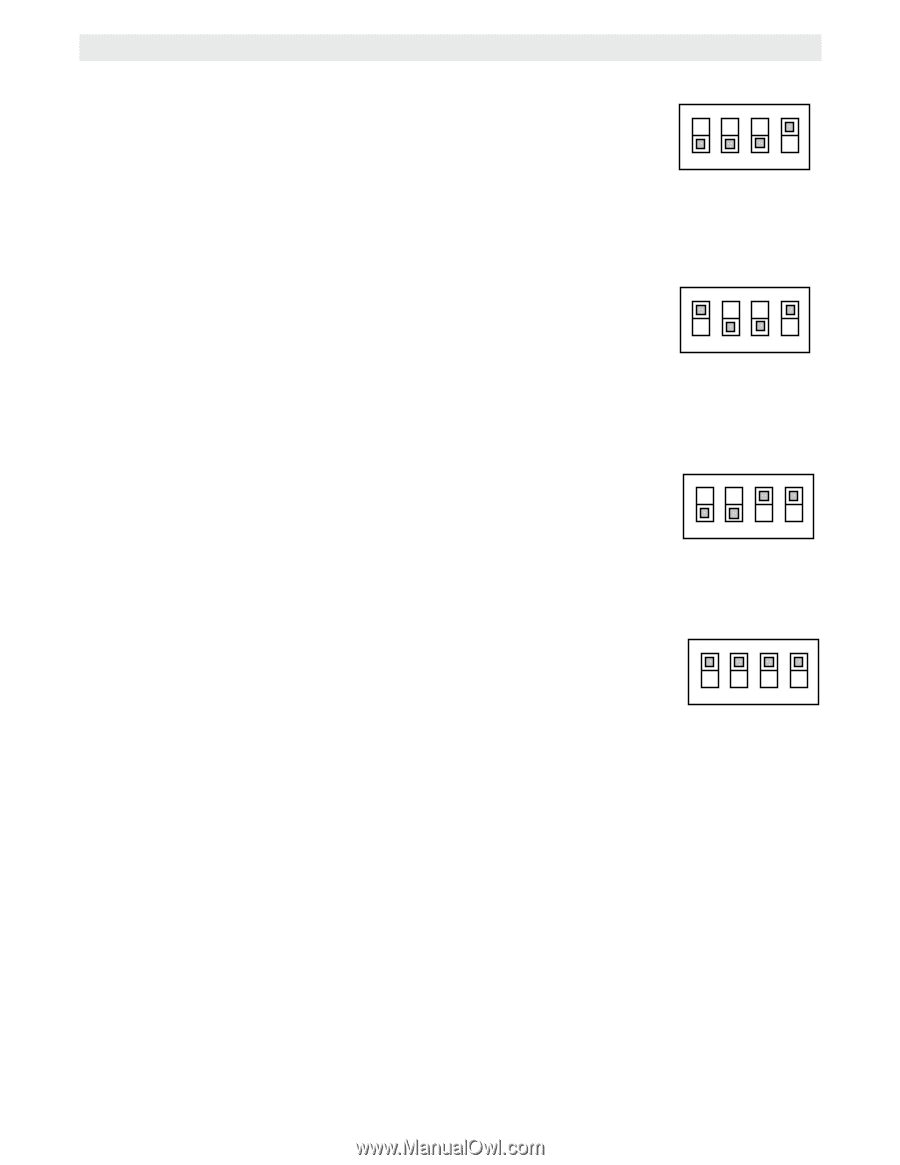
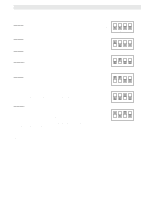
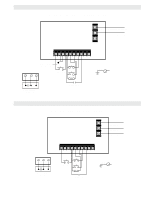
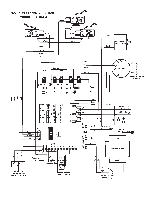
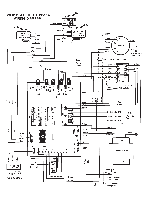
OPTIONAL CONTROL SETTINGS Set / Reset Maximum Run Timer Begin with door in closed position. Set dip switch to max. run timer mode. Press control station open button to operate door from closed to full open position without stopping. Set dip switch to desired operating mode (B2, C2, D1, E2, T, TS). Set max. run timer 1234 OFF Adjustable Mid Stop Set: Begin with door in closed position. Set dip switch to adj. mid stop mode. Press control station open button to operate door from closed to mid stop position and stop with control station stop button. Set dip switch to desired operating mode (B2, C2, D1, E2, T, TS). Clear: Begin with door in closed positon. Set operator in set mid stop mode. Press control station open button. Allow the door to run to the open limit. Set the dip switch to desired operating mode (B2, C2, D1, E2, T, TS). Set adj. mid stop 1234 OFF Set Timer to Close (NOTE: Requires P/N 1A4811 CPSII Option Board with Timer to Close Function.) Set dip switch to timer to close mode. Momentarily press control station open button to set timer duration in 5 second increments. (Red diagnostic L.E.D. will flash to indicate the entry of each 5 second increment into memory). To re-set timer memory to zero, press control station close button. Set dip switch to (T or TS) operating mode after timer is programmed. Set timer to close 1234 OFF Diagnostic Mode Set dip switch to diagnostic mode. Flashing red diagnostic L.E.D. indicates proper microprocessor function. If the diagnostic L.E.D. does not light, the control logic board requires replacement. 1234 Diagnostic mode OFF 14
-
 1
1 -
2
-
3
-
4
-
5
-
6
-
7
-
8
-
 9
9 -
 10
10 -
 11
11 -
 12
12 -
 13
13 -
 14
14 -
 15
15 -
 16
16 -
 17
17 -
 18
18 -
 19
19 -
20
 |
 |