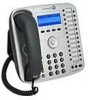
Linksys PHB1100 User Guide
Linksys PHB1100 - One Business Phone VoIP Manual
 |
UPC - 745883567645
View all Linksys PHB1100 manuals
Add to My Manuals
Save this manual to your list of manuals |
Linksys PHB1100 manual content summary:
- Linksys PHB1100 | User Guide - Page 1
PHM1200 and PHB1100 IP Phone User Guide Release 1.2 LINKSYS ONE IP PHONE USER GUIDE - Linksys PHB1100 | User Guide - Page 2
One Communications Solution Contents Chapter 1: Introduction 1 About this Guide 1 Related Documentation 1 Chapter 2: Getting to Know Your Phone 3 Understanding Phone Buttons 4 Understanding the Phone Screen Interface 5 Understanding Line Buttons 6 Understanding Your Phone Passwords - Linksys PHB1100 | User Guide - Page 3
the Auto Attendant 35 Managing the Auto Attendant 35 Recording the Auto Attendant Greeting 36 Enabling the After Hours greeting 38 Changing the Auto Attendant password 39 Managing Operator Calls 39 Linksys One Communications Solution ii - Linksys PHB1100 | User Guide - Page 4
Chapter 1 Linksys One Communications Solution Introduction The Linksys One IP Phone User Guide introduces you to your Linksys One IP phones and provides . Related Documentation Refer to the PHM1200 and PHB1100 Quick Reference Guides on www.linksysone.com/linksysoneproducts for related documentation - Linksys PHB1100 | User Guide - Page 5
Linksys One Communications Solution 1 Chapter 2 Chapter 1: Introduction - Linksys PHB1100 | User Guide - Page 6
Linksys One IP phones PHM1200 and PHB1100 are wired desktop phones that provide voice communication over the internet. In addition to the phone features you have come to expect from a traditional phone, the Linksys One IP phones also provide: • Simple automated installation with your Services Router - Linksys PHB1100 | User Guide - Page 7
shows button layout (PHM1200) OR the phone's IP and MAC address (PHB1100). 10 Cancel button cancels the current phone task and Linksys One Communications Solution 1 23 17 4 16 5 15 6 14 7 13 8 12 11 10 9 145777 Linksys One IP Phone Model PHM1200 2 Linksys One IP Phone Model PHB1100 - Linksys PHB1100 | User Guide - Page 8
Chapter 2 Linksys One Communications Solution Understanding the Phone Screen Interface PHM1200 IP Phone Your phone screen provides access to all calling functions and phone settings. The top of the phone screen displays the current date, time and - Linksys PHB1100 | User Guide - Page 9
Chapter PHB1100 IP Phone Your phone screen displays phone settings, the current date and time call Incoming call Call connected Call on hold Error Conference call Call proceeding Linksys One Communications Solution Lines 2 6 Chapter 2: Getting to Know Your Phone Understanding Line Buttons - Linksys PHB1100 | User Guide - Page 10
Chapter 2 Linksys One Communications Solution Understanding Your Phone Passwords Here is a list of default passwords that you will use to access phone features. Some features may not be available to you and must be enabled by your phone administrator for - Linksys PHB1100 | User Guide - Page 11
, if you change this password, you are also changing the password for your Personal Voice Mail. Dial 200 If no operator answers, the call is sent to the system voice mail. See "Managing Operator Calls" on page 39 No password needed. Linksys One Communications Solution 2 8 Chapter 2: Getting - Linksys PHB1100 | User Guide - Page 12
Linksys One IP phone includes a range of features for call handling.This section describes your phone's features and how to access them using the feature and line buttons on your phone. This section also describes the features you can access on your PHM1200 IP phone also supports advanced call - Linksys PHB1100 | User Guide - Page 13
. 2. Select an intercom and call the number to which you want to transfer the call. 3. Announce the call (optional). 4. Press Transfer again or hang up. Linksys One Communications Solution 3 10 Chapter 3: Using Your Phone Understanding your Phone Features - Linksys PHB1100 | User Guide - Page 14
Chapter 3 Linksys One Communications Solution Making Conference Calls If you want to... Make a Conference Call To End a Conference Call To Leave a Conference Call Using the Phone KeyPad If - Linksys PHB1100 | User Guide - Page 15
port on the back of the phone. 2. Press the Headset feature button. 3. Press the speakerphone button to place and receive calls using the headset. 12 Linksys One Communications Solution 3 Chapter 3: Using Your Phone Understanding your Phone Features Chapter - Linksys PHB1100 | User Guide - Page 16
Chapter 3 Linksys One Communications Solution Display If you want to... Use the Display button Cancel If you want to... Use the Cancel button Using Hold and Resume If you want to... Place a Call on Hold Then... Press the Display button to view the button layout screen on your PHM1200 IP Phone. - Linksys PHB1100 | User Guide - Page 17
phone, see section"Using Call Forward" on page 20. Then... To dial the last dialed extension or an outside number, press the Redial feature button. Linksys One Communications Solution 3 Chapter 3: Using Your Phone Understanding your Phone Features Chapter - Linksys PHB1100 | User Guide - Page 18
Chapter 3 Linksys One Communications Solution Using Voicemail If you want to... Access Voicemail Using System Voice Mail If you want to... Access System Voice Mail Using Auto Dial - Linksys PHB1100 | User Guide - Page 19
the After Hours Greeting (Button 15) The After Hours feature button allows you to manually override the After Hours greeting. This feature may not be available to you. See Calls" on page 39. Linksys One Communications Solution 3 16 Chapter 3: Using Your Phone Understanding your Phone Features - Linksys PHB1100 | User Guide - Page 20
Chapter 3 Linksys One Communications Solution Using Do Not Disturb If you want to... access basic phone features on your Phone screen (PHM1200 IP Phone model only) using the softkeys and navigation button. Some advanced call features that are supported may not be available to you and must be - Linksys PHB1100 | User Guide - Page 21
. 2. Select an intercom and call the number to which you want to transfer the call. 3. Announce the call (optional). 4. Select Transfer again or hang up. Linksys One Communications Solution 3 18 Chapter 3: Using Your Phone Using Your Phone Screen - Linksys PHB1100 | User Guide - Page 22
Chapter 3 Linksys One Communications Solution Making Conference Calls If you want to... Make a Conference Call To End a Conference Call To Leave a Conference Call Then... 1. Place a call to the - Linksys PHB1100 | User Guide - Page 23
Then... 1. During a call, select the Park button on the Calls tab on your PHM1200 IP phone. The Park lamp turns green. 1. Select the Park button again. If a parked call Voice Mail" on page 23. Linksys One Communications Solution 3 Chapter 3: Using Your Phone Using Your Phone Screen Chapter - Linksys PHB1100 | User Guide - Page 24
Chapter 3 Linksys One Communications Solution Using System Voice Mail If you want to... Access System Voice Mail Using Support If you want to... Display Support information Then... Press the Tasks softkey tab on your phone and choose System Voicemail. See "Accessing Your System Voice Mailbox" on - Linksys PHB1100 | User Guide - Page 25
Linksys One Communications Solution 3 Chapter 22 Chapter 3: Using Your Phone Using Your Phone Screen - Linksys PHB1100 | User Guide - Page 26
Voice Mail The Linksys One IP phones include an integrated voice mail application for high-quality voice messaging services. You can access it's a good idea to change your password the first time you login to your voice mail. See "Changing Your Voice Mail Password" on page 27. 2. Follow the voice - Linksys PHB1100 | User Guide - Page 27
and change personal settings. Accessing Voice Mail Using the Phone Screen On your PHM1200 IP phone screen: 1. Press the Tasks softkey tab and select Voice Mail. 2. advanced message handling options. 24 Linksys One Communications Solution 4 Chapter 4: Using Voice Mail Accessing Voice Mail Using - Linksys PHB1100 | User Guide - Page 28
Chapter 4 Linksys One Communications Solution Option Description Action Saved Messages Displays phone screen interface on your PHM1200 IP phone: • "Recording Voice Mail Greetings" on page 26 • "Recording Your Name" on page 26 • "Changing Your Voice Mail Password" on page 27 • "Changing Voice - Linksys PHB1100 | User Guide - Page 29
Select Recorded Name. 5. Press the Record softkey. 6. Follow the instructions on the phone screen to record your name. When recording is complete, the phone screen displays "Recording Successful!". 26 Linksys One Communications Solution 4 Chapter 4: Using Voice Mail Managing Your Personal Voice - Linksys PHB1100 | User Guide - Page 30
Linksys One Communications Solution 7. Press the Play softkey to playback your recorded name. If you'd like to re-record it, press the Record softkey again and follow the instructions , if you change it here, you'll need to use the new password to log in to your User page. See "Login To Your User - Linksys PHB1100 | User Guide - Page 31
phone screen. Accessing Your System Voice Mailbox Each Linksys One phone has one system voice mailbox. However, additional mailboxes can be an Intercom Button: 1. Select an intercom on your phone and dial the default extension 301 (or the extension number for your system-wide mailbox as applicable). - Linksys PHB1100 | User Guide - Page 32
Chapter 5 Linksys One Communications Solution Using Your User Page Although most system settings with a login screen, enter the following information: User: Password: by default Chapter 5: Using Your User Page 29 Login To Your User Page - Linksys PHB1100 | User Guide - Page 33
Password Change section, type your old and new password. For password verification, type your new password again. 4. Click the immediately. button to save your changes. Your password on User Settings. 30 Linksys One Communications Solution 5 Chapter 5: Using Your User Page Accessing - Linksys PHB1100 | User Guide - Page 34
Chapter 5 Linksys One Communications Solution Changing Your Call Forward Settings You can personalize your call VM_System All incoming calls are forwarded to the company's voice mailbox or one of the four system voice mailbox. Chapter 5: Using Your User Page 31 Accessing Your User Settings - Linksys PHB1100 | User Guide - Page 35
feature assignments. The Unused area (located on the right side) shows the features and autodial settings that are available but not currently in use. 32 Linksys One Communications Solution 5 Chapter 5: Using Your User Page Accessing Your User Template Chapter - Linksys PHB1100 | User Guide - Page 36
Chapter 5 Linksys One Communications Solution To set Auto Dials for inside or outside phone numbers: 1. Open your User Template screen. See "Accessing Your User Template" on page 32. 2. - Linksys PHB1100 | User Guide - Page 37
the Firefox browser: • On your browser menu, choose File > Page Setup • Choose Format and Options tab, click on the Print Background checkbox. Installing template. 4. Replace the plastic cover. Linksys One Communications Solution 5 34 Chapter 5: Using Your User Page Accessing Your User - Linksys PHB1100 | User Guide - Page 38
Attendant The Linksys One IP phones include the Auto Attendant To manage the Auto Attendant greetings and password, you will have to have administrative access to the IP Phone. • Selecting the After Hours feature button (if enabled on your phone by your phone administrator; disabled by default). - Linksys PHB1100 | User Guide - Page 39
default password is set to 209. See "Changing the Auto Attendant password" on page 39. 3. To record the Main greeting, select Main Greeting on the Auto Attendant phone screen. 4. Press the Record softkey. 5. Follow the instructions . 36 Linksys One Communications Solution 6 Chapter 6: - Linksys PHB1100 | User Guide - Page 40
Chapter 6 Linksys One Communications Solution To record a greeting using the Auto Attendant voice prompts for your IP phones: 1. Do one of the following: time you access the Auto Attendant the default password is set to 209. See "Changing the Auto Attendant password" on page 39. 3. Follow the - Linksys PHB1100 | User Guide - Page 41
until the next greeting window defined for your phone system. Contact your phone administrator for information on the greeting windows defined for your phone system. Linksys One Communications Solution 6 38 Chapter 6: Using the Auto Attendant Managing the Auto Attendant - Linksys PHB1100 | User Guide - Page 42
Chapter 6 Linksys One Communications Solution Changing the Auto Attendant password To change the Auto Attendant password: 1. Do one of the following: • Open an intercom on your phone and dial the Auto Attendant Administration extension (209). • From an outside line, access the Auto Attendant - Linksys PHB1100 | User Guide - Page 43
Linksys One Communications Solution 6 Chapter 40 Chapter 6: Using the Auto Attendant Managing Operator Calls - Linksys PHB1100 | User Guide - Page 44
Central Time, Monday - Friday. If you experience problems with any Linksys One product, you can call us at: Don't wish to call? You can e-mail us at: You can reach Linkys One technical support 24 hours a day, 7 days a week. If any Linksys One product proves defective during its warranty period, you - Linksys PHB1100 | User Guide - Page 45
©2006 Cisco Systems, Inc. All rights reserved. Linksys is a registered trademark and the Linksys One logo is a trademark of Cisco Systems, Inc. Software Release Number 1.2
-
 1
1 -
 2
2 -
 3
3 -
 4
4 -
 5
5 -
 6
6 -
 7
7 -
8
-
9
-
10
-
11
-
12
-
13
-
14
-
15
-
16
-
17
-
18
-
19
-
20
-
21
-
22
-
23
-
24
-
25
-
26
-
27
-
28
-
29
-
30
-
31
-
32
-
33
-
34
-
35
-
36
-
37
-
38
-
39
-
40
-
41
-
42
-
43
-
44
-
45
 |
 |

LINKSYS ONE IP PHONE USER GUIDE
PHM1200 and PHB1100 IP Phone
User Guide
Release 1.2