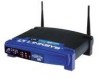
Linksys WPG12 User Guide - Page 9
Browse, Install, Down - review
 |
UPC - 745883552535
View all Linksys WPG12 manuals
Add to My Manuals
Save this manual to your list of manuals |
Page 9 highlights
Instant WirelessTM Series Installation 3. Click the Install tab and the InstallShield Wizard will begin the installation procedure, bringing up a screen like that shown in Figure 4-2. Click the Next button to continue the installation procedure. Presentation Player 5. The next screen, like that shown in Figure 4-4, will allow you to choose where the Setup Utility will be installed. By default, the destination folder is C:\Program Files\WPG12 Presentation Player. If you want to change the location, click the Browse button and select another destination where it will be installed. Click the Next button to continue. Figure 4-2 4. The next screen is the Warranty Policy (as shown in Figure 4-3.) Please read the entire policy. Press your Page Down key to view the end of the policy. Figure 4-4 6. The InstallShield Wizard will now be ready to begin copying the program files. Review the screen shown in Figure 4-5. Click the Next button to continue. Click Back if you want to change your settings. Figure 4-3 To accept the terms of the policy and continue with the installation, click the Yes button. If you click the No button, the installation will end. 10 Figure 4-5 11
-
 1
1 -
2
-
3
-
 4
4 -
 5
5 -
 6
6 -
 7
7 -
 8
8 -
 9
9 -
 10
10 -
 11
11 -
 12
12 -
 13
13 -
 14
14 -
15
-
16
-
17
-
18
-
19
-
20
-
21
-
22
-
23
-
24
-
25
 |
 |
