MSI K9N6SGM-V User Guide - Page 11
CPU and Cooler Installation - bios
 |
UPC - 816909036312
View all MSI K9N6SGM-V manuals
Add to My Manuals
Save this manual to your list of manuals |
Page 11 highlights
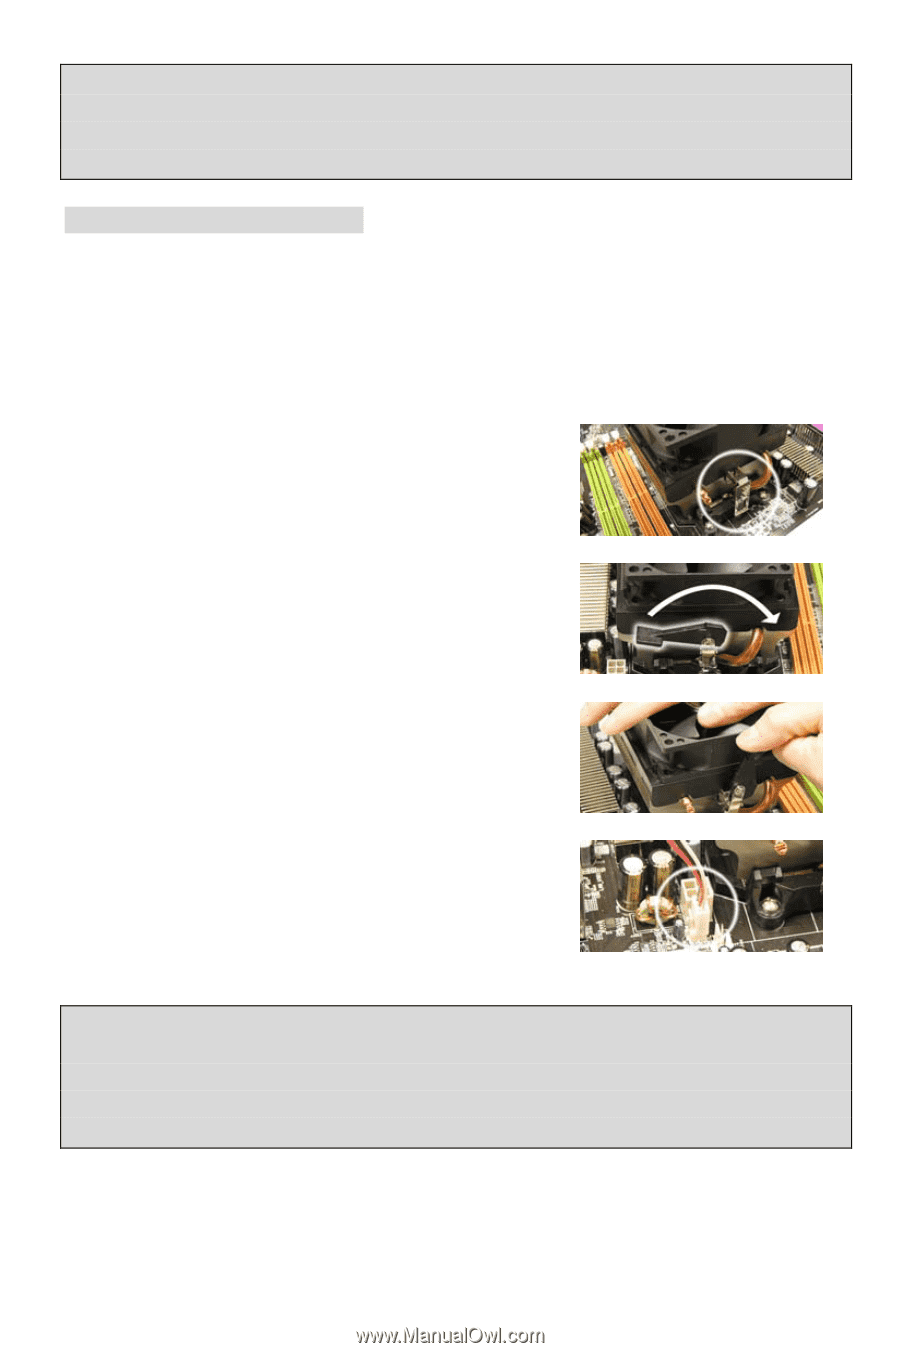
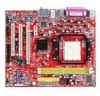
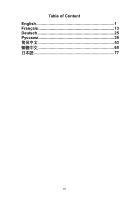
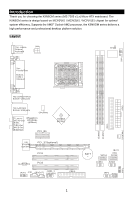
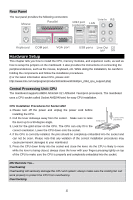
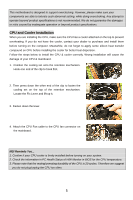
This motherboard is designed to support overclocking. However, please make sure your components are able to tolerate such abnormal setting, while doing overclocking. Any attempt to operate beyond product specifications is not recommended. We do not guarantee the damages or risks caused by inadequate operation or beyond product specifications. CPU and Cooler Installation When you are installing the CPU, make sure the CPU has a cooler attached on the top to prevent overheating. If you do not have the cooler, contact your dealer to purchase and install them before turning on the computer. Meanwhile, do not forget to apply some silicon heat transfer compound on CPU before installing the cooler for better heat dispersion. Follow the steps below to install the CPU & cooler correctly. Wrong installation will cause the damage of your CPU & mainboard. 1. Position the cooling set onto the retention mechanism. Hook one end of the clip to hook first. 2. Then press down the other end of the clip to fasten the cooling set on the top of the retention mechanism. Locate the Fix Lever and lift up it. 3. Fasten down the lever. 4. Attach the CPU Fan cable to the CPU fan connector on the mainboard. MSI Reminds You... 1. Confirm if your CPU cooler is firmly installed before turning on your system. 2. Check the information in PC Health Status of H/W Monitor in BIOS for the CPU temperature. 3. Please note that the mating/unmating durability of the CPU is 20 cycles. Therefore we suggest you do not plug/unplug the CPU too often. 5
-
 1
1 -
2
-
3
-
4
-
5
-
 6
6 -
 7
7 -
 8
8 -
 9
9 -
 10
10 -
 11
11 -
 12
12 -
 13
13 -
 14
14 -
 15
15 -
 16
16 -
17
-
18
-
19
-
20
-
21
-
22
-
23
-
24
-
25
-
26
-
27
-
28
-
29
-
30
-
31
-
32
-
33
-
34
-
35
-
36
-
37
-
38
-
39
-
40
-
41
-
42
-
43
-
44
-
45
-
46
-
47
-
48
-
49
-
50
-
51
-
52
-
53
-
54
-
55
-
56
-
57
-
58
-
59
-
60
-
61
-
62
-
63
-
64
-
65
-
66
-
67
-
68
-
69
-
70
-
71
-
72
-
73
-
74
-
75
-
76
-
77
-
78
-
79
-
80
-
81
-
82
-
83
-
84
-
85
-
86
-
87
-
88
-
89
-
90
-
91
-
92
-
93
-
94
 |
 |