Mackie 24.8Bus Meter Bridge - Page 1
Mackie 24.8Bus Manual
 |
View all Mackie 24.8Bus manuals
Add to My Manuals
Save this manual to your list of manuals |
Page 1 highlights
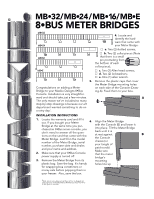
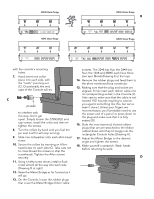
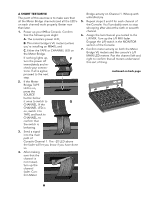
MB•32/MB•24/MB•16/MB•E 8•BUS METER BRIDGES MB•32 MB•24 4. Locate and identify the hardware that came with your Meter Bridge: I a. Two (2) slotted screws; MB•16 I b. Two (2) collar pieces (Note that there is a small pin protruding from the bottom of each collar piece); MB•E I c. Two (2) Allen head screws; I d. Two (2) lockwashers; I e. One (1) allen wrench. 5. Remove the plastic caps that cover the Meter Bridge mounting holes Congratulations on adding a Meter on each side of the Console (Draw- Bridge to your Mackie Designs 8•Bus ing A). Feed them to your boa. Console. Installation is very straightfor- ward and should take just a few minutes. A The only reason we've included so many step-by-step drawings is because our art department wanted something to do on a rainy day1. INSTALLATION INSTRUCTIONS 1. Locate the warranty card and fill it out. If you bought your Meter Bridge at the same time you purchased an 8•Bus series console, you don't need to answer all the questions on the card that came with the Meter Bridge. Just fill in the model number of the Meter Bridge, serial number, purchase date and dealer, and your name and address. 6. Align the Meter Bridge with the Console (B) and lower it into place. Tilt the Meter Bridge back until it is at rest against the Console chassis (or your tangle of patchcords). Make sure B 2. Make sure that your 8•Bus Console that the meter power supply is turned off. bridge's 3. Remove the Meter Bridge from its mounting plastic bag. Save the bag. It's handy holes line up for wrapping boa constrictors or moray eels before popping them in your freezer. Also, save the box. 1And, since every day except four or five in August are rainy up here in the Northwest Rainforest, they had time to do quite a nice job. .
-
 1
1 -
 2
2 -
 3
3 -
 4
4
 |
 |