Magnavox 9MDPF20 User manual, English (US)
Magnavox 9MDPF20 - Dvd-video Player Manual
 |
View all Magnavox 9MDPF20 manuals
Add to My Manuals
Save this manual to your list of manuals |
Magnavox 9MDPF20 manual content summary:
- Magnavox 9MDPF20 | User manual, English (US) - Page 1
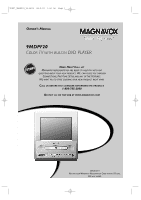
TD007_9MDPF20_V3.QX33 04.2.18 1:51 AM Page 1 OWNER'S MANUAL 9MDPF20 COLOR TV WITH BUILT-IN DVD PLAYER NEED HELP? CALL US! MAGNAVOX REPRESENTATIVES ARE READY TO HELP YOU WITH ANY QUESTIONS ABOUT YOUR NEW PRODUCT. WE CAN GUIDE YOU THROUGH CONNECTIONS, FIRST-TIME SETUP, AND ANY OF THE FEATURES. WE WANT - Magnavox 9MDPF20 | User manual, English (US) - Page 2
MAGNAVOX product, you must return your Warranty Registration Card within 10 days. So please mail it to us right now! CAUTION RISK OF ELECTRIC SHOCK DO NOT OPEN CAUTION: TO REDUCE THE RISK OF ELECTRIC SHOCK, DO NOT REMOVE COVER (OR BACK). NO USER-SERVICEABLE PARTS INSIDE. REFER SERVICING problems. - Magnavox 9MDPF20 | User manual, English (US) - Page 3
Radio/TV Interference: This equipment has been tested and found to comply with the limits for a Class B digital device, pursuant to Part 15 Declaration of Conformity Model Number: 9MDPF20 Trade Name: Magnavox Responsible Party: Philips Consumer Electronics P.O. Box 14810 Knoxville,TN 37914 - Magnavox 9MDPF20 | User manual, English (US) - Page 4
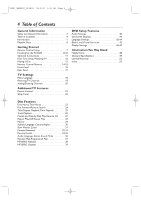
5 Playable Discs 6 Getting Started Remote Control Setup 7 Hooking Up the TV/DVD 8-10 Optional Connections 11 First-Time Setup,Watching TV 12 Playing a Disc 13 Remote Control Buttons 14-15 Front Panel 16 Rear Panel 17 TV Settings Menu Language 18 Resetting TV Channels 19 Adding/Deleting - Magnavox 9MDPF20 | User manual, English (US) - Page 5
, access it by pressing the DISC MENU button on the remote control. Details are on page 23. Setup Menus... Some instructions explain how to use the setup menus of the TV/DVD.There are two setup menus: one for the TV features while the unit is in TV mode, and one for the Disc features while the - Magnavox 9MDPF20 | User manual, English (US) - Page 6
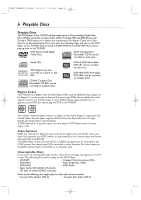
Codes and Color Systems as described below. Discs that have the following logos will play on the DVD Player of this TV/DVD. Finalize CD-R, CD-RW, DVD+R, and DVD+RW Discs before playing them in the TV/DVD. DVD: Prerecorded Digital Video Discs CD-R: Compact Disc Recordable. CD-Rs can be Recordable - Magnavox 9MDPF20 | User manual, English (US) - Page 7
batteries, for example, old with new or carbon with alkaline; and • Remove batteries when the unit will not be used for a long time. 3 Using the Remote Control Point the remote control at the remote sensor on the front of the TV/DVD. Details are on page 16. Do not put objects between the - Magnavox 9MDPF20 | User manual, English (US) - Page 8
so, connect Audio and Video cables to the Audio/Video Out jacks of the Cable Box/Satellite Receiver and to the AUDIO/VIDEO In jacks on the front of the TV/DVD. Press SELECT on the remote to set the TV/DVD to AUX, not channel 3 or 4. Select channels you want to watch at the Cable - Magnavox 9MDPF20 | User manual, English (US) - Page 9
to Another Video Source (VCR, DVD Player, Camcorder, etc.) You may need this connection if you want to play Discs or tapes on other equipment but watch them on the TV/DVD. Press the SELECT button on the remote to choose AUX at the TV/DVD when viewing materials playing on other equipment. Audio and - Magnavox 9MDPF20 | User manual, English (US) - Page 10
instructions with your other antenna to make a connection. DC 13.2V DC 13.2V L AUDIO OUT R COAXIAL ANT. 2 Make sure your vehicle has a 13.2-volt, negative ground electrical system. Connect one end of the car battery cord to the DC 13.2V jack on the rear of the TV/DVD on the grooved part of the - Magnavox 9MDPF20 | User manual, English (US) - Page 11
cable to orange COAXIAL jack on TV/DVD L AUDIO OUT R COAXIAL To Stereo's COAXIAL DIGITAL AUDIO IN jack Helpful Hints • You cannot use a Mini-Disc or Digital Audio Tape deck to copy 5.1 channel Dolby Digital surround sound Discs. • Discs recorded in Dolby Digital should show this on the Disc - Magnavox 9MDPF20 | User manual, English (US) - Page 12
not see these menus when you turn on the TV/DVD. Set channels and the menu language later. Details are on pages 18-19. • To select Cable TV channels higher than 99, press the +100/+10 button, then press the Number buttons for the last two digits. For example, to select channel 125, press +100 - Magnavox 9MDPF20 | User manual, English (US) - Page 13
the label facing up and the shiny side facing down. Some DVDs are recorded on both sides. Make sure the label of the side you you try to access a feature that is not currently available.This is not a problem with the TV/DVD. • If a Disc is dirty or scratched, the picture may be distorted or play - Magnavox 9MDPF20 | User manual, English (US) - Page 14
.QX33 04.2.18 1:51 AM Page 14 14 Remote Control Buttons PICTURE Button Press to access the picture controls. Details are on page 21. STANDBY-ON Button (POWER) Press to turn on or off the TV/DVD. Number Buttons TV Mode: Press two digits to access a specific channel. Press 0 before the number - Magnavox 9MDPF20 | User manual, English (US) - Page 15
15 Remote Control Buttons (cont'd) 15 EJECT A Button Press to open or close the Disc tray. ZOOM Button Press to enlarge the picture during DVD playback Details are on page 26. SETUP Button Press to access or remove the TV/DVD's menu. CLEAR Button Press to reset or erase a setting or wrong - Magnavox 9MDPF20 | User manual, English (US) - Page 16
, DVD Player, etc.This lets you watch materials playing on the other equipment when you choose AUX at the TV/DVD. Details are on page nine. STANDBY-ON Button (POWER) Press to turn the TV/DVD on or off. Remote Sensor Receives a signal from your remote control so you can operate the TV/DVD from - Magnavox 9MDPF20 | User manual, English (US) - Page 17
Page 17 Rear Panel 17 TV/DVD to a Mini-Disc or Digital Audio Tape deck. Details are on page 11. ANT. Jack (Antenna In) Connect an antenna or Cable TV signal here.This brings TV channels to the TV/DVD. If you do not connect an antenna or Cable TV signal to the TV/DVD (or connect to a Cable Box - Magnavox 9MDPF20 | User manual, English (US) - Page 18
1,4 3 Press ENTER to select ENGLISH, ESPAÑOL, or FRANÇAIS. The selected language will flash inside the [ ]. This will be the language of the TV/DVD setup menus. 4 Press SETUP to exit the menu. Helpful Hints • If you accidentally select Spanish or French, press SETUP. Press ▲ or ▼ to select IDIOMA - Magnavox 9MDPF20 | User manual, English (US) - Page 19
channel automatically. - CHANNEL SET UP - ADD / DELETE CH (TV) B AUTO PRESET 1 Helpful Hints • The TV/DVD cannot change channels at the Cable Box or Satellite Receiver. Set the TV/DVD to channel 3 or 4 or AUX. Change channels at the Cable Box/Satellite Receiver. Details are on page eight. • If the - Magnavox 9MDPF20 | User manual, English (US) - Page 20
(CATV) will appear beside ADD/DELETE CH. This indicates whether you connected an Antenna (TV) or a Cable TV signal (CATV) to the TV/DVD. Then, press ENTER. The menu will disappear and a TV channel will appear. The channel number will appear, along with ADD/DELETE. - CHANNEL SET UP - B ADD / DELETE - Magnavox 9MDPF20 | User manual, English (US) - Page 21
1:51 AM Page 21 The TV/DVD's picture controls - BRIGHT, SHARPNESS, TINT, COLOR, and CONTRAST - are preset to factory specifications. Although the factory settings are usually the best, you may need to make some adjustments for a natural looking image. Picture Control 21 1 1 Press PICTURE so the - Magnavox 9MDPF20 | User manual, English (US) - Page 22
Timer of 30, 60, 90, or 120 minutes. 1 After 10 seconds, the Sleep Timer information will disappear from the screen. SLEEP 120 MINUTE The TV/DVD will turn itself off after the selected amount of time has passed. To Cancel the Sleep Timer Press SLEEP until "SLEEP 0 MINUTE" appears. Helpful Hints - Magnavox 9MDPF20 | User manual, English (US) - Page 23
Disc menu and select features, follow these steps. ● Before you begin, press SELECT to put the TV/DVD in DVD mode. 1 Press DISC MENU. The DVD's Disc menu will appear. 2 1 2 Press o, p, s, or B to select an item, then press ENTER. Continue this process to set up all the features you want or - Magnavox 9MDPF20 | User manual, English (US) - Page 24
.QX33 04.2.18 1:51 AM Page 24 24 Fast Forward/Reverse Search ● Before you begin, press SELECT to put the TV/DVD in DVD mode. 1 During play, press g or h on the remote control. ● During DVD play, pressing g or h will forward or reverse the picture at two, eight, 50, or 100 times the normal playback - Magnavox 9MDPF20 | User manual, English (US) - Page 25
) appears on the TV screen. The number of available Titles or Chapters 2 will appear at the right ( /4, for example). _/4 2 Enter the Title or Chapter number using the Number buttons. The selected Title or Chapter will start to play. 4 / 4 12 / 17 1 Time Playback 1 During DVD or Audio CD - Magnavox 9MDPF20 | User manual, English (US) - Page 26
DVD in DVD mode. A-B A Using the Number Buttons Press the Number buttons to enter a Track number. Play will start at the selected Track. For single-digit Tracks (1-9), press a single Number button. For Tracks 10 and above, press the +100/+10 button so the Search display (TR - - ) appears on the TV - Magnavox 9MDPF20 | User manual, English (US) - Page 27
'PLAY'. 1 2 2 Press PLAY B. In a few seconds, play will resume from the point at which it stopped last. Opening the disc tray or turning off the TV/DVD will cancel the Resume feature. Play will start at the beginning the next time you insert the Disc. Or, to cancel Resume and start playing - Magnavox 9MDPF20 | User manual, English (US) - Page 28
TD007_9MDPF20_V3.QX33 04.2.18 1:51 AM Page 28 28 Repeat Play, A-B Repeat Play Repeat Play 1 During DVD or Audio CD play, press REPEAT until the repeat mode you want appears on the TV. On a DVD, select CHAPTER,TITLE, or OFF. On an Audio CD, select TRACK, ALL (all Tracks on the Disc), or OFF - Magnavox 9MDPF20 | User manual, English (US) - Page 29
the Marker you want, then press ENTER. Disc play will continue from the marked point. Helpful Hints • Opening the disc tray or turning off the TV/DVD will erase all the Markers. • To erase a single Marker, press SEARCH MODE until you see the Markers. Press s or B to select a Marker. Press CLEAR - Magnavox 9MDPF20 | User manual, English (US) - Page 30
Subtitle Language, Camera Angles Subtitle Language The DVD Player allows you to select a language for DVDs contain scenes recorded from different angles. The camera angle will not change if the DVD does not contain sequences recorded TV screen. ANGLE ICON must be ON. Details are on pages 46-47. - Magnavox 9MDPF20 | User manual, English (US) - Page 31
play to play the DVD forward or backward at 1/16, 1/8, or 1/2 the normal speed. 1/2 Example: Playing a DVD forward at half the normal box with an inner blue box that shows during Zoomed play is the position guide. To remove it or show it, press ENTER.The position of the blue box inside the gray box - Magnavox 9MDPF20 | User manual, English (US) - Page 32
rated or coded. Check your DVDs and settings before letting children access the TV/DVD. Follow these steps to change your password. ● Before you begin, press SELECT to put the 3 TV/DVD in DVD mode. 1 Press SETUP twice while play is stopped. QUICK SETUP TV MODE DOLBY DIGITAL 4:3 LETTER BOX ON - Magnavox 9MDPF20 | User manual, English (US) - Page 33
Password (cont'd) 33 4 Press p to select CHANGE, then press ENTER. PARENTAL PARENTAL LEVEL ALL CHANGE 5 O K 5 Press the Number buttons to enter a four-digit password. The password numbers will appear on the screen. Write down the password so you will not forget it. Press ENTER. The previous - Magnavox 9MDPF20 | User manual, English (US) - Page 34
SELECT to put the TV/DVD in DVD mode. 1 Press SETUP twice while play is stopped. 4 QUICK SETUP TV MODE DOLBY DIGITAL 4:3 LETTER BOX ON O K 2 discs can play. • 8 - Adult material • 7 - NC-17 - Not appropriate for children under 17 • 6 - R - Restricted; parental approval required for viewers - Magnavox 9MDPF20 | User manual, English (US) - Page 35
. The level you selected will appear beside PARENTAL LEVEL. PARENTAL PARENTAL LEVEL ALL 8 7 [NC-17] 6 [R] O K 5 4 [PG13] 3 [PG] 7 Press SETUP to exit the menu. 7 6 Helpful Hints • When you try to play a DVD whose rating exceeds the level you set, an on-screen message will indicate the - Magnavox 9MDPF20 | User manual, English (US) - Page 36
the available languages. The new audio will be heard. The display will disappear after about five seconds. The Audio display may show if the DVD has Dolby Digital or multi-channel (5.1 CH) sound or its sampling rate (48k, for example). The number of available languages appears after the " / " at the - Magnavox 9MDPF20 | User manual, English (US) - Page 37
which they are recorded (1,2,3...). You can also use this feature for JPEG and MP3 files. ● Before you begin, press SELECT to put the TV/DVD in DVD mode. 1 can have a maximum of 99 Tracks. 3 Press PLAY B. The Tracks will play once in the order you set.Turning off the TV/DVD or opening the disc tray - Magnavox 9MDPF20 | User manual, English (US) - Page 38
kbps and 320 kbps. ● When recording JPEG Files, the size of the picture should be between 32 x 32 and 6300 x 5100 dots. ● Before you begin, press SELECT to put the TV/DVD in DVD mode. 1 When you put a CD-RW or CD-R with MP3 or JPEG files in the Player, the File List may appear - Magnavox 9MDPF20 | User manual, English (US) - Page 39
TD007_9MDPF20_V3.QX33 04.2.18 1:51 AM Page 39 MP3/JPEG Displays 39 You can review MP3 and JPEG Track (File) information during playback. 1 Press DISPLAY until the current Track/File number, total Tracks/Files available, and elapsed playing time of the current Track (MP3 only) appear. 2 / 25 0:01:15 - Magnavox 9MDPF20 | User manual, English (US) - Page 40
TV/DVD in DVD mode. 1 While play is stopped, press SETUP twice. The QUICK SETUP screen will appear. QUICK SETUP TV MODE DOLBY DIGITAL 4:3 LETTER BOX DOLBY DIGITAL, or DOWN SAMPLING, then follow step 5 accordingly. 5 ● If you selected DRC, press ENTER repeatedly to turn Dynamic Range Control (DRC - Magnavox 9MDPF20 | User manual, English (US) - Page 41
TD007_9MDPF20_V3.QX33 04.2.18 1:51 AM Page 41 On-Screen Displays 41 DVD Display 1 Press DISPLAY repeatedly to see the following displays during DVD playback. CH (Chapter): Current Chapter number / total Chapters CH 7/49 0:01:46 - 0:03:27 Elapsed playing time of the current Chapter; remaining - Magnavox 9MDPF20 | User manual, English (US) - Page 42
Disc menus. ● Before you begin, press SELECT to put the TV/DVD in DVD mode. 1 While play is stopped, press SETUP twice. The QUICK SETUP screen appears. QUICK SETUP TV MODE DOLBY DIGITAL 4:3 LETTER BOX ON O K 2-3 2 Press B to select CUSTOM at the top of the menu, then press ENTER. 1 LANGUAGE - Magnavox 9MDPF20 | User manual, English (US) - Page 43
menu beside AUDIO, SUBTITLE, or DISC MENU. LANGUAGE LANGUAGE CODE Please enter a 4-digit language code. O K ●You can select other languages only if the language is available on the Disc. If the language you select is not recorded on the DVD, changing these settings will have no effect. 6 Press SETUP - Magnavox 9MDPF20 | User manual, English (US) - Page 44
TD007_9MDPF20_V3.QX33 04.2.18 1:51 AM Page 44 44 Language Settings (cont'd) Language Codes A-B Abkhazian 4748 Afar 4747 Afrikaans 4752 Albanian 6563 Amharic 4759 Arabic 4764 Armenian 5471 Assamese 4765 Aymara 4771 Azerbaijani 4772 Bangla 4860 Bashkir 4847 Basque - Magnavox 9MDPF20 | User manual, English (US) - Page 45
to choose ON or OFF. ON brightens the dark parts 2 of the picture. OFF shows the original picture as recorded. 1 Virtual Surround You can enjoy improved stereo sound when you play DVDs, Audio CDs, or MP3 files recorded in Dolby Digital or Pulse Code Modulation (PCM). Check the Disc case for - Magnavox 9MDPF20 | User manual, English (US) - Page 46
The QUICK SETUP screen will appear. QUICK SETUP TV MODE DOLBY DIGITAL 4:3 LETTER BOX ON O K 2 Press B to select TV MODE 4:3 LETTER BOX ANGLE ICON ON AUTO POWER OFF ON O K Helpful Hints • Selecting a different TV MODE setting is only effective if it is available on the DVD. Check the DVD - Magnavox 9MDPF20 | User manual, English (US) - Page 47
OFF to ON or OFF. The default setting is ON. Choose ON if you want the TV/DVD to turn off when there is no activity in DVD mode for 20 minutes. DISPLAY TV MODE 4:3 LETTER BOX 4:3 PAN & SCAN OFF ON ON O K TV MODE DISPLAY TV MODE 4:3 LETTERBOX ANGLE ICON ON AUTO POWER OFF ON O K ANGLE ICON - Magnavox 9MDPF20 | User manual, English (US) - Page 48
feature must be recorded on the DVD. Not all DVDs contain multiple angles, subtitles, etc. Refer to the Disc case to see what features are available. If the feature is not available, the may appear. Remote control does not operate the TV/DVD. • Aim the remote control directly at the remote sensor on - Magnavox 9MDPF20 | User manual, English (US) - Page 49
stereo. VIDEO In Jack: yellow jack on the front of the TV/DVD that receives video from another source (VCR, Camcorder, etc.). Glossary / Specifications 49 Specifications General TV CRT : Color system : Tuner channels: Cable TV: 9 inch in-line gun, 90˚ deflection tube NTSC-M 2-69 1-125 General - Magnavox 9MDPF20 | User manual, English (US) - Page 50
or repair of antenna systems outside of the product. • product repair and/or part replacement because of misuse, accident, unauthorized repair or other cause not within the control of Magnavox. • reception problems caused by signal conditions or cable or antenna systems outside the unit. • a product - Magnavox 9MDPF20 | User manual, English (US) - Page 51
TD007_9MDPF20_V3.QX33 04.2.18 1:51 AM Page 51 - Magnavox 9MDPF20 | User manual, English (US) - Page 52
adding/deleting 20 setup 12, 19 o/p buttons 15-16 chapters 25 clear button 15 coaxial jack 11, 17 color 21 connections 8-11 contents, table of 4 contrast 21 controls remote 14-15 tv/dvd 16 copyright protection 3 disc menu button 15, 23 disc tray 13, 16 display button 14, 41 display
-
 1
1 -
 2
2 -
 3
3 -
 4
4 -
 5
5 -
 6
6 -
 7
7 -
8
-
9
-
10
-
11
-
12
-
13
-
14
-
15
-
16
-
17
-
18
-
19
-
20
-
21
-
22
-
23
-
24
-
25
-
26
-
27
-
28
-
29
-
30
-
31
-
32
-
33
-
34
-
35
-
36
-
37
-
38
-
39
-
40
-
41
-
42
-
43
-
44
-
45
-
46
-
47
-
48
-
49
-
50
-
51
-
52
 |
 |

O
WNER
’
S
M
ANUAL
N
EED
H
ELP
?C
ALL US
!
M
AGNAVOX REPRESENTATIVES ARE READY TO HELP YOU WITH ANY
QUESTIONS ABOUT YOUR NEW PRODUCT
.W
E CAN GUIDE YOU THROUGH
C
ONNECTIONS
,F
IRST
-
TIME
S
ETUP
,
AND ANY OF THE
F
EATURES
.
W
E WANT YOU TO START ENJOYING YOUR NEW PRODUCT RIGHT AWAY
.
C
ALL US BEFORE YOU CONSIDER RETURNING THE PRODUCT
.
1-800-705-2000
O
R VISIT US ON THE WEB AT WWW
.
MAGNAVOX
.
COM
I
MPORTANT
!
R
ETURN YOUR
W
ARRANTY
R
EGISTRATION
C
ARD WITHIN
10
DAYS
.
S
EE WHY INSIDE
.
9MDPF20
C
OLOR
TV
WITH BUILT-IN
DVD PLAYER
TD007_9MDPF20_V3.QX33
04.2.18
1:51 AM
Page 1