Marantz NR1506 Owner's Manual in English - Page 36
Connecting a playback device
 |
View all Marantz NR1506 manuals
Add to My Manuals
Save this manual to your list of manuals |
Page 36 highlights
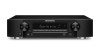
Contents Connections Playback Settings Tips Appendix Connecting a playback device This unit is equipped with two types of video input connectors (HDMI and composite video) and three types of audio input connectors (HDMI, digital audio and audio). Select input connectors on this unit according to the connectors equipped on the device you want to connect. If the device connected to this unit is equipped with an HDMI connector, it is recommended to use HDMI connections. In the HDMI connection, audio and video signals can be transmitted through a single HDMI cable. 0 "Connecting a set-top box (Satellite tuner/cable TV)" (v p. 37) 0 "Connecting a DVD player or Blu-ray Disc player" (v p. 38) 0 "Connecting a video camcorder or game console" (v p. 39) 0 Connect devices to this unit as indicated by the input sources printed on the audio/video input connectors of this unit. 0 The source that is assigned to the HDMI IN, DIGITAL AUDIO IN, VIDEO IN and AUDIO IN connectors can be changed. See "Input Assign" on how to change the input source assigned to the input connectors. (v p. 151) 0 To play back audio signals that are input to this unit on a TV connected via HDMI, set in the menu "HDMI Audio Out" to "TV". (v p. 144) 0 To enjoy content that is copyright protected by HDCP 2.2, use a playback device and TV compatible with HDCP 2.2 only. Front panel Display Rear panel 36 Remote Index
-
 1
1 -
2
-
3
-
4
-
5
-
6
-
7
-
8
-
9
-
10
-
11
-
12
-
13
-
14
-
15
-
16
-
17
-
18
-
19
-
20
-
21
-
22
-
23
-
24
-
25
-
26
-
27
-
28
-
29
-
30
-
 31
31 -
 32
32 -
 33
33 -
 34
34 -
 35
35 -
 36
36 -
 37
37 -
 38
38 -
 39
39 -
 40
40 -
 41
41 -
42
-
43
-
44
-
45
-
46
-
47
-
48
-
49
-
50
-
51
-
52
-
53
-
54
-
55
-
56
-
57
-
58
-
59
-
60
-
61
-
62
-
63
-
64
-
65
-
66
-
67
-
68
-
69
-
70
-
71
-
72
-
73
-
74
-
75
-
76
-
77
-
78
-
79
-
80
-
81
-
82
-
83
-
84
-
85
-
86
-
87
-
88
-
89
-
90
-
91
-
92
-
93
-
94
-
95
-
96
-
97
-
98
-
99
-
100
-
101
-
102
-
103
-
104
-
105
-
106
-
107
-
108
-
109
-
110
-
111
-
112
-
113
-
114
-
115
-
116
-
117
-
118
-
119
-
120
-
121
-
122
-
123
-
124
-
125
-
126
-
127
-
128
-
129
-
130
-
131
-
132
-
133
-
134
-
135
-
136
-
137
-
138
-
139
-
140
-
141
-
142
-
143
-
144
-
145
-
146
-
147
-
148
-
149
-
150
-
151
-
152
-
153
-
154
-
155
-
156
-
157
-
158
-
159
-
160
-
161
-
162
-
163
-
164
-
165
-
166
-
167
-
168
-
169
-
170
-
171
-
172
-
173
-
174
-
175
-
176
-
177
-
178
-
179
-
180
-
181
-
182
-
183
-
184
-
185
-
186
-
187
-
188
-
189
-
190
-
191
-
192
-
193
-
194
-
195
-
196
-
197
-
198
-
199
-
200
-
201
-
202
-
203
-
204
-
205
-
206
-
207
-
208
-
209
-
210
-
211
-
212
-
213
-
214
-
215
-
216
-
217
-
218
-
219
-
220
-
221
-
222
-
223
-
224
-
225
-
226
-
227
-
228
-
229
-
230
-
231
-
232
-
233
-
234
-
235
-
236
-
237
-
238
-
239
-
240
-
241
-
242
-
243
-
244
-
245
-
246
-
247
-
248
-
249
 |
 |
