Marantz PM8003 PM8003 User Manual - English - Page 11
Wiring Speaker Cable, Connecting Speaker Systems, Connecting Of Ac Power Cable - speaker terminals
 |
View all Marantz PM8003 manuals
Add to My Manuals
Save this manual to your list of manuals |
Page 11 highlights
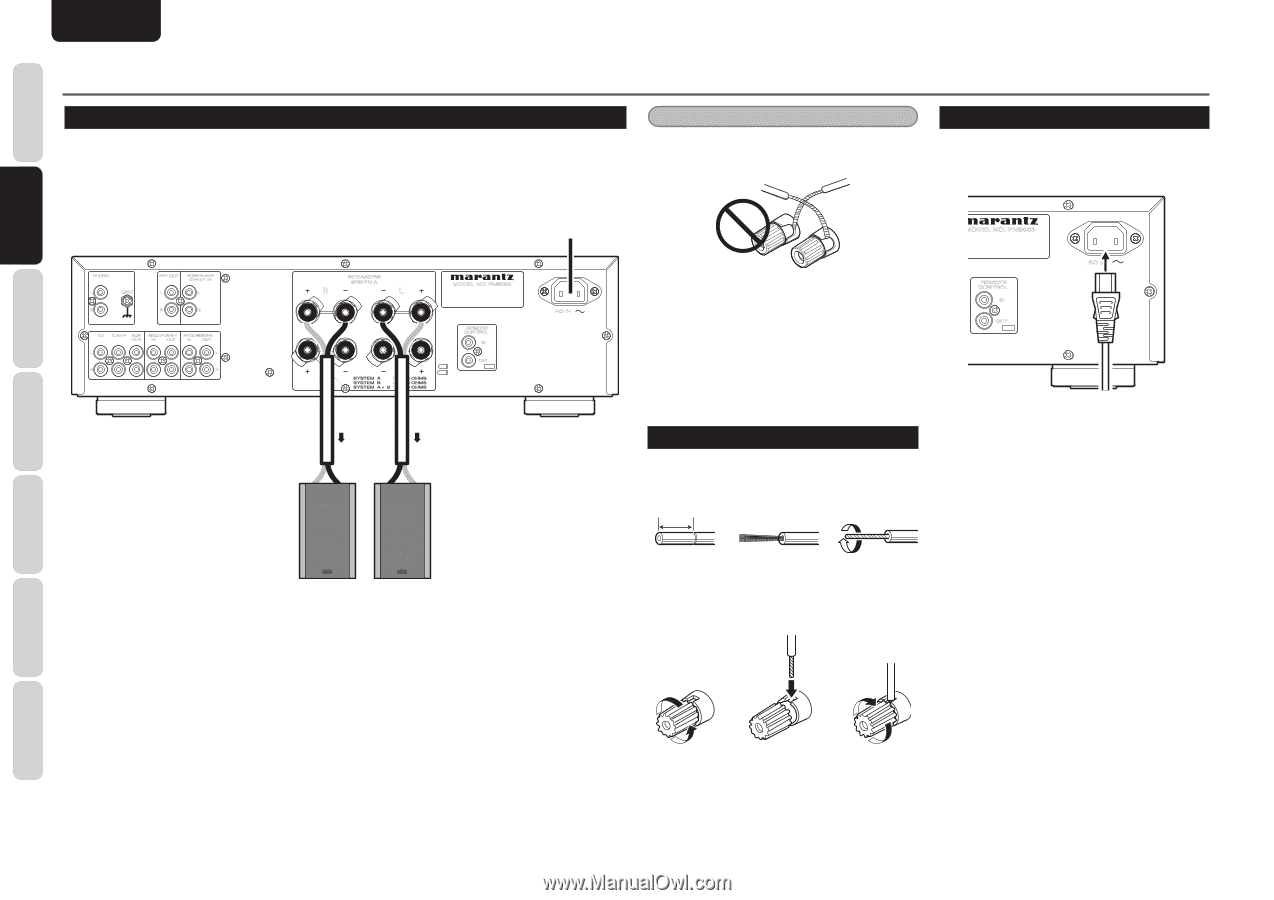
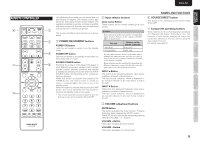
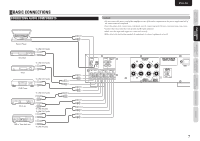
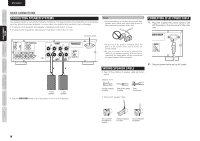
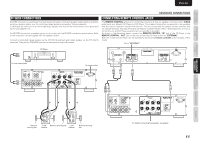
Names aNd FuNctioNs Basic coNNectioNs Basic operatioN ENGLISH Basic coNNectioNs coNNectiNg speaKer sYstems Your speaker system must satisfy the below conditions. If it does not, this unit's protective circuit will active, whereby preventing proper playback. In some cases, the amplifier and speakers may be damaged. • If using 1 set of speakers, total speaker impedance must be 4Њ or more. • If using 2 sets of speakers, total speaker impedance must be 8Њ or more. Notes: • To prevent damage to circuitry, do not let the bare speaker wires touch each other and do not let them touch any metal part of this unit. coNNectiNg oF ac poWer caBle 1. Plug the supplied AC power cable to the AC IN socket on the rear panel of the main unit. PHONO L GND R PRE OUT POWER AMP DIRECT IN L L R R CD TUNER AUX / DVD RECORDER 1 IN OUT RECORDER 2 IN OUT L L R R SPEAKERS SYSTEM A R L R L To power outlet MODEL NO. PM8003 REMOTE CONTROL IN OUT AC IN • Do not touch the speaker terminals when the power is on. It may cause you to receive an electric shocks. • Be sure to connect the positive and negative cables for the speaker properly. If they are missconnected, the signal phase will be reversed and the signal quality will be corrupted. MODEL NO. PM8003 REMOTE CONTROL IN OUT AC IN WiriNg speaKer caBle • Peel off the coating of speaker cable as shown below. 2. Plug the power cable into an AC outlet. Approx. 1 cm R CH speaker L CH speaker • Set the SPEAKERS knob on the front panel in the A or A+B position. Cut the coating of cable. Peel off the edge Twist of cable. conductors. • Wiring with speaker cable. adVaNced coNNectioNs remote coNtroller operatioN trouBleshootiNg others Turn counterclockwise to loosen. Insert conductor Turn clockwise of cable. to tighten. 8
-
 1
1 -
2
-
3
-
4
-
5
-
 6
6 -
 7
7 -
 8
8 -
 9
9 -
 10
10 -
 11
11 -
 12
12 -
 13
13 -
 14
14 -
 15
15 -
 16
16 -
17
-
18
-
19
 |
 |