Marantz SR4120 SR4120 User Manual - Page 9
Basic Operation, Presetting Stations - manual
 |
View all Marantz SR4120 manuals
Add to My Manuals
Save this manual to your list of manuals |
Page 9 highlights
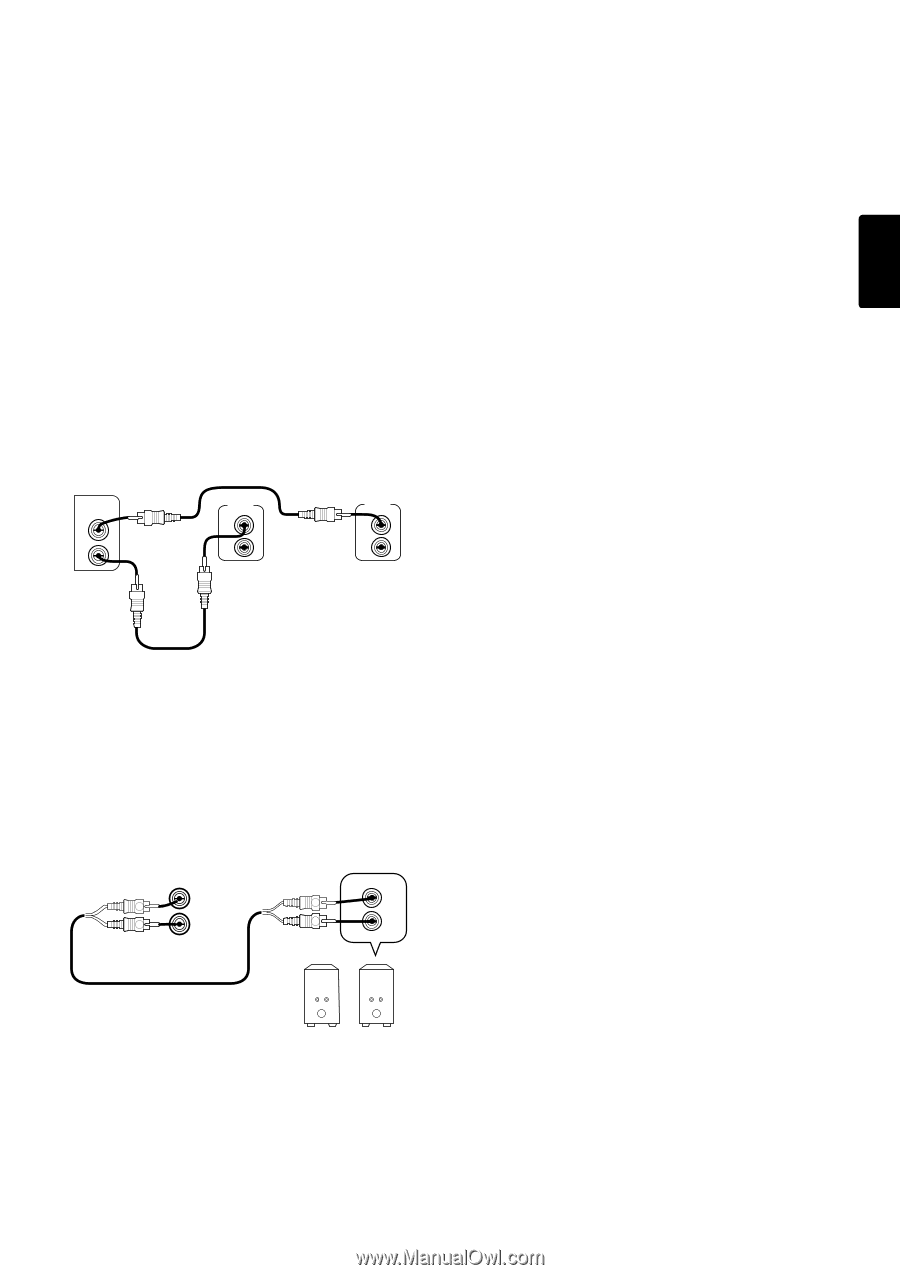
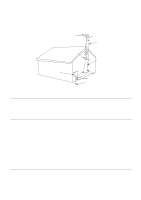
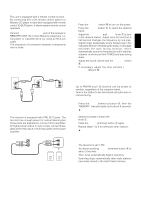
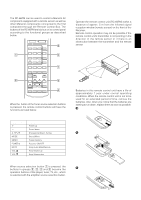
ENGLISH Remote control bus connections This unit is equipped with a remote control function. By connecting this unit's remote control jacks to a Marantz CD player or tape deck equipped with remote control (D-BUS) jacks, it allows system remote control operation. Connect REMOTE CONT. OUT jack of the receiver to REMOTE CONT. IN of other Marantz equipment, i.e. CD player or Cassette deck, by using an RCA pin cable. The sequence of connection between components has no order. Note: If a component equipped with remote control (D-BUS) jacks has an INT/EXT switch on the rear panel, set the switch to EXT when using the system control function. (Connection example) Receiver rear panel REMOTE CONTROL IN OUT CD player rear panel REMOTE CONT IN OUT Tape deck rear panel REMOTE CONT IN OUT PRE OUT jacks The receiver is equipped with PRE OUT jacks. The receiver has enough power for normal listening but these jacks are prepared to connect other amplifiers for higher power output. In such a case, connect these jacks to the main input or AUX input jacks of the power amplifier. PRE-OUT MAIN IN or AUX IN L L L R R R POWER AMPLIFIER BASIC OPERATION Listening to the tuner 1. Press the POWER switch !0 to turn on the power. 2. Press the AM/FM button y to select the desired band. 3. Adjust the TUNING UP and DOWN knob u to tune in the desired station. Adjust once for less than a half second changes the frequency by one step. Adjust longer sequentially scans frequencies in the indicated direction. Releasing the button in this state activates the auto tuning function, which automatically scans the frequencies until it reaches a station, at which point the TUNED and auto tuning stops. 4. Adjust the sound volume with the VOLUME control i. If necessary, adjust the tone controls (BASS/ TREBLE) !3 and !4. PRESETTING STATIONS Up to FM/AM each 30 stations can be preset at random, regardless of the reception band. Tune in the station to be memorized using the auto or manual tuning. manual preset 1. Press the MEMO(memory) button r, then the "MEMORY" indicator lights up for about 5 seconds. ¡ When the MEMORY indicator goes off, press again to memorize. 2. Select the preset number with TUNING UP/DOWN knob u. 3. Press the MEMO (memory) button r again. 4. Repeat steps 1 to 3 to memorize other stations. ¡When memorizing a new station, the prevision memorized station the same preset number is cleared. auto preset 1. The receiver is set in FM. 2. You keeps pushing MEMO (memory) button r at about 3 seconds. 3. Then, tuner automatically begins scanning. Scanning stops automatically after radio stations have been stored in the Auto Preset memory. 9
-
 1
1 -
2
-
3
-
 4
4 -
 5
5 -
 6
6 -
 7
7 -
 8
8 -
 9
9 -
 10
10 -
 11
11 -
 12
12 -
 13
13 -
 14
14 -
15
-
16
-
17
-
18
-
19
-
20
-
21
-
22
-
23
-
24
 |
 |