Maytag MGT3800TW User Instructions
Maytag MGT3800TW - 27" Gas Laundry Center Manual
 |
UPC - 883049046822
View all Maytag MGT3800TW manuals
Add to My Manuals
Save this manual to your list of manuals |
Maytag MGT3800TW manual content summary:
- Maytag MGT3800TW | User Instructions - Page 1
LA LAVADORA/SECADORA INSTRUCTIONS POUR L'UTILISATEUR p DE LA LAVEUSE/SECHEUSE Table of Contents / Indice / Table des mati_res ASSISTANCE OR SERVICE 1 WASHER/DRYER SAFETY 2 WASHER USE 4 DRYER USE 5 WASHER/DRYER CARE 6 TROUBLESHOOTING WASHER TROUBLESHOOTING DRYER 10 WARRANTY 12 AYUDA - Maytag MGT3800TW | User Instructions - Page 2
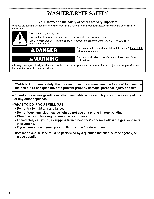
WASHER/DRYER SAFETY Your safety and the safety of others are very important. We have provided many important safety messages in this manual instructions. • If you cannot reach your gas supplier, call the fire department. - Installation and service must be performed by a qualified installer, service - Maytag MGT3800TW | User Instructions - Page 3
part of the washer/dryer or attempt any servicing unless specifically recommended in this Use and Care Guide or in published user-repair instructions exhaust air to flow. Check vent after installation. Refer to the Installation Instructions for proper length requirements of vent. Fire Hazard - Maytag MGT3800TW | User Instructions - Page 4
installing your dryer in a new location. When cleaning is complete, be sure to follow the Installation Instructions supplied with your dryer for final product check. Good Better WASHER Style 1: With liquid fabric softener dispenser (on some models) • Use only liquid fabric softener in this - Maytag MGT3800TW | User Instructions - Page 5
dryer. Do not dry anything that has ever had anything flammable on it (even after washing). Failure to follow these instructions can result in death, explosion, or fire. Fire Hazard No washer the Energy Preferred Automatic Setting to dry most heavy to medium weight fabrics. 4. (OPTIONAL) Your dryer - Maytag MGT3800TW | User Instructions - Page 6
deposits using only cleaners labeled as washer safe. Cleaning the liquid fabric softener dispenser (on some models): 1. Remove dispenser by grasping top marker. Every Load Cleaning Style 1: 1. The lint screen is located inside the dryer on the back wall. Pull out the lint screen and its cover. 2. - Maytag MGT3800TW | User Instructions - Page 7
edge and into the basket. 11. Use masking tape to secure the washer lid and dryer door. Reinstalling your washer/dryer 1. Follow the "Installation Instructions" to locate, level and connect the washer/dryer. 2. Run the washer through a complete cycle with 1 scoop or capful of detergent to clean the - Maytag MGT3800TW | User Instructions - Page 8
contribute to noise and vibration of the washer. A %" (1.9 cm) piece of plywood under the washer will reduce the sounds. See the Installation Instructions. • Is the washer/dryer level? The washer/dryer must be level. See the Installation Instructions. • Is the load balanced? Evenly distribute the - Maytag MGT3800TW | User Instructions - Page 9
gap. See the Installation Instructions, Washer won't drain or spin; water remains in washer • Is the . The air movement and tumbling of a dryer removes lint from the load. • Was paper low wash and spin speeds (if available) to reduce wrinkling, tangling and twisting. • Did you overload the washer - Maytag MGT3800TW | User Instructions - Page 10
the washer (on some models). Do not use more than than the manufacturer's recommended amount for a full load. • Did you follow the manufacturer's care label instructions? TROUBLESHOOTING DRYER First try the solutions suggested here and possibly avoid the cost of a service call... Dryer will - Maytag MGT3800TW | User Instructions - Page 11
and bottom of the door. A minimum of 1" (2.5 cm) of airspace is recommended for the front of the dryer, and, for most installations, the rear of the dryer requires 5" (12.7 cm). See the Installation Instructions. • Has an air dry cycle been selected? Select the right cycle for the types of garments - Maytag MGT3800TW | User Instructions - Page 12
" section of the Use & Care Guide. After checking "Troubleshooting," additional help can be found by checking the "Assistance or Service" section or by calling Maytag. In the U.S.A., call 1-800-688-9900. In Canada, call 1-800-807-6777. 9/06 Replacement Parts If you need to order replacement - Maytag MGT3800TW | User Instructions - Page 13
a nuestro Maytag Services, LLC Customer Assistance al 1-800-688-9900 desde cualquier lugar de los EE.UU., o escriba a: Maytag Services, LLC ATTN importante. Hemos incluido muchos mensajes importantes de seguridad en este manual yen su electrodomestico. Lea y obedezca siempre todos los mensajes - Maytag MGT3800TW | User Instructions - Page 14
el agitador, o el tambor estan movimiento. [] No instale o almacene esta lavadora/secadora donde este expuesta al agua que esto se recomiende especificamente en el Manual de Use y Cuidado o en instrucciones abertura sin pelusa, polvo o suciedad. [] La parte interior de la maquina y el ducto de escape - Maytag MGT3800TW | User Instructions - Page 15
para fijar el ducto. 5. Limpie el ducto de escape por Io menos cada 2 a_os o peri6dicamente segt]n el uso que le de a la secadora o cuando instale la secadora en un nuevo lugar. Cuando termine la limpieza revise per Qltima vez el producto, asegurandose de seguir las Instrucciones de instalaci6n que - Maytag MGT3800TW | User Instructions - Page 16
USO DE LA LAVADORA Para estas cargas de volumen completo recomendadas, coloque el control de tamaSo de carga (LOAD SIZE) a la posici6n de la carga mas grande. LAVADORAS DE CAPACIDAD GRANDE Ropa de trabajo pesada 2 pantalones 3 camisas 3 pantalones de mezclilla 1 overol Carga mixta 2 sabanas - Maytag MGT3800TW | User Instructions - Page 17
tipo de carga que se va a secar. Use el ajuste Ahorro de energia (Energy Preferred Automatic Setting) para secar la mayor[a de las telas pesadas y de la secadora tan pronto como se detenga. La sepal de fin de ciclo forma parte del bot6n Inicio (Start) y se puede seleccionar. Gire el bot6n PUSH TO - Maytag MGT3800TW | User Instructions - Page 18
, explosibn o incendio. Limpieza externa Use un paso o una esponja suave y hQmeda para limpiar cualquier derrame, tales como los de detergente o blanqueador, de la parte exterior de su lavadora. De vez en cuando, limpie el exterior de su lavadora para que se yea como nueva. Limpieza del interior - Maytag MGT3800TW | User Instructions - Page 19
persona calificada. Del interior del ducto de escape SegOn el uso de la secadora, se debe quitar la pelusa cada 2 a_os, o con mas frecuencia. Instale y almacene su lavadorWsecadora en un lugar donde no se congele. Debido a que queda algo de agua en las mangueras, la congelaci6n de esta puede da_ar - Maytag MGT3800TW | User Instructions - Page 20
engranajes despu_s del desagie y antes del exprimido, o esta la parte superior del agitador haciendo chasquidos durante el lavado? Estos ruidos de esta demasiado bajo, o parece que la lavadora no se Ilena per complete? La parte superior del agitador esta mucho mas alta que el nivel mas alto del agua. - Maytag MGT3800TW | User Instructions - Page 21
con la tapa abierta. La lavadora continua Ilenando o desaguando, el ciclo parece estar atascado • &Est_ la parte superior de la manguera de desagLie mas baja que las perillas de control en la lavadora? La parte superior de la manguera de desagQe debe estar a una altura mfnima de 39" (99 cm) del piso - Maytag MGT3800TW | User Instructions - Page 22
con firmeza el bot6n de empuje para poner en marcha la secadora (PUSH TO START DRYER)? Sin calor • &Hay un fusible de la casa fundido o se dispar6 el &Hay una moneda, bot6n o sujetapapeles entre el tambor y la parte frontal o trasera de la secadora? Revise los hordes frontales y traseros - Maytag MGT3800TW | User Instructions - Page 23
de 4" (10,2 cm) de diametro, • &Esta la secadora ubicada en un armario? Las puertas del armario deben tener aberturas de ventilaci6n en la parte superior e inferior de la puerta. Se recomienda un espacio minimo de 1" (2,5 cm) para el frente de la secadora y, para la mayoria de las instalaciones - Maytag MGT3800TW | User Instructions - Page 24
de Maytag para determinar si corresponde otra garantia. Si necesita servicio, consulte primero la secci6n "Soluci6n de problemas" del Manual de Centro de ayuda al cliente de Maytag Services, LLC al 1-800-688-9900, o a su centro de servicio designado mas cercano. En CanadA, Ilame al 1-800-807-6777. - Maytag MGT3800TW | User Instructions - Page 25
installation ou service en telephonant au centre d'assistance a la clientele de Maytag Services, LLC au 1-800-807-6777, ou en ecrivant a : Maytag Services pas immediatement les instructions. Risque possible de deces ou de blessure grave si vous ne suivez pas les instructions. Tousles messages de - Maytag MGT3800TW | User Instructions - Page 26
L'installation et I'entretien doivent _tre effectues par un installateur qualifie, une agence de service ou le fournisseur de gaz. IMPORTANTES INSTRUCTIONS DE 6tre effectue par une personne qualifiee. [] Voir "Specifications electriques" pour les instructions de liaison a la terre. CONSERVEZ CES - Maytag MGT3800TW | User Instructions - Page 27
installation que vous trouverez dans vos Instructions d'installation. Voir les instructions d'installation installation. Se referer aux instructions d'installation Instructions d'installation pour plus de renseignements. REMARQUE : Les visites de service possible Iors de I'installation du conduit. Bon - Maytag MGT3800TW | User Instructions - Page 28
genre d'huile (y compris les huiles de cuiesen). Le non-respect de ces instructions peut causer un d_cee, une explosion eu un incendie. Mesurer le detergent et Style 1 : Distributeur d'assouplissant liquide pour tissu (sur certains modeles) • Utiliser seulement de I'assouplissant de tissu dans ce - Maytag MGT3800TW | User Instructions - Page 29
ou par le programme de sechage a I'air. Le non-respect de ces instructions peut causer un deces ou un incendie. Avant d'utiliser la secheuse, essuyer pour le type de charge que vous sechez. Utiliser le reglage automatique Energy Preferred (econergique) pour secher la plupart des tissus Iourds et de - Maytag MGT3800TW | User Instructions - Page 30
telle que I'essence, loin de ia s_cheuse. Le non-respect de cette instruction peut causer un deces, une explosion ou un incendie. __o e _a d'eau tilde, puis le remettre en place. REMARQUE : Si votre modele dispose d'un distributeur d'assouplissant de tissu liquide, ne pas laver de v_tements - Maytag MGT3800TW | User Instructions - Page 31
eau. 4. Au Canada Risque de choc electrique Brancher sur une prise a 4 alveoies reliee a la terre. Le non-respect de cette instruction peut causer un secheuse. R6installation de la laveuse/s_cheuse 1. Suivre les "Instructions d'installation" pour choisir I'emplacement, regler I'aplomb de la laveuse/ - Maytag MGT3800TW | User Instructions - Page 32
peut-_tre le coOt d'une visite de service... Bruit, vibrations, d6s6quilibre %. 9 Fuites part de la laveuse. Un morceau de contreplaque de 3A" (1,9 cm) sous la laveuse reduira les sons. Voir les Instructions d'installation reenclencher le disjoncteur. Si le probleme persiste, appeler un electricien. - Maytag MGT3800TW | User Instructions - Page 33
boutons de commande sur la laveuse? Le dessus du tuyau de vidange dolt _tre au moins & 39" (99 cm) au-dessus du plancher. Voir les Instructions d'installation. • Le tuyau de vidange est-il trop serr_ dans le conduit d'_vacuation, ou est-il fix_ au conduit d'_vacuation avec du ruban adh_sif? Le tuyau - Maytag MGT3800TW | User Instructions - Page 34
laveuse (sur certains modeles). P P DEPANNAGE DE LA le probleme persiste appuy6 sur le bouton PUSH TO START DRYER (appuyer pour mettre la s6cheuse en marche La s6cheuse est-elle restee hers service pendant un certain temps? Si la installee. Voir les Instructions d'installation. • Les v6tements - Maytag MGT3800TW | User Instructions - Page 35
est pas trop long ou ne comporte pas trop de changements de direction. Un long conduit augmentera les duress de sechage. Voir les Instructions d'installation. Le diametre du conduit d'_vacuation a-t-il la taille correcte? Utiliser un composant de 4" (10,2 cm) de diametre. Charpie sur la charge • Le - Maytag MGT3800TW | User Instructions - Page 36
abord la section "Depannage" du Guide d'utilisation et d'entretien. Apres avoir v@ifie la section ".Depannage", de I'aide supplementaire peut _tre trouvee en verifiant la section "Assistance ou service" ou en appelant Maytag. Aux E.-U., composer le 1-800-688-9900. Au Canada, composer le 1-800-807
-
 1
1 -
 2
2 -
 3
3 -
 4
4 -
 5
5 -
 6
6 -
 7
7 -
8
-
9
-
10
-
11
-
12
-
13
-
14
-
15
-
16
-
17
-
18
-
19
-
20
-
21
-
22
-
23
-
24
-
25
-
26
-
27
-
28
-
29
-
30
-
31
-
32
-
33
-
34
-
35
-
36
 |
 |

M_&YEAG®
WASHER/DRYER
USER
INSTRUCTIONS
INSTRUCCIONES
PARA
EL USUARIO
LA LAVADORA/SECADORA
INSTRUCTIONS
POUR
L'UTILISATEUR
p
DE LA LAVEUSE/SECHEUSE
Table
of Contents
/
Indice
/
Table
des
mati_res
ASSISTANCE
OR SERVICE
............................
1
WASHER/DRYER
SAFETY
.............................
2
WASHER
USE
..................................................
4
DRYER
USE
......................................................
5
WASHER/DRYER
CARE
.................................
6
TROUBLESHOOTING
WASHER
.....................
TROUBLESHOOTING
DRYER
......................
10
WARRANTY
....................................................
12
AYUDA
O SERVICIO
TleCNICO
....................
13
SEGURIDAD
DE LA
LAVADORA/SECADORA
...............................
13
USO DE LA LAVADORA
................................
16
USO DE LA SECADORA
...............................
17
CUlDADO
DE LA
LAVADORA/SECADORA
...............................
18
SOLUCION
DE PROBLEMAS
DE LA
LAVADORA
.....................................................
20
SOLUCION
DE PROBLEMAS
DE LA
SECADORA
....................................................
22
GARANTiA
......................................................
24
ASSISTANCE
OU SERVICE
..........................
25
SleCURITle DE LA
LAVEUSE/S¢CHEUSE
...................................
25
UTILISATION
DE LA LAVEUSE
....................
28
UTILISATION
DE LA SleCHEUSE
.................
29
ENTRETIEN
DE LA
LAVEUSE/S¢CHEUSE
...................................
30
DlePANNAGE
DE LA LAVEUSE
....................
32
DlePANNAGE
DE LA SleCHEUSE
.................
34
GARANTIE
......................................................
36
Assistance
or Service
If you need assistance
or service, first see the "Troubleshooting"
section. Additional
help is available by calling the Maytag
Services,
LLC Customer
Assistance
at f-800-688-9900
from
anywhere
in the U.S.A., or write:
Maytag
Services,
LLC
ATTN: CAIR
®
Center
P.O. Box 2370
Cleveland,
TN 37320-2370
Information
may also be obtained
by visiting our website
at
www.maytag.com.
In
Canada, for assistance,
installation
or service, call us at
1-800-807-6777,
or write:
Maytag
Services,
LLC
ATTN: CAIR
®
Center
P.O. Box 2370
Cleveland,
TN 37320-2370
In Canada, visit www.maytag.ca.
Please include a daytime
phone number
in your correspondence.
Keep this book and your sales slip together
for
future
reference.
You must provide proof of purchase
or installation
date
for
in-warranty
service.
Write down the following
information
about your appliance to help
you obtain assistance
or service if you ever need it. You will need
to know your complete
model number and serial number. You can
find this information
on the model and serial number label, located
at the top inside dryer door well.
Dealer
name
Serial number
Address
Phone number
Model
number
Purchase
date
W10117754A