Maytag MSD2650KEU Use and Care Manual - Page 8
Full-Length Aluminum, Handles, Wide-by-Side™ Handles, Metal Handle
 |
View all Maytag MSD2650KEU manuals
Add to My Manuals
Save this manual to your list of manuals |
Page 8 highlights
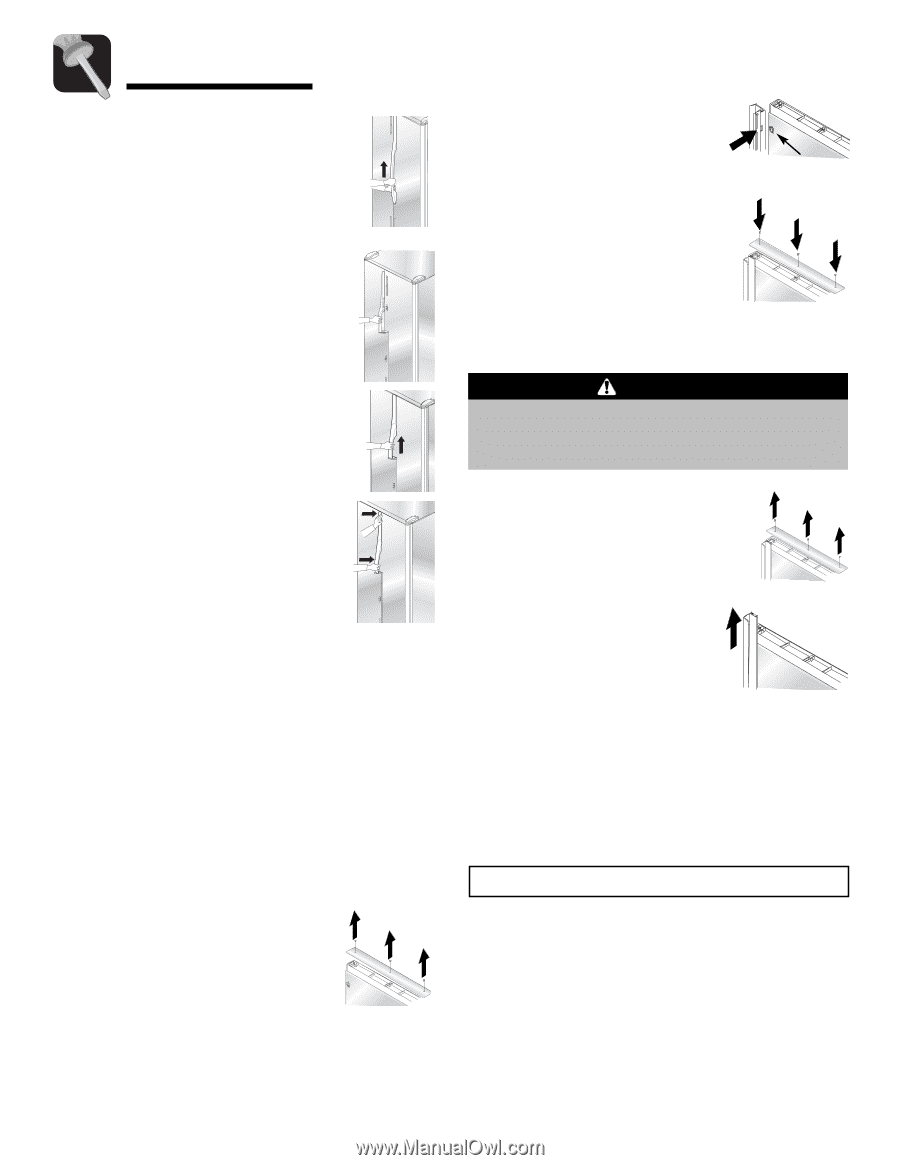
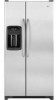
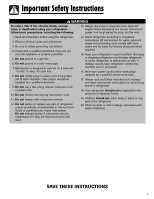
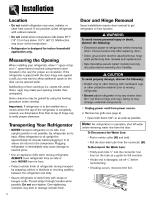
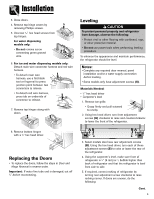
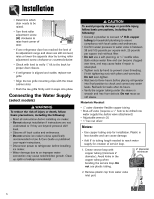
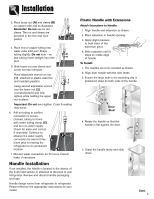
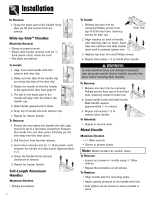
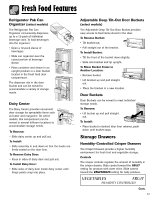
Installation To Remove: 1. Grasp the lower part of the handle firmly, slide up, lift and remove from the surface. Wide-by-Side™ Handles Materials Needed: • Gloves to protect hands • Plastic door handle removal card (or 1⁄32" thick plastic card), retain the card • Flat blade screwdriver To Install: 1. Align fresh food handle with trim retainer and door clip. 2. Make sure the tabs of the handle clip are below the tabs of the door clip. 3. Rotate the handle so that the handle is flat against the door (see page 6). 4. The tab on the lower part of the handle will align with the hole in the handle cap. 5. Slide handle upward until it clicks. 6. Snap top of handle into trim retainer clip. 7. Repeat for freezer handle. To Remove: 1. Protect the area above the handle trim with tape. Insert the tip of a flat blade screwdriver between the handle trim and door panel. Carefully pry the trim away from the door panel. 2. Pull trim free from the trim retainer. 3. Insert door removal card (or 1⁄32" thick plastic card) between the handle and door panel (approximately 11⁄2"). 4. Grasp the handle firmly and pull downward to remove. 5. Repeat for freezer handle. Full-Length Aluminum Handles Materials Needed: • Phillips screwdriver 7 To Install: 1. Release top door trim by removing Phillips screws from top of fresh food door, retaining screws for later use. Door Clip 2. Align notches on back of handle with retaining clips on doors. Insert clips into notches and slide handle down until it contacts bottom trim. 3. Replace top door trim and Phillips screws. 4. Repeat instructions 1-3 to install other handle. WARNING To avoid possible injury and damage to property, tape decorative panels (select models) securely into place before removing door handles. To Remove: 1. Release top door trim by removing Phillips screws from top of fresh food door, retaining screws for later use. 2. Grasp handle firmly with both hands. Slide handle upward approximately 3⁄4" to release. 3. Repeat instructions 1-2 to remove other handle. To Reinstall: 1. Repeat in reverse order. Metal Handle Materials Needed: • 3⁄32" Allen wrench • Gloves to protect hands Note: Metal handles can scratch doors. To Remove: • Loosen set screws in handle using 3⁄32" Allen wrench. • Repeat the procedure on all screws. To Replace: • Align handle with the mounting posts. • Apply upward pressure to the handle and hold. • Fully tighten all set screws to secure handle in place.
-
 1
1 -
2
-
 3
3 -
 4
4 -
 5
5 -
 6
6 -
 7
7 -
 8
8 -
 9
9 -
 10
10 -
 11
11 -
 12
12 -
 13
13 -
14
-
15
-
16
-
17
-
18
-
19
-
20
-
21
-
22
-
23
-
24
-
25
-
26
-
27
-
28
-
29
-
30
-
31
-
32
-
33
-
34
-
35
-
36
-
37
-
38
-
39
-
40
-
41
-
42
-
43
-
44
-
45
-
46
-
47
-
48
-
49
-
50
-
51
-
52
-
53
-
54
-
55
-
56
-
57
-
58
-
59
-
60
-
61
-
62
-
63
-
64
-
65
-
66
-
67
-
68
-
69
-
70
-
71
-
72
-
73
-
74
-
75
-
76
-
77
-
78
-
79
-
80
-
81
-
82
-
83
-
84
-
85
-
86
-
87
-
88
-
89
-
90
-
91
-
92
-
93
-
94
-
95
-
96
-
97
-
98
-
99
-
100
-
101
-
102
-
103
-
104
-
105
-
106
-
107
-
108
-
109
-
110
-
111
-
112
 |
 |