McAfee IIP-M80K-ISAA Quick Start Guide - Page 3
Start > Programs > IntruShield > IntruShield Security Manager - manual
 |
View all McAfee IIP-M80K-ISAA manuals
Add to My Manuals
Save this manual to your list of manuals |
Page 3 highlights
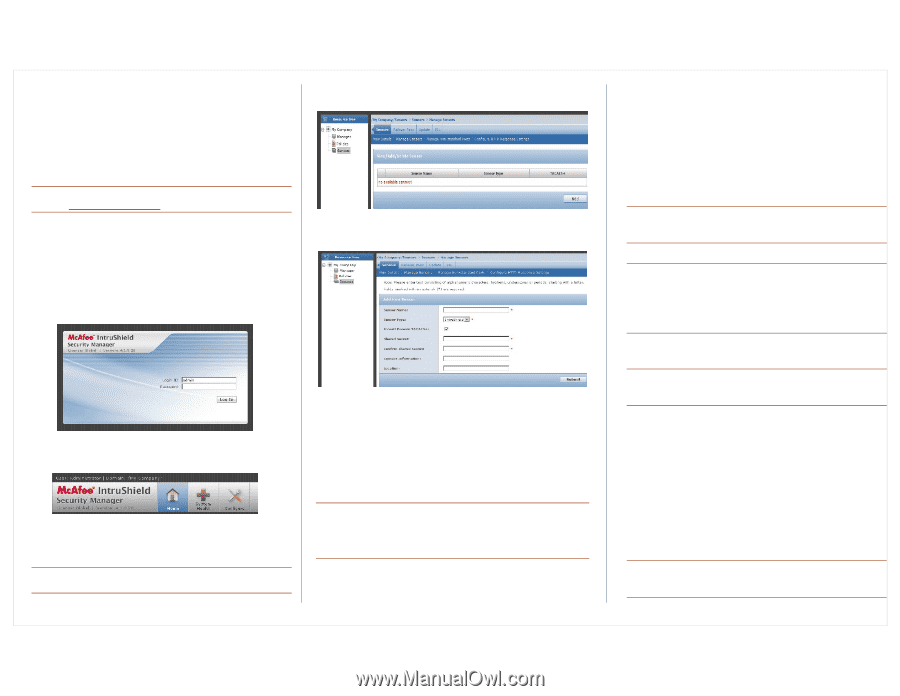
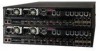
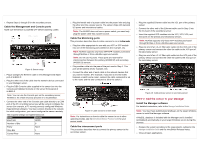
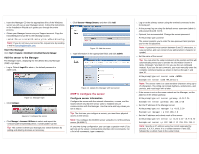
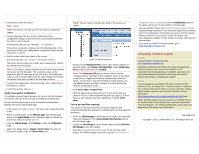
3. Insert the Manager CD into the appropriate drive of the Windows server you will use as your Manager server. Follow the instructions in the Installation Wizard as it guides you through the entire process. 4. Obtain your Manager license via your Support account. Copy the IntruShieldLicense.jar file to the following location: installDrive:>installDirectory\IntruShield\config Note: If you do not have your license file, request one by sending e-mail to [email protected]. Start the Manager Click Start > Programs > IntruShield > IntruShield Security Manager. Add the sensor to the Manager The Manager starts, displaying the IntruShield Security Manager (ISM) Login page. 1. Log in. Default Login ID is admin; the default password is admin123. 4. Click Sensors > Manage Sensors, and then click Add. Figure 13: Add the sensor 5. Type information in the appropriate fields and click Submit. 2. Click Configure. Figure 11: Manager login Figure 12: Configure the sensor 3. Click Manager > Licenses > M-Series to select and import the IntruShieldLicense_.jar file. Tip: This screen is where you manage your sensor licenses by adding and deleting licenses as necessary. Figure 14: Update the Manager with new sensor STEP 3: Configure the sensor Configure sensor information Configure the sensor with the network information, a name, and the shared secret key that the sensor uses to establish secure communication with the Manager. Use the name and key values you set in Step 2. Tip: The first time you configure a sensor, you must have physical access to the sensor. Note: You configure the M-8000 sensor using the CLI of the primary sensor (M-8000 P). At any time during configuration, you can type a question mark (?) to get help on the sensor command-line interface (CLI) commands. For a list of all commands, type commands. 1. Log on to the primary sensor using the terminal connected to the Console port. 2. At the prompt, log on using the default sensor username (admin) and password (admin123). 3. Optional, but recommended. Change the sensor password: At the prompt, type: passwd The sensor prompts you to enter the new password and prompts you for the old password. Note: A password must contain between 8 and 25 characters, is case-sensitive, and can consist of any alphanumeric character or symbol. 4. Set the name of the sensor: Tip: You can enter the setup command at the prompt and this will automatically prompt you to provide the information shown in items 4 through 7 and item 10. Or, you use the set command instead. If you use the set command, you must manually enter the complete command syntax as shown in items 4 through 7 and item 10. At the prompt, type: set sensor name Example: set sensor name HR_sensor1 Note: The sensor name is a case-sensitive character string up to 25 characters. The string can include hyphens, underscores, and periods, and must begin with a letter. 5. If the sensor is not on the same network as the Manager, set the address of the default gateway: At the prompt, type: set sensor gateway Example: set sensor gateway 192.168.3.68 6. Set the IP address of the Manager server: At the prompt, type: set manager ip Example: set manager ip 192.168.2.8 7. Set the IP address and subnet mask of the sensor: At the prompt, type: set sensor ip Example: set sensor ip 192.168.2.12 255.255.255.0 Note: Specify an IP address using four octets separated by periods: X.X.X.X, where X is a number between 0 and 255, followed by a subnet mask in the same format.
-
 1
1 -
 2
2 -
 3
3 -
 4
4
 |
 |