NEC 50XC10 42XC10 50XC10 60XC10 user's manual
NEC 50XC10 Manual
 |
View all NEC 50XC10 manuals
Add to My Manuals
Save this manual to your list of manuals |
NEC 50XC10 manual content summary:
- NEC 50XC10 | 42XC10 50XC10 60XC10 user's manual - Page 1
English User's Manual PlasmaSync 42XC10 PlasmaSync 50XC10 PlasmaSync 60XC10 - NEC 50XC10 | 42XC10 50XC10 60XC10 user's manual - Page 2
Package Contents •Plasma Monitor •Remote control and AA Batteries •Power cord •Users Manual (CD-ROM) •Start Up Guide (Paper / CD-ROM) •Main Power Switch cover and screw •Cable clamps - NEC 50XC10 | 42XC10 50XC10 60XC10 user's manual - Page 3
Safety Instructions...English-1 Remote ...English-8 Part Names and Functions Control Panel ...English-9 Terminal Panel ...English-10 Remote Control Troubleshooting...English-27 Specifications 42XC10...English-28 50XC10 ...English-29 60XC10 ...English-30 Supported Resolutions 42XC10...English-31 50XC10 - NEC 50XC10 | 42XC10 50XC10 60XC10 user's manual - Page 4
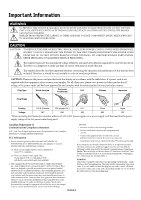
with the manufacturer's instructions. 8. Do Electronic Industries Alliance: www.eiae org. 16. Damage Requiring Service -The appliance should be serviced by qualified service All monitors must code. ANSI/NFPA No.70-1984, provides information with respect to proper grounding of the mats and supporting - NEC 50XC10 | 42XC10 50XC10 60XC10 user's manual - Page 5
COMPONENTS INSIDE. REFER SERVICING TO QUALIFIED SERVICE PERSONNEL. CAUTION CAUTION in order to avoid any problems. CAUTION: Please use the 100 *When operating the PlasmaSync monitor with its AC 125- (P50XC10) or P606Y5(P60XC10) color monitor accordance with the instructions, may cause harmful - NEC 50XC10 | 42XC10 50XC10 60XC10 user's manual - Page 6
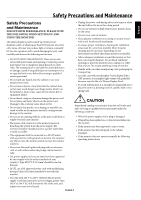
unit, read carefully and observe the following instructions. • DO NOT OPEN THE MONITOR. There are no userserviceable parts inside and opening attempt service or open the back cover. Refer all servicing to qualified service personnel. • Do not spill any liquids into the cabinet or use your monitor - NEC 50XC10 | 42XC10 50XC10 60XC10 user's manual - Page 7
surface with a lint-free, nonabrasive cloth. Avoid using any cleaning solution or glass cleaner. • Adjust the monitor's brightness and contrast controls to enhance readability. • Get regular eye checkups. Ergonomics To realize the maximum ergonomic benefits, we recommend the following: • Use the - NEC 50XC10 | 42XC10 50XC10 60XC10 user's manual - Page 8
Plasma monitor becomes high. You may hear the sound of the motor at that time. NOTE: The following items are not covered by the warranty. in a computer room as defined in the Standard for the Protection of Electronic Computer/Data Processing Equipment ANSI/NFPA 75. NOTE: Please use shielded video - NEC 50XC10 | 42XC10 50XC10 60XC10 user's manual - Page 9
warranty does not cover damage caused by improper installation. • Allow adequate ventilation or provide air conditioning around the monitor . Mounting Location The ceiling and wall must be strong enough to support the monitor and mounting accessories. Figure 3 • DO NOT install in locations - NEC 50XC10 | 42XC10 50XC10 60XC10 user's manual - Page 10
. If a problem is detected, please refer to qualified personnel for service. • Regularly check the mounting location for signs of damage or weakness that may occur over time. Please note the following when mounting on wall or ceiling. • When using mounting accessories other than those that are NEC - NEC 50XC10 | 42XC10 50XC10 60XC10 user's manual - Page 11
explosion if batteries are replaced incorrectly. Operating Range for the Remote Control Point the top of the remote control toward the monitor's remote sensor while pressing buttons. The remote control can be used from the front of the monitor at a maximum distance of 7 m/23 ft. from the front of - NEC 50XC10 | 42XC10 50XC10 60XC10 user's manual - Page 12
to the previous menu within the OSD. 9) Remote control sensor and Power indicator Receives the signal when using the wireless remote control. Glows green when the monitor is active. Glows red when the monitor is in Standby mode. Glows Amber when the monitor is in POWER SAVE mode. A red blinking - NEC 50XC10 | 42XC10 50XC10 60XC10 user's manual - Page 13
VGA L(MONO) AUDIO2 Y Cr/Pr Cb/Pb L(MONO) S-VIDEO IN DVD/HD1 AUDIO1 VIDEO SPEAKER (S) AC IN 2 3 4 5 6 1) EXTERNAL CONTROL OUT (D-Sub 9 pin) Connect RS-232C output to a second monitor. 2) EXTERNAL CONTROL (D-Sub 9 pin) Connect RS-232C input to external equipment such as a PC in order to - NEC 50XC10 | 42XC10 50XC10 60XC10 user's manual - Page 14
AUTO SET UP SET + EXIT VOL ZOOM POINTER + + MUTE SPLIT SCREEN PIP S BY S SINGLE SWAP SELECT/FREEZE CAPTURE REMOTE ID SET RESET SLEEP 15 16 17 18 19 20 21 REMOTE CONTROLLER RU-M113 1) POWER ON/STANDBY Switches the power on/standby. *If the Power Indicator on the display is not - NEC 50XC10 | 42XC10 50XC10 60XC10 user's manual - Page 15
on the unit). The monitor's ON/STANDBY indicator turns red and the unit will be in STANDBY mode. 3. Press the POWER ON button on the remote control. The ON/STANDBY indicator Cover POINTER Use the Pointer to point to a specific area on the screen. Press the UP and DOWN or PLUS and MINUS - NEC 50XC10 | 42XC10 50XC10 60XC10 user's manual - Page 16
1. Using the remote in REMOTE CONTROL ID mode will only operate one specific monitor within the group Figure 2. Monitor ID:1 Monitor ID:2 Monitor ID:3 Remote works Remote works Remote works TO SET REMOTE CONTROL ID: While holding down the REMOTE ID SET button on the remote control, use the - NEC 50XC10 | 42XC10 50XC10 60XC10 user's manual - Page 17
Press UP or DOWN button to select sub-menu. Press SET. Remote Control 4. Change the setting or adjustment by pressing the + and - buttons on the Control Panel or the Remote Control. 5. Press the EXIT button on the Remote Control, on the Control Panel to return to the previous menu. NOTE: Not all - NEC 50XC10 | 42XC10 50XC10 60XC10 user's manual - Page 18
function in the FUNCTION menu is enabled. SET UP LEVEL Available only when the Advanced OSD function in the FUNCTION menu is enabled. COLOR CONTROL Available only when the Advanced OSD function in the FUNCTION menu is enabled. RED GREEN BLUE YELLOW MAGENTA CYAN RESET Explanation Store picture menu - NEC 50XC10 | 42XC10 50XC10 60XC10 user's manual - Page 19
displayed image. Press + or - to select. Controls the vertical position of the image within the Display area of the PDP. Press manually. 1080I : Standard digital broadcasts 540P : Special digital broadcasts ( ex. DTC100 ) If there is a problem with signal detection, this function forces the monitor - NEC 50XC10 | 42XC10 50XC10 60XC10 user's manual - Page 20
(U.S. models only) INPUT DETECT INPUT VOLUME PROTOCOL SET RS232C CONTROL SIGNAL INFORMATION Chooses the brightness of the closed caption. Sets NEC protocol is used (normal). ON : When special protocol is used. * Consult your dealer for details of protocol. Selects the mode of the monitor when - NEC 50XC10 | 42XC10 50XC10 60XC10 user's manual - Page 21
Operation Picture Size Using Video Signals Select one of seven picture sizes manually. While viewing videos or digital video discs, perform the following actions: 1. Press the SIZE button on the remote control. 2. To switch the screen sizes, press the SIZE button again within 3 seconds. The - NEC 50XC10 | 42XC10 50XC10 60XC10 user's manual - Page 22
, perform the following actions: 1. Press the SIZE button on the remote control. 2. To switch the screen sizes, press the SIZE button again within an appropriate setting for the RGB SELECT mode. 2. Refer to the Resolutions Supported section of Model Information on pages 31 - 36. NOTE: Do not display - NEC 50XC10 | 42XC10 50XC10 60XC10 user's manual - Page 23
pictures on the screen, perform the following actions: 1. Press the desired SPLIT SCREEN function button on the remote (PIP, S BY S, SINGLE). Only certain RGB signals are supported. SINGLE button A PIP button S BY S button VGA PIP button A B S BY S button SINGLE button B VGA A Split Screen - NEC 50XC10 | 42XC10 50XC10 60XC10 user's manual - Page 24
/HD, or RGB button. The input selection may also be changed by pressing the INPUT button on the front of the unit. Adjusting the OSD controls 1. To make the desired picture active, press the SELECT/ FREEZE button. 2. To display the main menu, press the MENU button. 3. Adjust the settings as desired - NEC 50XC10 | 42XC10 50XC10 60XC10 user's manual - Page 25
Operation - continued Picture Settings Menu Storing picture settings This function stores the current input signal and PICTURE menu settings in memory in order to recall these settings if necessary. Up to six different settings can be stored. Notes of up to 15 characters long can also be stored - NEC 50XC10 | 42XC10 50XC10 60XC10 user's manual - Page 26
via personal computer using an RS-232C connection. MONITOR ID and RS-232C CONTROL Up to 26 individual monitors can be controlled through a daisy chain via RS-232C connection. 1. Connect PC to the monitor. Connect a PC's RS-232C control output to the monitor's RS-232C input. You can then connect the - NEC 50XC10 | 42XC10 50XC10 60XC10 user's manual - Page 27
Data Data End Code 0Dh [Address code] 30h 30h (In ASCII code, '0' '0') fixed. [Function code] A code of each fixed control move. [Data code] A code of each fixed control data (number) and not always indicated. [End code] 0Dh (In ASCII code, ' ' ) fixed. To control multiple monitors that are - NEC 50XC10 | 42XC10 50XC10 60XC10 user's manual - Page 28
and confirms if the command which has been sent has been executed or not. 4) This Plasma monitor sends various codes other than the return code. When sending a control sequence via RS-232C, other codes from personal computers will be ignored. *The sending time of the return command may be delayed - NEC 50XC10 | 42XC10 50XC10 60XC10 user's manual - Page 29
Host computer sends the command without Data-code to monitor. After receiving this command, the monitor returns the command with Data-code of current status to host computer. When the Host computer checks the Power status of monitor, the status of monitor is powered-on. Command from computer - NEC 50XC10 | 42XC10 50XC10 60XC10 user's manual - Page 30
cord should be connected. Red LED on monitor is blinking • A certain failure might have occurred, please contact your nearest authorized NEC DISPLAY SOLUTIONS service facility. Troubleshooting Display image is not sized properly • Use the OSD screen controls to increase or decrease the clock total - NEC 50XC10 | 42XC10 50XC10 60XC10 user's manual - Page 31
.2 No.60065/EN60065/IEC60065 FCC-B/DOC-B/EN55022-B/EN55024/EN61000-3-2/EN61000-3-3/CE/C-Tick VESA DPM (Separate HV Sync. only) VESA DDC2B Remote control, AA Batteries, Power cord, Users Manual (CD-ROM), Start Up Guide (Paper / CD-ROM), Main Power Switch cover and screw, Cable clamps English-28 - NEC 50XC10 | 42XC10 50XC10 60XC10 user's manual - Page 32
Specifications 50XC10 PDP Module Frequency Panel Display Size Input Signals Audio Speaker Output External Control Power Supply Operational DPM (Separate HV Sync. only) VESA DDC2B Remote control, AA Batteries, Power cord, Users Manual (CD-ROM), Start Up Guide (Paper / CD-ROM), Main Power Switch - NEC 50XC10 | 42XC10 50XC10 60XC10 user's manual - Page 33
.2 No.60065/EN60065/IEC60065 FCC-B/DOC-B/EN55022-B/EN55024/EN61000-3-2/EN61000-3-3/CE/C-Tick VESA DPM (Separate HV Sync. only) VESA DDC2B Remote control, AA Batteries, Power cord, Users Manual (CD-ROM), Start Up Guide (Paper / CD-ROM), Main Power Switch cover and screw, Cable clamps English-30 - NEC 50XC10 | 42XC10 50XC10 60XC10 user's manual - Page 34
42XC10 Supported Resolutions (PC) English-31 IBM PC/AT Compatible Computers Apple Macintosh® EWS Series Specification of the signal Sig. Resolution V freq. H freq. no. H X V Signal Type Hz (kHz) 1 640 X 400 400line 70.1 31.5 2 720 X 400 400line 70.1 31.5 3 85 37.9 4 720 X - NEC 50XC10 | 42XC10 50XC10 60XC10 user's manual - Page 35
1920 X 1080P 1920 X 1080P 1920 X 1080P 1366 X 768 1024 X 768 853 X 480 Specification of the signal V freq. H freq. Signal Type Hz (kHz) 59.9 15.8 59.9 -- -- -- -- -- -- HD select Item 1080I -----540P - Not Supported NORMAL(4:3) 768 pixels x 768 lines FULL(16 : 9 ) 1024 pixels - NEC 50XC10 | 42XC10 50XC10 60XC10 user's manual - Page 36
50XC10 Supported Resolutions (PC) English-33 IBM PC/AT Compatible Computers Apple Macintosh® EWS Series Specification of the signal Sig. Resolution V freq. H freq. no. H X V Signal Type Hz (kHz) 1 640 X 400 400line 70.1 31.5 2 720 X 400 400line 70.1 31.5 3 85 37.9 4 720 X - NEC 50XC10 | 42XC10 50XC10 60XC10 user's manual - Page 37
50XC10 Supported Resolutions (Video) English-34 Sig. no. Video 101 720P 1920 X 1080I 1920 X 1080P 1920 X 1080P 1920 X 1080P 1920 X 1080P 1366 X 768 1024 X 768 853 X 480 Specification of the signal V freq. H freq. Signal Type Hz (kHz) 59.9 15.8 59.9 15.8 50 15.6 59.9 15.8 - NEC 50XC10 | 42XC10 50XC10 60XC10 user's manual - Page 38
1152 X 900 96 1280 X 1024 97 1024 X 768 98 1280 X 1024 Specification of the signal V freq. H freq. Signal Type Hz (kHz) 400line 70.1 -- - - -- - - -- - - -- - - -- - - -- - - 4 1024X768 -- - - - Not Supported NORMAL (4:3) 1024 pixels x 768 lines FULL (16:9) 1366 pixels - NEC 50XC10 | 42XC10 50XC10 60XC10 user's manual - Page 39
1920 X 1080P 1920 X 1080P 1920 X 1080P 1366 X 768 1024 X 768 853 X 480 Specification of the signal V freq. H freq. Signal Type Hz (kHz) 59.9 15.8 59.9 15 -- -- -- -- -- HD select Item 1080I -----540P - Not Supported NORMAL (4:3) 1024 pixels x 768 lines FULL (16:9) 1366 pixels - NEC 50XC10 | 42XC10 50XC10 60XC10 user's manual - Page 40
English 1) Analog RGB Input (Mini D-SUB 15P) VGA Pin No. Name 1 Video Signal Red 2 Video Signal Green 3 Video Signal Blue 1 4 GND 5 6 5 DDC-GND 10 11 15 6 Red-GND 7 Green-GND 8 Blue-GND 9 +5V (DDC) Mini D-SUB 15P 10 SYNC-GND 11 GND 12 DDC-SDA 13 H-SYNC 14 V-SYNC 15 DDC-SCL 2) - NEC 50XC10 | 42XC10 50XC10 60XC10 user's manual - Page 41
used electrical and electronic products outside the NEC Display Solutions of America, Inc. 500 Park Blvd. Suite 1100 Itasca, IL 60143 (630)467-3000 Type of Product: Equipment Classification: Model: Computer Monitor Class B Peripheral PlasmaSync 42XC10 (P426Y3) PlasmaSync 50XC10 (P506Y4) PlasmaSync
-
 1
1 -
 2
2 -
 3
3 -
 4
4 -
 5
5 -
 6
6 -
 7
7 -
8
-
9
-
10
-
11
-
12
-
13
-
14
-
15
-
16
-
17
-
18
-
19
-
20
-
21
-
22
-
23
-
24
-
25
-
26
-
27
-
28
-
29
-
30
-
31
-
32
-
33
-
34
-
35
-
36
-
37
-
38
-
39
-
40
-
41
 |
 |

PlasmaSync 42XC10
PlasmaSync 50XC10
PlasmaSync 60XC10
English
User’s Manual