NEC LCD1770NXM-BK MultiSync 1770V/1770NX/1770NXM Users Manual - Page 5
Sound bar Setup - display
 |
UPC - 805736011845
View all NEC LCD1770NXM-BK manuals
Add to My Manuals
Save this manual to your list of manuals |
Page 5 highlights
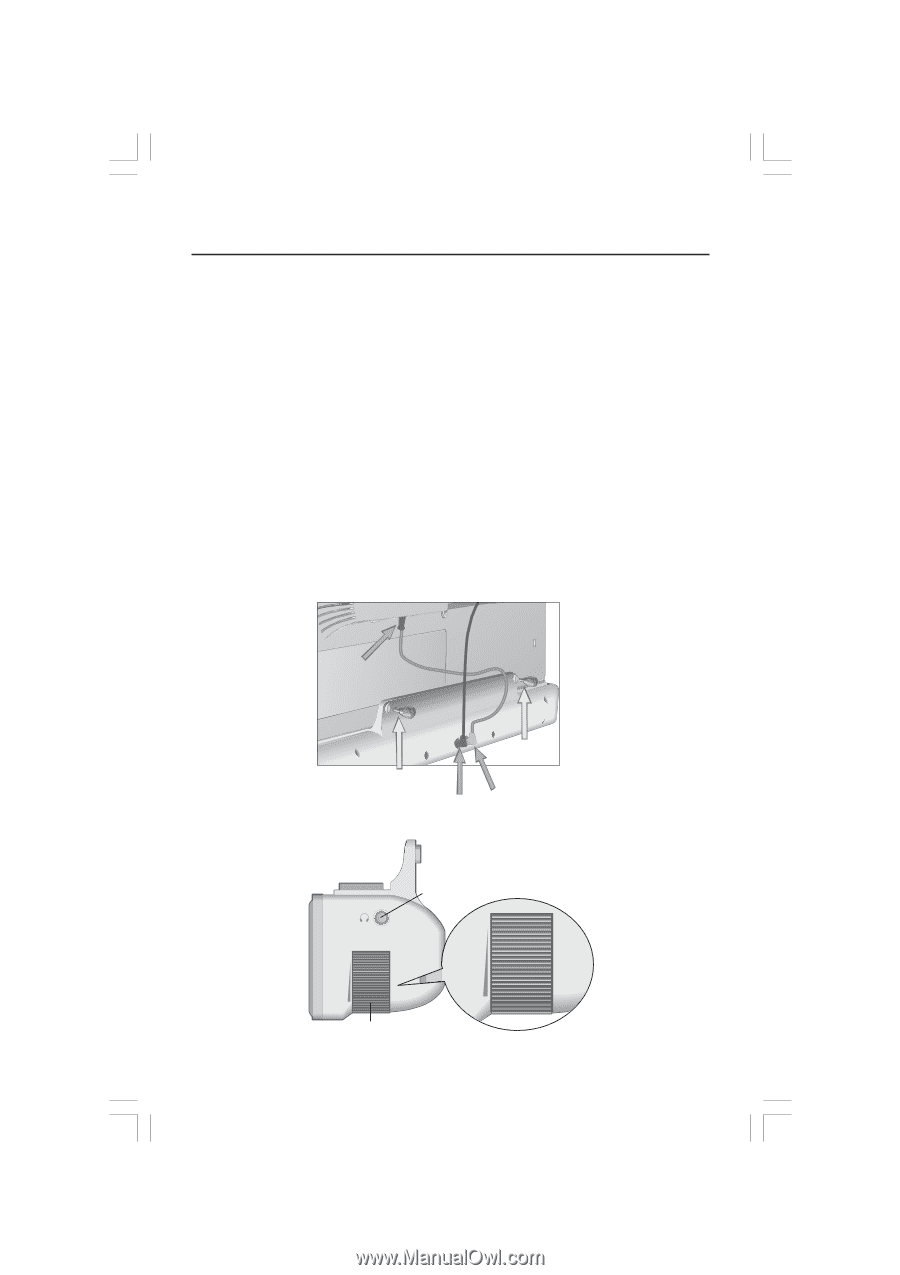
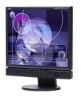
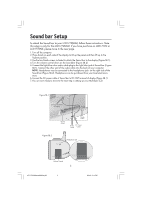
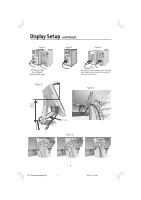
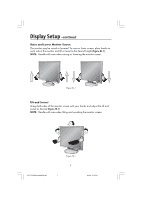
Sound bar Setup To attach the Sound bar to your LCD1770NXM, follow these instructions. Note: this setup is only for the LCD1770NXM. If you have purchase an LCD1770V or LCD1770NX, please move to the next page. 1. Turn off the computer. 2. Place hands on each side of the display to tilt up the panel and then lift up to the highest position. 3. Use the two thumb screws included to attach the Sound bar to the display (Figure SB.1). 4. Turn the volume control down on the Soundbar (Figure SB.2). 5. Connect the light blue color audio cable plug to the light blue jack of Sound bar (Figure SB.1). Connect the other end of the audio cable into the back of your computer. NOTE: Headphones may be connected to the headphones jack on the right side of the Sound bar (Figure SB.2). Headphones can be purchased from your local electronics store. 6. Connect the DC power cable of Sound bar to DC-OUT terminal of display (Figure SB.1). 7. You are now ready to move to the next step in setting up your MultiSync LCD. Figure SB.1 DC-OUT Terminal of Display Figure SB.2 Thumb Screw Thumb Screw Audio DC Power Cable Cable Headphone Jack VOL. Volume Control VOL. 3 LCD17PISAManual080604.p65 3 8/6/04, 5:14 PM
-
 1
1 -
 2
2 -
 3
3 -
 4
4 -
 5
5 -
 6
6 -
 7
7 -
 8
8 -
 9
9 -
 10
10 -
 11
11 -
12
-
13
-
14
-
15
-
16
-
17
-
18
-
19
-
20
-
21
-
22
-
23
-
24
-
25
-
26
-
27
-
28
-
29
-
30
-
31
-
32
-
33
-
34
-
35
-
36
-
37
-
38
-
39
-
40
-
41
-
42
-
43
-
44
-
45
-
46
-
47
-
48
-
49
-
50
-
51
-
52
-
53
-
54
-
55
 |
 |