NEC NP-M332XS MP300CM Installation Manual - Page 9
AA AD DEE AA BEE
 |
View all NEC NP-M332XS manuals
Add to My Manuals
Save this manual to your list of manuals |
Page 9 highlights
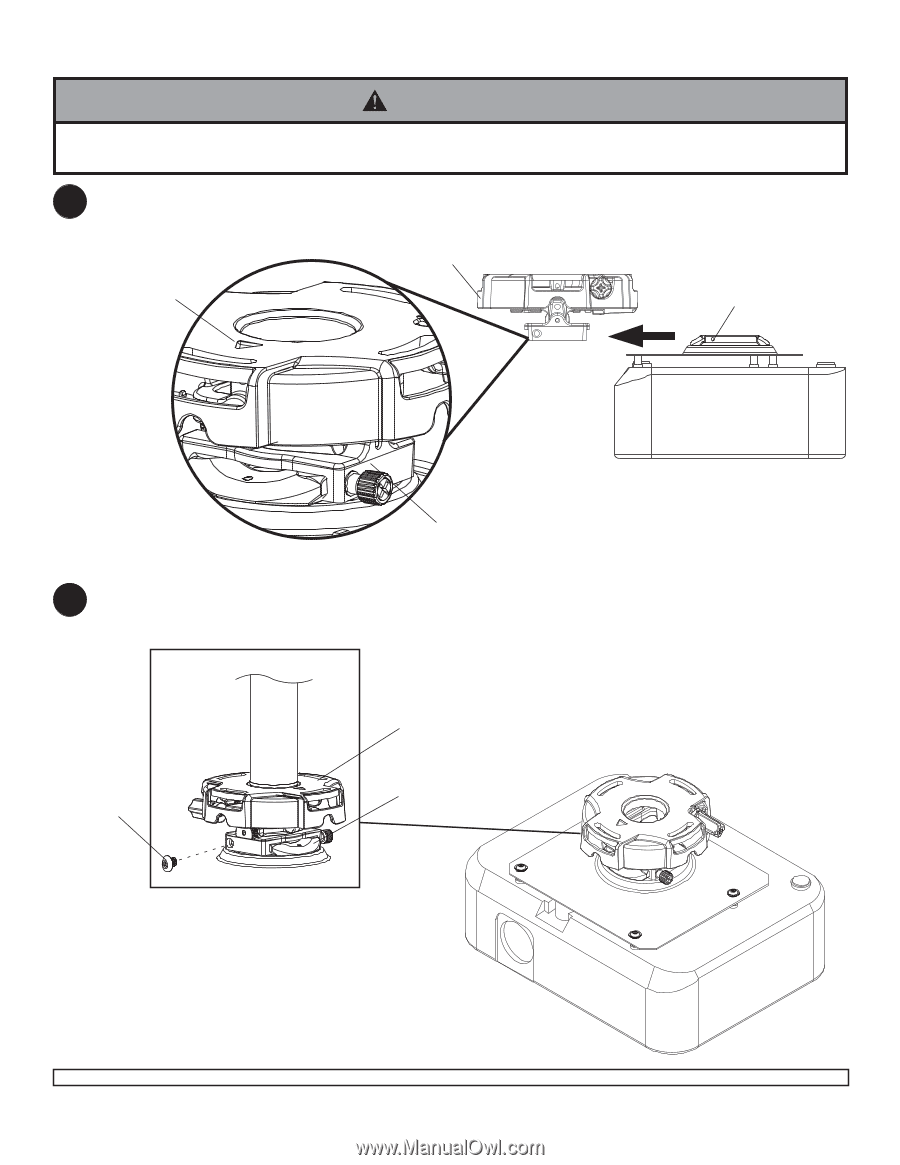
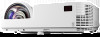
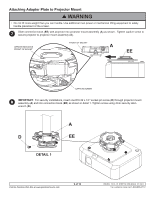
Attaching Adapter Plate to Projector Mount WARNING • Do not lift more weight than you can handle. Use additional man power or mechanical lifting equipment to safely handle placement of the screen. 7 Slide connection block (EE) with projector into projector mount assembly (A) as shown. Tighten captive screw to secure projector to projector mount assembly (A). ARROW INDICATES FRONT OF MOUNT FRONT OF MOUNT A EE CAPTIVE SCREW 8 IMPORTANT: For security installations, insert one #10-32 x 1/4" socket pin screw (D) through projector mount assembly (A) and into connection block (EE) as shown in detail 1. Tighten screw using 4mm security allen wrench (B). A D EE DETAIL 1 Visit the Peerless Web Site at www.peerlessmounts.com 9 of 10 ISSUED: 10-01-10 SHEET #: 056-9034-4 07-29-11 For customer care call 1-800-865-2112
-
 1
1 -
2
-
3
-
 4
4 -
 5
5 -
 6
6 -
 7
7 -
 8
8 -
 9
9 -
 10
10
 |
 |