Netgear CSM4532 Hardware Installation Guide - Page 23
Hardware Installation
 |
View all Netgear CSM4532 manuals
Add to My Manuals
Save this manual to your list of manuals |
Page 23 highlights
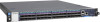
Hardware Installation Unpacking the Hardware Upon receiving the switch, inspect the packing box. If the packing box was not damaged in transit, unpack it carefully. NOTE: Retain the packing box in case you need to transport the switch. Because the packing box is heavy, we recommend that you carry the box and perform the installation together with someone else. Package Contents The following items are included with a standard package. When you open the box, check if all items are included and free of damage. One Netgear M4500 Intelligent Fully Managed Switch Depending on the product ordered, two or four AC power cords Console cables One set of rail kits Two mounting ears Four screws for two mounting ears Installation Guide Ensure that all items are included in the package before starting the installation. 1 Place the box on a flat and stable surface and cut the straps securing the box. 2 Carefully remove the switch. Then place it on a flat and clean surface. 3 Remove all other items from the box and inspect each item. Installing the Switch Site Survey Consider the following when choosing a location to install the switch: Installation Location Ensure that there is adequate space to allow you to access the front and rear panel ports for easy cable management and maintenance. Ensure that the site is located within a proper distance to the power source. The power source must be properly grounded and readily accessible. Ensure that the site is free from strong electromagnetic field sources, such as radiators, motors, and heat sources. Ensure that the site is not exposed to direct sunlight, rain or moisture. 23 Network Switch Installation Guide
-
 1
1 -
2
-
3
-
4
-
5
-
6
-
7
-
8
-
9
-
10
-
11
-
12
-
13
-
14
-
15
-
16
-
17
-
 18
18 -
 19
19 -
 20
20 -
 21
21 -
 22
22 -
 23
23 -
 24
24 -
 25
25 -
 26
26 -
 27
27 -
 28
28 -
29
-
30
-
31
-
32
-
33
 |
 |
