Netgear CSM4532 Hardware Installation Guide - Page 27
clicks into place. Make sure that the L-shaped bracket is facing inward.
 |
View all Netgear CSM4532 manuals
Add to My Manuals
Save this manual to your list of manuals |
Page 27 highlights
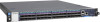
Hardware Installation 9 Install the outer rails to the rack. To install the front bracket: Pull the latch and install the rail by aligning the hooks with the front rack holes, and then release the latch to lock the hooks into place. To install the rear bracket: Align and push the rail firmly into the rear rack until it clicks into place. Make sure that the L-shaped bracket is facing inward. 10 Pull the middle rails out until they are fully extended, ensuring that the ball bearing retainers are locked at the front of the middle rails. 11 Slide the inner rails on the switch into the middle rails until the movement stops. 27 NETGEAR M4500 Series Switches Hardware Installation Guide
-
 1
1 -
2
-
3
-
4
-
5
-
6
-
7
-
8
-
9
-
10
-
11
-
12
-
13
-
14
-
15
-
16
-
17
-
18
-
19
-
20
-
21
-
 22
22 -
 23
23 -
 24
24 -
 25
25 -
 26
26 -
 27
27 -
 28
28 -
 29
29 -
 30
30 -
 31
31 -
 32
32 -
33
 |
 |

Hardware Installation
27
NETGEAR M4500 Series Switches Hardware Installation Guide
9
Install the outer rails to the rack.
To install the front bracket: Pull the latch and install the rail by aligning the hooks
with the front rack holes, and then release the latch to lock the hooks into place.
To install the rear bracket: Align and push the rail firmly into the rear rack until it
clicks into place. Make sure that the L-shaped bracket is facing inward.
10
Pull the middle rails out until they are fully extended, ensuring that the ball bearing
retainers are locked at the front of the middle rails.
11
Slide the inner rails on the switch into the middle rails until the movement stops.