Netgear FVG318v1 FVG318 to NETGEAR VPN Client - Page 10
For more troubleshooting, you can review the VPN log on the FVG318 and the, the VPN Client Policy
 |
View all Netgear FVG318v1 manuals
Add to My Manuals
Save this manual to your list of manuals |
Page 10 highlights
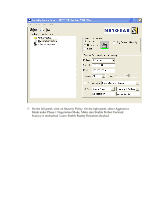
11. To connect, right click on the ProSafe VPN client icon on the system tray and choose Connect, select the Connection Profile you just created. 12. A connection status window should be displayed and eventually, it should said Successfully connect to your connection profile. 13. You can test the VPN by pinging resources behind the FVG318. Note that if you have not enable Response to ping on Internet port in the FVG318 WAN option menu, you won't be able to ping the LAN interface IP address of the FVG318. 14. If the VPN will not connect, double check the parameters in both the FVG318 and the VPN Client Policy, make sure they are matching on both side. 15. For more troubleshooting, you can review the VPN log on the FVG318 and the Log Viewer on the ProSafe VPN client by right click on the ProSafe VPN client icon on the system tray and select Log Viewer. A successful connection should appear as follow in the Log Viewer.
-
 1
1 -
2
-
3
-
4
-
 5
5 -
 6
6 -
 7
7 -
 8
8 -
 9
9 -
 10
10 -
 11
11
 |
 |
