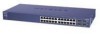
Netgear GS724TS GS7xxTS User Manual
Netgear GS724TS - ProSafe 24 Port Gigabit Stackable Smart Switch Manual
 |
UPC - 606449049442
View all Netgear GS724TS manuals
Add to My Manuals
Save this manual to your list of manuals |
Netgear GS724TS manual content summary:
- Netgear GS724TS | GS7xxTS User Manual - Page 1
GS700TS Smart Switch Software Administration Manual NETGEAR, Inc. 350 East Plumeria Drive San Jose, CA 95134 USA June 2009 202-10505-01 - Netgear GS724TS | GS7xxTS User Manual - Page 2
Smart Switch Software Administration Manual © 2009 by NETGEAR, Inc. All Rights reserved Trademarks NETGEAR and the NETGEAR logo are registered trademarks of NETGEAR NETGEAR reserves the right to make changes to the products described in this document without notice. NETGEAR operating instructions. two - Netgear GS724TS | GS7xxTS User Manual - Page 3
GS700TS Smart Switch Software Administration Manual determined by turning the equipment off and on, the user is encouraged to try to correct the interference by one or more of the following measures: • Reorient or relocate the receiving antenna. • Increase the separation - Netgear GS724TS | GS7xxTS User Manual - Page 4
GS700TS Smart Switch Software Administration Manual FCC Requirements for Operation in the United States FCC Information to User: This product does not contain any user-serviceable components and is to be used with approved antennas only. Any product changes or modifications will invalidate all - Netgear GS724TS | GS7xxTS User Manual - Page 5
Gigabit Stackable Smart Switch ...1-6 Web Access ...1-7 Additional Utilities ...1-8 Password Change ...1-9 Firmware Upgrade 1-9 Exit ...1-10 Chapter 2 Introduction to the Web Browser Interface Logging Into the NETGEAR Home Screen 2-1 The Navigation Menu 2-2 Using the NETGEAR Web Management System - Netgear GS724TS | GS7xxTS User Manual - Page 6
Smart Switch Software Administration Manual Chapter 3 Managing System Settings Using the System Settings Utility 3-1 Management ...3-1 System Information 3-1 IP Configuration ...3-4 Time ...3-5 Device View ...3-8 Stacking ...3-8 Operation Modes ...3-9 Understanding Stack Topology 3-9 Stacking - Netgear GS724TS | GS7xxTS User Manual - Page 7
GS700TS Smart Switch Software Administration Manual Advanced ...4-16 Voice VLAN ...4-21 Basic ...4-22 Advanced ...4-23 Properties ...4-24 Port Setting ...4-25 OUI ...4-26 STP ...4-28 Basic ...4-28 Advanced ...4-31 Multicast ...4-43 Basic ...4-43 Advanced ...4-45 Address Table ...4-51 Basic ...4-51 - Netgear GS724TS | GS7xxTS User Manual - Page 8
Smart Switch Software Administration Manual Port Security ...6-17 Protected Ports ...6-19 ACL ...6-20 MAC ACL ...6-21 MAC Rules ...6-22 MAC Binding Configuration 6-24 IPv4 ACL ...6-25 IPv4 Rules ...6-26 IPv4 Binding Configuration 6-28 IPv6 ACL ...6-29 IPv6 Rules ...6-30 IPv6 Binding Configuration - Netgear GS724TS | GS7xxTS User Manual - Page 9
GS700TS Smart Switch Software Administration Manual Download ...8-5 Download ...8-5 File Management ...8-6 Active Image ...8-6 Troubleshooting ...8-7 Diagnostics ...8-7 Chapter 9 Online Help Online Help ...9-1 Support ...9-1 User Guide ...9-2 Chapter A Default Settings Index ix v1.0, June 2009 - Netgear GS724TS | GS7xxTS User Manual - Page 10
About This Manual The NETGEAR® GS700TS Smart Switch Software Administration Manual describes how to install, configure, operate, and troubleshoot the GS700TS Gigabit Stackable Smart Switch using its included software. This book describes the software configuration procedures and explains the - Netgear GS724TS | GS7xxTS User Manual - Page 11
GS700TS Smart Switch Software Administration Manual • Chapter 6, "Managing Security" describes how to configure security. • Chapter 7, "Monitoring the Switch" describes how to configure switch monitoring. • Chapter 8, "Maintenance" describes the firmware upgrade procedure and reset functions. • - Netgear GS724TS | GS7xxTS User Manual - Page 12
for the GS700TS Smart Switch according to these specifications: Product Version Manual Publication Date GS700TS Gigabit Stackable Smart Switch June 2009 . Note: Product updates are available on the NETGEAR, Inc. website at http://www.netgear.com/support. How to Use This Manual The HTML version - Netgear GS724TS | GS7xxTS User Manual - Page 13
GS700TS Smart Switch Software Administration Manual How to Print this Manual To print this manual, select one of the following options: • Printing a Page from HTML. Each page in the HTML version of the manual is dedicated to a major topic. Select File > Print from the browser menu to print the page - Netgear GS724TS | GS7xxTS User Manual - Page 14
GS700TS Smart Switch Software Administration Manual Chapter 1 Getting Started with Switch Management This section provides an overview of switch management, including the methods you can choose to start managing your NETGEAR GS700TS Gigabit Stackable Smart Switch. It also leads you through the steps - Netgear GS724TS | GS7xxTS User Manual - Page 15
GS700TS Smart Switch Software Administration Manual Note: For complete hardware installation instructions, refer to the GS700TS Smart Switch Hardware Installation Manual included on your Resource CD, or go to http://www.netgear.com/support. Switch Management Interface Your NETGEAR GS700TS Gigabit - Netgear GS724TS | GS7xxTS User Manual - Page 16
Smart Switch Software Administration Manual Table 1-1. Switch Management Methods Management Method Features SmartWizard Discovery utility Web browser interface No IP address or subnet mask setup needed Discover all switches on the network User-friendly interface under Microsoft Windows Firmware - Netgear GS724TS | GS7xxTS User Manual - Page 17
GS700TS Smart Switch Software Administration Manual Figure 1-1 6. Note the displayed IP address assigned by the DHCP server. You will need this value to access the switch directly from a web browser (without using the SmartWizard Discovery utility). 7. Select your switch by highlighting the name of - Netgear GS724TS | GS7xxTS User Manual - Page 18
for your switch • Configure the NIC settings on the host PC • Log in to the web-based switch management utility Manually Assigning Network Parameters If your network has no DHCP service, you must assign a static IP address to your switch. You can also assign the switch a static IP address even if - Netgear GS724TS | GS7xxTS User Manual - Page 19
Smart Switch Software Administration Manual Figure 1-3 7. Select Disable to disable DHCP. 8. The default IP address is 192.168.0.239 and the default subnet mask is 255.255.255.0. If you want different values, enter the switch IP address, gateway IP address and subnet mask. 9. Type your password - Netgear GS724TS | GS7xxTS User Manual - Page 20
GS700TS Smart Switch Software Administration Manual Figure 1-4 You need Windows Administrator privileges to change these settings. 1. On your PC, access the MS Windows operating system TCP/IP Properties. 2. Set IP address and subnet mask appropriately. The subnet mask value is identical to that set - Netgear GS724TS | GS7xxTS User Manual - Page 21
GS700TS Smart Switch Software Administration Manual You must work from the same network segment that contains the switch (i.e., the subnet mask values of switch and PC host must be the same) and you must point your browser using the switch IP address. If you used the SmartWizard Discovery utility to - Netgear GS724TS | GS7xxTS User Manual - Page 22
the new password. Firmware Upgrade The GS700TS Smart Switch software is upgradeable, and enables your switch to take advantage of improvements and additional features as they become available. The upgrade procedure assumes that you have downloaded or otherwise obtained the firmware upgrade and that - Netgear GS724TS | GS7xxTS User Manual - Page 23
Smart Switch Software Administration Manual Figure 1-6 1. Enter the following values into the appropriate places in the form: • Product Assigned Firmware: The location of the new firmware. If you do not know the location, click Browse to locate the file. • Upgrade Password: Enter your password - Netgear GS724TS | GS7xxTS User Manual - Page 24
introduces the web browser interface that enables you to configure and manage your NETGEAR GS700TS Gigabit Stackable Smart Switch. Your GS700TS Smart Switch provides a built-in browser interface that enables you to configure and manage it remotely using a standard Web browser such as Microsoft - Netgear GS724TS | GS7xxTS User Manual - Page 25
Software Administration Manual 2. Enter the password (the factory default is password) and click Login. The home screen of the GS700TS Smart Switch browser interface displays. The Navigation Menu As shown below, logging in brings you to the view of the web browser interface. Figure 2-2 The NETGEAR - Netgear GS724TS | GS7xxTS User Manual - Page 26
services including technical support, online help and device information. • Using Screen and Table Options - Provides an explanation of specific GUI characteristics and tables for configuring the device. Device Management Buttons The NETGEAR GS700TS Smart Switch web browser GUI management - Netgear GS724TS | GS7xxTS User Manual - Page 27
services including NETGEAR online support and an online user guide in PDF format. For a detailed description of how to access and use these functions, see Chapter 9, "Online Help". Accessing Device Information Each screen of the web browser interface contains a help file with configuration - Netgear GS724TS | GS7xxTS User Manual - Page 28
GS700TS Smart Switch Software Administration Manual Figure 2-3 A help window for the screen opens. Figure 2-4 Using Screen and Table Options The NETGEAR GS700TS web browser interface contains screens and tables for configuring devices. This section describes the table options: • "Selecting an - Netgear GS724TS | GS7xxTS User Manual - Page 29
GS700TS Smart Switch Software Administration Manual Selecting an Entry To select an entry: 1. Check the entry's Select box. The selected entry is highlighted and the information appears in the first row, - Netgear GS724TS | GS7xxTS User Manual - Page 30
GS700TS Smart Switch Software Administration Manual To add an entry by creating a new entry in the table: 1. Enter the fields for the new entry in the provided fields in the first - Netgear GS724TS | GS7xxTS User Manual - Page 31
GS700TS Smart Switch Software Administration Manual Deleting an Entry To delete entries from a table: 1. Select the entries to be deleted. 2. Click DELETE to update the device. Special Table Options The NETGEAR web browser interface tables have a unique GUI design which includes the following - Netgear GS724TS | GS7xxTS User Manual - Page 32
GS700TS Smart Switch Software Administration Manual Quick Boxes Quick Boxes provide users with flexibility in configuring VLANs for all ports (on a stacking unit level) or LAGs. Clicking on the quick box toggles between the various options that exist for this field. A quick box appears to the right - Netgear GS724TS | GS7xxTS User Manual - Page 33
GS700TS Smart Switch Software Administration Manual Figure 2-13 4. Click again on the Unit 1 quick box of column headers. Clicking on the Unit No. or LAGS displays the ports in the unit or the LAGs: Figure 2-14 To display all ports in a stacking unit: 1. Click the unit number in the interface - Netgear GS724TS | GS7xxTS User Manual - Page 34
Smart Switch Software Administration Manual To display all interfaces in all stacking units: 1. Click All in the interface selection row. A confirmation window opens. Figure 2-15 2. Click OK. The screen displays a table of all interfaces in all stacking units. To display the LAG table: 1. Click LAGS - Netgear GS724TS | GS7xxTS User Manual - Page 35
GS700TS Smart Switch Software Administration Manual Figure 2-17 Introduction to the Web Browser Interface v1.0, June 2009 2-12 - Netgear GS724TS | GS7xxTS User Manual - Page 36
"Management" • "Device View" • "Stacking" • "SNMP" • "LLDP" The description that follows in this chapter describes configuring and managing system settings in the GS700TS Smart Switch. Management The Management menu enables configuration of general device information, defining an IP and configuring - Netgear GS724TS | GS7xxTS User Manual - Page 37
Smart Switch Software Administration Manual To configure system parameters: 1. Click System > Management > System Information. The System Information screen displays: Figure 3-1 The System Information screen contains the following fields: • System Name - Enter the user recent device reset. The - Netgear GS724TS | GS7xxTS User Manual - Page 38
by Stack or Standalone after resetting the device. • Jumbo Frames Status - Displays the Jumbo Frame status. • Jumbo Frames After Reset - Select the Jumbo Frame status. The possible field values are: - Enable - Enables Jumbo Frames. - Disable - Disables Jumbo Frames. This is the default value - Netgear GS724TS | GS7xxTS User Manual - Page 39
GS700TS Smart Switch Software Administration Manual IP Configuration The IP Configuration screen contains fields for assigning IP addresses. IP addresses are either defined as static or are retrieved using the Dynamic Host Configuration Protocol (DHCP). The DHCP assigns dynamic IP addresses to - Netgear GS724TS | GS7xxTS User Manual - Page 40
GS700TS Smart Switch Software Administration Manual • Subnet Mask - Enter the IP address mask. • Gateway - Enter the default gateway IP address. The following option is available: - Delete - Deletes the default gateway IP address. • Management VLAN ID - Select an existing VLAN to be defined as the - Netgear GS724TS | GS7xxTS User Manual - Page 41
GS700TS Smart Switch Software Administration Manual Figure 3-3 The Time Configuration screen contains the following fields: • Clock Source - Select the source used to set the system clock. The possible field values are: - Local - Indicates system time is set locally. This is the default value. - - Netgear GS724TS | GS7xxTS User Manual - Page 42
GS700TS Smart Switch Software Administration Manual SNTP Server Configuration The SNTP Server Configuration screen allows network administrators to define primary and secondary SNTP servers. The system time is initially retrieved through the primary SNTP server. If the device - Netgear GS724TS | GS7xxTS User Manual - Page 43
in which to control and manage the stack. The device software is downloaded separately for each of the stack members. All units in the stack must be running the same software version. The Stacking Master maintains switch stacking and configuration. The Stacking Master detects and reconfigures the - Netgear GS724TS | GS7xxTS User Manual - Page 44
Smart Switch Software Administration Manual • Inter-unit Stacking Link Failure • Unit Insertion • Removal of a Stacking Unit Operation Modes A stack unit can operate in one of the following modes: • Standalone - Indicates the device is operating as a single unit and is not connected in a stack - Netgear GS724TS | GS7xxTS User Manual - Page 45
the Gigabit Ethernet ports that are configurable by the user. • In Standalone mode all Gigabit Ethernet ports are available. • In Stack mode two dedicated Gigabit Ethernet ports are used for stack connection. The factory default of the device is stack mode. Use the System Information screen - Netgear GS724TS | GS7xxTS User Manual - Page 46
for example, dynamically learned MAC addresses are not saved. Each port in the stack has a specific Unit No., port type, and port number, which are part of both the configuration commands and the configuration files. Configuration files are managed only from the device Stacking Master. This includes - Netgear GS724TS | GS7xxTS User Manual - Page 47
GS700TS Smart Switch Software Administration Manual to a topology failure, the stacking member is no longer connected to the stack. The device can be booted, but it cannot be managed through the Stacking Master. The network manager can either reset the device defaults, or correct the topology - Netgear GS724TS | GS7xxTS User Manual - Page 48
GS700TS Smart Switch Software Administration Manual Switching the Stacking Master The Secondary Master replaces the Stacking Master if one of the following events occur: • The Stacking Master fails or is removed from the stack. • Links from the Stacking Master to the stacking members fails. • A soft - Netgear GS724TS | GS7xxTS User Manual - Page 49
GS700TS Smart Switch Software Administration Manual Figure 3-6 The Basic Stack Configuration screen contains the following fields: • Master Election - Select the mode by which the Stacking Master is elected. When the stack is powered up and completes the boot-up process, the Master unit is elected - Netgear GS724TS | GS7xxTS User Manual - Page 50
GS700TS Smart Switch Software Administration Manual Advanced The Stacking Advanced menu contains the following options: • "Stack Configuration" • "Stack Management" Stack Configuration The Advanced Stack Configuration screen allows network managers to define the stacking master election mode. A - Netgear GS724TS | GS7xxTS User Manual - Page 51
GS700TS Smart Switch Software Administration Manual - Force Master - Forces the selection of a Stacking Master. This causes the new Master unit to take control of the current configuration of the Stack. The old Master is reset and becomes the Secondary Master. Note that only Unit 1 or Unit 2 can be - Netgear GS724TS | GS7xxTS User Manual - Page 52
GS700TS Smart Switch Software Administration Manual • Unit No. After Reset - Select the stacking member's Unit number after the device is reset. The possible field values are: - 1-6 - Assigns the selected Unit number to the stacking member after the device is reset. - Auto - Assigns the Unit number - Netgear GS724TS | GS7xxTS User Manual - Page 53
Smart Switch Software Administration Manual • Privacy - Protects against the disclosure of message content. Cipher Block-Chaining (CBC) is used for encryption. Either authentication is enabled on an SNMP Key Management - Enter key generation, key updates, and key usage. The device supports SNMP - Netgear GS724TS | GS7xxTS User Manual - Page 54
Smart Switch Software Administration Manual Figure 3-9 The SNMPv1/v2 Community Configuration screen contains the following fields: • Management Station IP - Enter the management station IP address for which the Basic SNMP community is defined. • Management Station IP Mask - Enter the management - Netgear GS724TS | GS7xxTS User Manual - Page 55
GS700TS Smart Switch Software Administration Manual 5. Click APPLY to update the device. To add a new SNMP community: 1. Click System > SNMP > SNMPv1/v2 > Community Configuration. The Community Configuration screen displays. 2. Enter the Management Station IP, Management Station IP Mask and - Netgear GS724TS | GS7xxTS User Manual - Page 56
GS700TS Smart Switch Software Administration Manual Figure 3-10 The SNMPv1/v2 Trap Configuration screen contains the following fields: • Recipients IP - Enter the IP address to which the traps are sent. • Notification Type - (Configurable only if the Notification Version is SNMPv2.) Select the type - Netgear GS724TS | GS7xxTS User Manual - Page 57
Smart Switch Software Administration Manual To add a new SNMP trap: 1. Click System > SNMP > SNMPv1/v2 > Trap Configuration. The SNMPv1/v2 Trap Configuration screen displays. 2. Enter the fields in the first row. 3. Click ADD to update the device. To remove an SNMP trap: 1. Click System > SNMP - Netgear GS724TS | GS7xxTS User Manual - Page 58
GS700TS Smart Switch Software Administration Manual Figure 3-11 The SNMPv3 Engine ID screen contains the following fields: • Local Engine ID (10-64 Hex Characters) - Enter the local device Engine ID. The field value is a hexadecimal string. Each byte in hexadecimal character strings is two - Netgear GS724TS | GS7xxTS User Manual - Page 59
Smart Switch Software Administration Manual Figure 3-12 The SNMPv3 View Name screen contains the following field: • View Name - Enter the user- row. 3. Click ADD to update the device. To remove an SNMP View Name: 1. Click System > SNMP > SNMPv3 > View Name. The SNMPv3 View Name screen displays. - Netgear GS724TS | GS7xxTS User Manual - Page 60
GS700TS Smart Switch Software Administration Manual View Content The View Content screen allows the network manager to SNMP > SNMPv3 > View Content. The SNMPv3 View Content screen displays: Figure 3-13 The SNMPv3 View Content screen contains the following fields: Views • View Name - Select the user - Netgear GS724TS | GS7xxTS User Manual - Page 61
GS700TS Smart Switch Software Administration Manual 4. Select either Included or Excluded from the View Type provided field in the first row. 5. Click APPLY to update the device. To add a new SNMP OID entry: 1. Click System > SNMP > SNMPv3 > View Content. The SNMPv3 View Content screen displays. 2. - Netgear GS724TS | GS7xxTS User Manual - Page 62
GS700TS Smart Switch Software Administration Manual Figure 3-14 The SNMPv3 Community Configuration screen contains the following fields: • Management Station IP - Enter the management station IP address for which the SNMP community is defined. • Community String - Enter the password used to - Netgear GS724TS | GS7xxTS User Manual - Page 63
GS700TS Smart Switch Software Administration Manual To remove an SNMPv3 community: 1. Click System > SNMP > SNMPv3 > Community Configuration. The SNMPv3 Community Configuration screen displays. 2. Select the community entry. 3. Click DELETE to remove the entry. Group Configuration The SNMPv3 Groups - Netgear GS724TS | GS7xxTS User Manual - Page 64
GS700TS Smart Switch Software Administration Manual - SNMPv3 - SNMPv3 is defined for the group. • Security the assigned SNMP view. - Write - Management access is read-write. Changes are made to the assigned SNMP view. - Notify - Sends traps for the assigned SNMP view. 2. Select the SNMP group entry. - Netgear GS724TS | GS7xxTS User Manual - Page 65
Smart Switch Software Administration Manual 2. Select the group entry. 3. Click DELETE to remove the entry. User Configuration The SNMPv3 User Configuration screen provides information for creating users, assigning the user a group, an Engine Id, and Authentication attributes. To define SNMP users - Netgear GS724TS | GS7xxTS User Manual - Page 66
GS700TS Smart Switch Software Administration Manual - SHA Password - Users are authenticated using the HMAC-SHA-96 authentication level. The user must enter a password. - MD5 Key - Users are authenticated using the HMAC-MD5 algorithm. - SHA Key - Users are authenticated using the HMAC-SHA-96 - Netgear GS724TS | GS7xxTS User Manual - Page 67
GS700TS Smart Switch Software Administration Manual To remove an SNMPv3 user: 1. Click System > SNMP > SNMPv3 > Users Configuration. The SNMPv3 User Configuration screen displays. 2. Select the user entry. 3. Click DELETE to remove the entry. Global Trap Configuration The SNMPv3 Global Trap Settings - Netgear GS724TS | GS7xxTS User Manual - Page 68
Smart Switch Software Administration Manual • Authentication Notifications - Select the SNMP is the default value. 2. Select either Enable or Disable in the SNMP Notifications specific users, and the trap type sent. SNMP notification filters provide the following services: • Identifying Management - Netgear GS724TS | GS7xxTS User Manual - Page 69
Smart Switch Software Administration Manual The SNMPv3 Trap Configuration screen contains the following fields: • Recipients IP - Enter the IP address inform request if a response is not received. The default is 3 times. 2. Enter the Recipients IP address in the provided field in the first row. 3. - Netgear GS724TS | GS7xxTS User Manual - Page 70
GS700TS Smart Switch Software Administration Manual 2. Enter the Recipients IP address in the provided field in the first row. 3. Select either Traps or Informs in the Notification Type provided field in the first row. 4. Enter the User Name in the provided field in the first row. 5. Select the - Netgear GS724TS | GS7xxTS User Manual - Page 71
GS700TS Smart Switch Software Administration Manual Figure 3- update the device. To add a new trap filter name: 1. Click System > SNMP > SNMPv3 > Trap Filter Name. The SNMPv3 Trap Filter Name screen displays. 2. Enter managers to filter notifications. Managing System Settings v1.0, June 2009 3-36 - Netgear GS724TS | GS7xxTS User Manual - Page 72
GS700TS Smart Switch Software Administration Manual To define SNMPv3 Trap Filter settings: 1. Click System > SNMP > SNMPv3 > Trap Filter Content. The SNMPv3 Trap Filter Content screen displays: Figure 3-20 The SNMPv3 Trap Filter Content screen contains the following fields: Trap Filter - Netgear GS724TS | GS7xxTS User Manual - Page 73
Smart Switch Software Administration Manual To add a new trap filter content entry: 1. Click System > SNMP Layer Discovery Protocol (LLDP) allows network managers to troubleshoot and enhance network management Value (TLV) field. LLDP devices must support chassis and port ID advertisement, as well as - Netgear GS724TS | GS7xxTS User Manual - Page 74
Smart Switch Software Administration Manual Basic The LLDP Basic menu contains the following option: • "LLDP Configuration" LLDP Configuration The Basic LLDP Configuration screen allows network managers to assign global LLDP and LLDP-MED (LLDP - Media Endpoint Discovery) parameters. To configure - Netgear GS724TS | GS7xxTS User Manual - Page 75
Smart Switch Software Administration Manual • TLV Advertised Interval - Enter the rate in seconds at which LLDP advertisement updates are sent. The possible field range is 5 - 32768 seconds. The default : • "LLDP Configuration" • "LLDP Port Settings" Managing System Settings v1.0, June 2009 3-40 - Netgear GS724TS | GS7xxTS User Manual - Page 76
GS700TS Smart Switch Software Administration Manual • "LLDP-MED Network Policy" • "LLDP-MED Port Settings" • "Local Information" • "Neighbors Information" • , "LLDP Statistics" LLDP Configuration The Advanced LLDP Configuration screen allows network managers to assign global LLDP and LLDP-MED (LLDP - Netgear GS724TS | GS7xxTS User Manual - Page 77
Smart Switch Software Administration Manual • LLDPDU Handling - Select LLDPDU (LLDP Data Unit) packet handling when LLDP is disabled. The possible field values are: - Flooding - LLDPDU packets are flooded to all ports in the system. - Filtering - LLDPDU packets are filtered. This is the default reset - Netgear GS724TS | GS7xxTS User Manual - Page 78
Smart Switch Software Administration Manual contains the following fields: • Interface - Displays the specific interface for which LLDP parameters are defined. • Admin Disables LLDP on the interface. • Management IP Address - Select the management IP address that is advertised from the interface. - Netgear GS724TS | GS7xxTS User Manual - Page 79
GS700TS Smart Switch Software Administration Manual - AutoAdvertise - Advertises the device's current IP address as the management IP address. • Notification - Select the topology change notification status on the interface. - Enable - Enables topology change notification on the interface. This is - Netgear GS724TS | GS7xxTS User Manual - Page 80
GS700TS Smart Switch Software Administration Manual • Provides troubleshooting information. LLDP-MED sends network managers alerts for: - Port speed and duplex mode conflicts - QoS policy misconfigurations To configure LLDP-MED Network Policy: 1. Click System > LLDP > Advanced > LLDP-MED Network - Netgear GS724TS | GS7xxTS User Manual - Page 81
GS700TS Smart Switch Software Administration Manual - Streaming Video - Indicates the network policy is defined for a Streaming Video application. - Video Signaling - Indicates the network policy is defined for a Video Signaling application. • VLAN ID - Enter the VLAN ID for which the network policy - Netgear GS724TS | GS7xxTS User Manual - Page 82
GS700TS Smart Switch Software Administration Manual To remove a network policy entry: 1. Settings screen contains parameters for assigning LLDP-MED network policies to specific ports. To configure LLDP-MED port settings: 1. Click System > LLDP > . 3-47 v1.0, June 2009 Managing System Settings - Netgear GS724TS | GS7xxTS User Manual - Page 83
GS700TS Smart Switch Software Administration Manual - Disable - Disables notification on the selected port. • Network Policies - Click on the gold fields: Device Information • Chassis ID Subtype - Displays the chassis ID type. For example, MAC address. Managing System Settings v1.0, June 2009 3-48 - Netgear GS724TS | GS7xxTS User Manual - Page 84
GS700TS Smart Switch Software Administration Manual • Chassis ID - Displays the chassis identification of the device transmitting the LLDP frame. • System fields: Managed Address • Address SubType - Displays the managed address subtype. For example, IPv4. • Address - Displays the managed address. • - Netgear GS724TS | GS7xxTS User Manual - Page 85
GS700TS Smart Switch Software Administration Manual MAC/PHY Details • Auto-Negotiation Supported - Displays the port speed auto-negotiation support status. The possible values are: - True - Indicates auto-negotiation is supported on the port. - False - Indicates auto-negotiation is not supported on - Netgear GS724TS | GS7xxTS User Manual - Page 86
Smart Switch Software Administration Manual • VLAN Type - Displays the VLAN type for which the network policy is defined. The possible field values are: - Tagged - Indicates the network policy is defined for tagged VLANs. - Untagged - Indicates the network policy is defined for untagged VLANs - Netgear GS724TS | GS7xxTS User Manual - Page 87
Smart Switch Software Administration Manual • Port ID SubType - Displays the port ID subtype. For example, MAC address. • Port ID - Displays the port identification of the port transmitting the LLDP frame Neighbors Information window opens: Figure 3-28 Managing System Settings v1.0, June 2009 3-52 - Netgear GS724TS | GS7xxTS User Manual - Page 88
GS700TS Smart Switch Software Administration Manual The Neighbors Information window contains the following fields: Port Details • Local Port - Displays the port number. • MSAP Entry - Displays the device's Media Service Access Point (MSAP) entry number. Basic Details • Chassis ID SubType - Displays - Netgear GS724TS | GS7xxTS User Manual - Page 89
GS700TS Smart Switch Software Administration Manual • Auto-Negotiation Enabled - Frame Size - Displays the advertised maximum frame size that is supported on the port. 802.1 VLAN and Protocol • PVID - Displays the advertised port VLAN ID. PPVIDs • VID - Displays the protocol VLAN ID. Managing - Netgear GS724TS | GS7xxTS User Manual - Page 90
GS700TS Smart Switch Software Administration Manual • Supported - Displays the supported Port and Protocol VLAN IDs. • Enabled - Displays the Enabled Port and Protocol VLAN IDs. VLAN IDs • VID - Displays the Port and Protocol VLAN ID. • VLAN Names - Displays the advertised VLAN names. Protocol IDs - Netgear GS724TS | GS7xxTS User Manual - Page 91
GS700TS Smart Switch Software Administration Manual Location Information • Civic - Displays the device's civic or street address location. For for tagged VLANs. - Untagged - Indicates the network policy is defined for untagged VLANs. • User Priority - Displays the network policy user priority. - Netgear GS724TS | GS7xxTS User Manual - Page 92
GS700TS Smart Switch Software Administration Manual Figure 3-29 The LLDP Statistics the stacking member for which the LLDP statistics are displayed. • Tx Frames Total - Indicates the total amount of LLDP packets transmitted on the port. • Rx Frames - : 3-57 v1.0, June 2009 Managing System Settings - Netgear GS724TS | GS7xxTS User Manual - Page 93
GS700TS Smart Switch Software Administration Manual - Discarded - Indicates the total number of TLVs discarded on were aged out on the port. 2. Select a stacking member in the Unit No. field. The LLDP statistics for the stacking member are displayed. Managing System Settings v1.0, June 2009 3-58 - Netgear GS724TS | GS7xxTS User Manual - Page 94
features under the following main headings: • "Ports" • "LAG" • "VLAN" • "Voice VLAN" • "STP" • "Multicast" • "Address Table" The description that follows in this chapter describes configuring and managing switching settings in the GS700TS Smart Switch. Ports The Ports menu contains the following - Netgear GS724TS | GS7xxTS User Manual - Page 95
GS700TS Smart Switch Software Administration Manual Figure 4-1 The Port Configuration screen contains the following fields: • Port - Displays the port number. • Port Description - Enter a user-defined port description. • Status - Select the port's operational status. The possible field values are: - Netgear GS724TS | GS7xxTS User Manual - Page 96
GS700TS Smart Switch Software Administration Manual - 10M - Indicates the port is currently operating at 10 Mbps. - 100M - Indicates the port is currently operating at 100 Mbps. - 1000M - Indicates the port is currently operating at 1000 Mbps. • Duplex Mode - Select the port duplex mode. This field - Netgear GS724TS | GS7xxTS User Manual - Page 97
GS700TS Smart Switch Software Administration Manual - MDI (Media Dependent Interface) - Connects end stations. - MDIX (Media Dependent Interface with Crossover) - Connects HUBs and switches. - Auto - Provides automatic cable type detection. • LAG ID - Select the LAG ID to which the selected port is - Netgear GS724TS | GS7xxTS User Manual - Page 98
GS700TS Smart Switch Software Administration Manual Basic The LAG Basic menu contains the following options: • "LAG Configuration" • "LAG Membership" LAG Configuration The Basic LAG Configuration screen contains fields for configuring LAG parameters. The system supports 8 LAGs, and each LAG can - Netgear GS724TS | GS7xxTS User Manual - Page 99
Smart Switch Software Administration Manual - Enable - Reactivates the suspended LAG. - Disable - Does not reactivate the suspended LAG. • Type - Displays the LAG type. The possible field values are: - Static - Indicates the LAG is configured manually. - LACP - Indicates the LAG is configured - Netgear GS724TS | GS7xxTS User Manual - Page 100
GS700TS Smart Switch Software Administration Manual LAG Membership The Basic LAG Membership screen allows network managers to assign ports to LAGs. To assign ports to LAGs: 1. Click Switching > LAG > Basic > LAG Membership. The Basic LAG Membership screen displays: Figure 4-3 The Basic LAG - Netgear GS724TS | GS7xxTS User Manual - Page 101
Smart Switch Software Administration Manual Figure 4-4 Advanced The LAG Advanced menu contains the following options: • "LAG Configuration" • "LAG Membership" • "LACP Configuration" • "LACP Port Configuration" LAG Configuration The Advanced LAG Configuration screen contains fields for configuring - Netgear GS724TS | GS7xxTS User Manual - Page 102
GS700TS Smart Switch Software Administration Manual Figure 4-5 The Advanced LAG Configuration screen contains the following fields: • Interface - Displays the LAG number. • Description - Enter a user-defined LAG description. • Status - Select the current link operation. The possible field values - Netgear GS724TS | GS7xxTS User Manual - Page 103
GS700TS Smart Switch Software Administration Manual - 1000M - Indicates the LAG is currently operating at 1000 Mbps. • Duplex Mode - Displays the duplex mode of the LAG. The possible field values are: - Full - Indicates the interface supports transmission between the device and its link partner in - Netgear GS724TS | GS7xxTS User Manual - Page 104
Smart Switch Software Administration Manual Figure 4-6 The Advanced LAG Membership screen contains the following fields: • LAG ID - Select the LAG ID. • LAG Name - Displays the user-defined LAG name. • LAG Type - Select the LAG type. The possible field values are: - Static - Indicates the LAG - Netgear GS724TS | GS7xxTS User Manual - Page 105
GS700TS Smart Switch Software Administration Manual Figure 4-7 LACP Configuration Aggregated links can be set up manually or automatically established by enabling LACP on the relevant links. Aggregated ports can be linked into link-aggregation port-groups. Each group is comprised of ports with the - Netgear GS724TS | GS7xxTS User Manual - Page 106
GS700TS Smart Switch Software Administration Manual The LACP Configuration screen contains the following field: • LACP System Priority - Enter the system priority value. The field range is 1-65535. The field default is 1. 2. Enter the LACP System Priority in the provided field. 3. Click APPLY to - Netgear GS724TS | GS7xxTS User Manual - Page 107
GS700TS Smart Switch Software Administration Manual 2. Select the interface. 3. Enter the LACP Priority and select the Timeout in the provided fields in the first row. 4. Click APPLY to update the device. VLAN VLANs are logical subgroups with a Local Area Network (LAN) which combine user stations - Netgear GS724TS | GS7xxTS User Manual - Page 108
GS700TS Smart Switch Software Administration Manual To define VLAN properties: 1. Click Switching > VLAN > Basic > VLAN Configuration. The Basic VLAN Configuration screen displays: Figure 4-10 The Basic VLAN Configuration screen contains the following fields: • VLAN ID - Enter the VLAN ID. The - Netgear GS724TS | GS7xxTS User Manual - Page 109
Smart Switch Software Administration Manual To remove a VLAN: Note: Prior to deleting a VLAN, ensure all multicast group configuration entries associated with the VLAN are deleted. Refer to "Multicast Group Configuration" for deleting multicast group entries. 1. Click Switching > VLAN > Basic > VLAN - Netgear GS724TS | GS7xxTS User Manual - Page 110
GS700TS Smart Switch Software Administration Manual The Advanced VLAN Configuration screen contains the following fields: • VLAN ID - Enter the VLAN ID. The field range is 2-4093. • VLAN Name - Enter the user-defined VLAN name. • Type - Displays the VLAN type. The possible field values are: - Static - Netgear GS724TS | GS7xxTS User Manual - Page 111
GS700TS Smart Switch Software Administration Manual Figure 4-12 The VLAN Membership screen contains the following fields: • VLAN ID - Select the VLAN ID to be displayed and configured. VLAN ID 1 cannot be modified. • VLAN Name - Displays the name of the VLAN. • VLAN Type - Displays the VLAN type. - Netgear GS724TS | GS7xxTS User Manual - Page 112
GS700TS Smart Switch Software Administration Manual To tag or untag selected ports or LAGs: 1. Click Switching > VLAN > Advanced > VLAN Membership. The VLAN Membership screen displays. 2. Click a gold button to display the ports or LAGs. 3. Click the boxes below the selected ports or LAGs to mark - Netgear GS724TS | GS7xxTS User Manual - Page 113
GS700TS Smart Switch Software Administration Manual To view VLAN untagged port members: 1. Click Switching > VLAN > Advanced > VLAN Membership. The VLAN Membership screen displays. 2. Click UNTAGGED PORT MEMBERS. The VLAN Untagged Ports screen opens: Figure 4-14 Port PVID Configuration The Port - Netgear GS724TS | GS7xxTS User Manual - Page 114
GS700TS Smart Switch Software Administration Manual Figure 4-15 The Port PVID Configuration screen contains the following fields: • Interface - Displays the interface (port number or LAG number) to which the PVID tag is assigned. • PVID - Enter the PVID value. The possible field range is 1-4093. 2. - Netgear GS724TS | GS7xxTS User Manual - Page 115
GS700TS Smart Switch Software Administration Manual There are two operational modes for IP Phones: • IP phones are configured with VLAN-mode as enabled, ensuring that tagged packets are used for all communications. • If the IP phone's VLAN-mode is disabled, the phone uses untagged packets. The phone - Netgear GS724TS | GS7xxTS User Manual - Page 116
GS700TS Smart Switch Software Administration Manual The Voice VLAN Basic Properties screen contains the following fields: • VoiceVLAN Status - Select the VoiceVLAN status on the device. The possible field values are: - Disable - Disables Voice VLAN on the device. This is the default value. - Enable - Netgear GS724TS | GS7xxTS User Manual - Page 117
GS700TS Smart Switch Software Administration Manual Properties The Voice VLAN Advanced Properties screen contains information about Voice VLAN on the device, including the ports enabled and included in the Voice VLAN. To define Voice VLAN settings: 1. Click Switching > Voice VLAN > Advanced > - Netgear GS724TS | GS7xxTS User Manual - Page 118
GS700TS Smart Switch Software Administration Manual • Voice VLAN Aging Time - Enter the Voice VLAN aging time. The Voice VLAN aging time sets the maximum inactivity time for a Voice VLAN port member after its MAC Address is aged out. If the time since the last MAC Address with telephony MAC Address - Netgear GS724TS | GS7xxTS User Manual - Page 119
defined aging time. If the MAC Address of the IP phones OUI was added manually to a port/LAG in the Voice VLAN, the user cannot add it to the Voice VLAN in Auto mode, only in Manual mode. • Voice VLAN Security - Select the port/LAG security mode on the Voice VLAN. Port Security ensures that packets - Netgear GS724TS | GS7xxTS User Manual - Page 120
Smart Switch Software Administration Manual Figure 4-19 The Voice VLAN OUI screen contains the following fields: • Telephony OUI(s) - Enter the OUI to enable on the Voice VLAN. The following OUIs are enabled by default. - 00-E0-BB - Assigned to 3COM IP Phones. - 00-03-6B - Assigned to Cisco IP - Netgear GS724TS | GS7xxTS User Manual - Page 121
Smart Switch Software Administration Manual To remove a Voice VLAN OUI: 1. Click Switching > Voice VLAN > Advanced > OUI. The Voice VLAN OUI screen displays. 2. Select the OUI entry. 3. Click DELETE to remove the entry. To restore Voice VLAN OUI factory defaults: 1. Click Switching > Voice VLAN - Netgear GS724TS | GS7xxTS User Manual - Page 122
GS700TS Smart Switch Software Administration Manual Figure 4-20 The Basic STP Configuration screen contains the following default value. - MSTP - Enables Multiple STP on the device. • Configuration Name - Enter the user-defined configuration name. The maximum length is 32 characters. • Configuration - Netgear GS724TS | GS7xxTS User Manual - Page 123
GS700TS Smart Switch Software Administration Manual • Filtering - Filters BPDU packets when Spanning Tree is disabled on an interface or globally on the device. Filtering is used when a bridge interconnects two regions and there is a need to have a separate spanning tree for each region. Filtering - Netgear GS724TS | GS7xxTS User Manual - Page 124
GS700TS Smart Switch Software Administration Manual Advanced The STP Advanced menu contains the following options: • "STP Configuration" • "CST Configuration" • "CST Port Configuration" • "RSTP" • "MST Configuration" • "MST Port Configuration" STP Configuration The Advanced STP Configuration screen - Netgear GS724TS | GS7xxTS User Manual - Page 125
GS700TS Smart Switch Software Administration Manual The Advanced STP Configuration screen contains the following fields: STP Configuration • Spanning default. - Bridging - Indicates BPDUs are bridged to all ports in the VLAN. Status • Bridge Identifier - Displays the Bridge priority and MAC address - Netgear GS724TS | GS7xxTS User Manual - Page 126
GS700TS Smart Switch Software Administration Manual • Forward Delay (Sec) - Displays the device Forward Delay Time. The Forward Delay Time is the amount of time in seconds a bridge remains in a listening and learning state before forwarding packets. The default is 15 seconds. • Hello Time (Sec) - - Netgear GS724TS | GS7xxTS User Manual - Page 127
GS700TS Smart Switch Software Administration Manual Figure 4-22 The CST Configuration screen contains the following fields: CST Configuration • Bridge Priority - Enter the bridge priority value. When switches or bridges are running STP, each is assigned a priority. After exchanging BPDUs, the - Netgear GS724TS | GS7xxTS User Manual - Page 128
GS700TS Smart Switch Software Administration Manual • Root Port - Displays the port number that offers the lowest cost path from this bridge to the Root Bridge. This field is significant when the - Netgear GS724TS | GS7xxTS User Manual - Page 129
GS700TS Smart Switch Software Administration Manual The CST Port Configuration screen contains the following fields: • Interface - Displays the port or LAG for which the STP information is displayed. • STP Status - Select the STP status on the interface. The possible field values are: - Enable - - Netgear GS724TS | GS7xxTS User Manual - Page 130
GS700TS Smart Switch Software Administration Manual 2. Select the STP Status and Fast Link status in the provided fields. 3. Enter the Path Cost in the provided field. 4. Select the Priority from the - Netgear GS724TS | GS7xxTS User Manual - Page 131
GS700TS Smart Switch Software Administration Manual - Designated - Indicates the port or LAG through which the designated switch is attached to the LAN. - Alternate - Provides an alternate path to the root switch from the root interface. - Backup - Provides a backup path to the designated port path - Netgear GS724TS | GS7xxTS User Manual - Page 132
Smart Switch Software Administration Manual - Disables - Disables point-to-point link. - Auto - Enables the device to automatically establish a point-to-point link. This is the default device. MST Configuration Multiple Spanning Tree (MST) allows the user to group and associate VLANs to spanning tree - Netgear GS724TS | GS7xxTS User Manual - Page 133
Smart Switch Software Administration Manual Figure 4-25 The MST Configuration screen contains the following fields: • MST ID - Specifies the instance to which the VLAN 0-61440. The field default is 32768. • VLAN ID - Maps the selected VLANs to the selected instance. Each VLAN belongs to one instance - Netgear GS724TS | GS7xxTS User Manual - Page 134
Smart Switch Software Administration Manual Figure 4-26 The MST Port Configuration screen contains the following fields: • Select MST - Select an MST to be displayed. • Interface - Displays the Port or LAG always be 1-200,000,000. The field default is 100. • Port ID - Indicates the port priority - Netgear GS724TS | GS7xxTS User Manual - Page 135
Smart Switch Software Administration Manual - Listening - Indicates that the port is in Listening mode. The port cannot forward traffic nor can it learn MAC addresses. - Learning - Indicates that the port is in Learning mode. The port cannot forward traffic, however it can learn new MAC addresses - Netgear GS724TS | GS7xxTS User Manual - Page 136
GS700TS Smart Switch Software Administration Manual Multicast Multicast forwarding allows a single packet to be forwarded to multiple destinations. L2 Multicast service is based on L2 switch receiving a single packet addressed to a specific Multicast address. Multicast forwarding creates copies of - Netgear GS724TS | GS7xxTS User Manual - Page 137
GS700TS Smart Switch Software Administration Manual To configure Basic IGMP Snooping: 1. Click Switching > Multicast > Basic > IGMP Snooping Configuration. The Basic IGMP Snooping Configuration screen displays: Figure 4-27 The Basic IGMP Snooping Configuration screen contains the following fields: - Netgear GS724TS | GS7xxTS User Manual - Page 138
GS700TS Smart Switch Software Administration Manual 2. Select the VLAN ID entry in the Interface Settings table. 3. Snooping Configuration To configure Advanced IGMP Snooping: 1. Click Switching > Multicast > Advanced > IGMP Snooping Configuration. The Advanced IGMP Snooping Configuration screen - Netgear GS724TS | GS7xxTS User Manual - Page 139
GS700TS Smart Switch Software Administration Manual The Advanced IGMP Snooping Configuration screen contains the following fields: IGMP Snooping Configuration • Status - Select the IGMP Snooping status on the device. IGMP Snooping is operational if both the Status and Bridge Multicast Filtering - Netgear GS724TS | GS7xxTS User Manual - Page 140
GS700TS Smart Switch Software Administration Manual 2. Select the IGMP Snooping Status and Bridge Multicast Filtering Status in the provided fields. 3. Click APPLY to update the device. To configure IGMP Snooping on a VLAN: 1. Click Switching > Multicast > Advanced > IGMP Snooping Configuration. The - Netgear GS724TS | GS7xxTS User Manual - Page 141
GS700TS Smart Switch Software Administration Manual • VLAN Name - Displays the user-defined VLAN name. • Multicast Address - Enter the Multicast group MAC Address associated with the VLAN. • Type - Indicates the VLAN ID status in relation to the Multicast group. - Static - Attaches the VLAN ID to - Netgear GS724TS | GS7xxTS User Manual - Page 142
GS700TS Smart Switch Software Administration Manual The Multicast Group Membership screen contains the following information: Multicast Group Membership • VLAN ID - Enter the VLAN ID. • VLAN Name - Displays the user defined VLAN name. • Multicast Address - Enter the Multicast group MAC address. - Netgear GS724TS | GS7xxTS User Manual - Page 143
GS700TS Smart Switch Software Administration Manual Figure 4-31 The Multicast Forward All screen contains the following information: Multicast Forward All • VLAN ID - Enter the VLAN ID. • VLAN Name - Displays the user defined VLAN name. Multicast Forward All • Interface - Displays the interface for - Netgear GS724TS | GS7xxTS User Manual - Page 144
Smart Switch Software Administration Manual 5. Click APPLY to update the device. Address Table Packets addressed to destinations stored in either the Static or Dynamic databases are immediately forwarded to the port. The Dynamic MAC Address Table can be sorted by interface, VLAN, or MAC Address - Netgear GS724TS | GS7xxTS User Manual - Page 145
GS700TS Smart Switch Software Administration Manual To query the Basic Address Table: 1. Click Switching > Address Table > Basic > Address Table. The Basic Address Table screen displays: Figure 4-32 The Basic Address Table screen contains the following fields: • Search By - Display the MAC Address - Netgear GS724TS | GS7xxTS User Manual - Page 146
GS700TS Smart Switch Software Administration Manual To delete all addresses from the Basic Address Table: 1. Click Switching > Address Table > Basic > Address Table. The Basic Address Table screen displays. 2. Click CLEAR ALL to delete all entries in the address table. Advanced The Address Table - Netgear GS724TS | GS7xxTS User Manual - Page 147
GS700TS Smart Switch Software Administration Manual • Interface - Enter the interface to which the entry refers. • Status - Select the MAC Address duration period status within the table. The possible field values are: - Permanent - Indicates the MAC address is permanent. - Delete on Reset - - Netgear GS724TS | GS7xxTS User Manual - Page 148
Smart Switch Software Administration Manual • Address Aging - Enter the amount of time the MAC address remains in the Dynamic MAC Address table before it is timed out if no traffic from the source is detected. The range is 10 - 630 seconds. The default value is 300 seconds. 2. Enter the Address - Netgear GS724TS | GS7xxTS User Manual - Page 149
GS700TS Smart Switch Software Administration Manual - Interface - Display the MAC Address table entries that relate to the specific interface. • VLAN ID - Displays the VLAN ID number to which the entry refers. • MAC Address - Displays the MAC address to which the entry refers. • Interface - Displays - Netgear GS724TS | GS7xxTS User Manual - Page 150
configuring and managing QoS settings in the GS700TS Smart Switch. CoS Quality of Service specific values. All packets matching the user-defined specifications are classified together. • Action - Defines traffic management For example, under SP, Voice over IP (VoIP) traffic can be prioritized so that - Netgear GS724TS | GS7xxTS User Manual - Page 151
GS700TS Smart Switch Software Administration Manual • Weighted Round Robin - Ensures that a single Configuration" • "CoS Interface Configuration" • "Queue" • "Bandwidth" CoS Global Configuration The CoS Global Configuration screen contains information for enabling QoS globally. To configure - Netgear GS724TS | GS7xxTS User Manual - Page 152
GS700TS Smart Switch Software Administration Manual Figure 5-1 The CoS Global Configuration screen contains the following: • QoS Status - Select whether QoS is enabled or disabled on the device. The possible values are: - Enable - Enables QoS globally. This is the default value. - Disable - - Netgear GS724TS | GS7xxTS User Manual - Page 153
GS700TS Smart Switch Software Administration Manual • Trust Mode - Select which packet fields to Configuration The CoS Interface Configuration screen contains information for configuring the default CoS value on a selected interface. After CoS has been configured, the device's original CoS default - Netgear GS724TS | GS7xxTS User Manual - Page 154
GS700TS Smart Switch Software Administration Manual The CoS Interface Configuration screen contains the following fields: • Interface - Displays the interface for which the default CoS parameters are defined. • Default CoS - Select the default CoS value for incoming packets to the selected interface - Netgear GS724TS | GS7xxTS User Manual - Page 155
Smart Switch Software Administration Manual maximum number of data bits transmitted within a specific time interval. • Committed Information Rate - time increment. The Bandwidth screen allows the network manager to define Ingress Rate Limit and Egress Shaping Configuring QoS 5-6 v1.0, June 2009 - Netgear GS724TS | GS7xxTS User Manual - Page 156
GS700TS Smart Switch Software Administration Manual - Disable - Disable - Disables egress shaping rate on the interface. This is the default value. • Egress Shaping Rates CIR - Enter the Egress Shaping Committed "Policy Table Mapping" • "Policy Binding" 5-7 Configuring QoS v1.0, June 2009 - Netgear GS724TS | GS7xxTS User Manual - Page 157
GS700TS Smart Switch Software Administration Manual CoS to Queue Mapping The CoS to Queue Mapping supported (Lowest, Low, Normal and High). The High Queue is reserved for special traffic and is not recommended for use. Restore Default Mapping • Restore Defaults - Restore the device factory defaults - Netgear GS724TS | GS7xxTS User Manual - Page 158
GS700TS Smart Switch Software Administration Manual 4. Click APPLY to update the device. DSCP to Queue Mapping The DSCP To Queue Mapping screen contains the incoming packet's DSCP value. The following DSCP In values are predefined: 3, 11, 19, 27, 35, 43, 51, 59. 5-9 Configuring QoS v1.0, June 2009 - Netgear GS724TS | GS7xxTS User Manual - Page 159
GS700TS Smart Switch Software Administration Manual • Queue - Select the traffic-forwarding queue to which the DSCP is mapped. Four traffic priority queues are supported (Lowest, Low, Normal and High). The High Queue is reserved for special traffic and is not recommended for use. Restore Default - Netgear GS724TS | GS7xxTS User Manual - Page 160
Smart Switch Software Administration Manual • IPv4 ACL - Select a user-defined IPv4 ACL from the list. • Or - Indicates the criteria used to match class maps with an IP ACL address. Matches either IPv4 or IPv6 or MAC to the packet. • IPv6 ACL - Select a user-defined IPv6 Before configuring policies - Netgear GS724TS | GS7xxTS User Manual - Page 161
Smart Switch Software Administration Manual with other policers in another device. Traffic from two different ports can be aggregated for policing purposes. the following fields: • Policy Name - Define the user-defined policy name. • Class Map - Select a class Configuring QoS v1.0, June 2009 5-12 - Netgear GS724TS | GS7xxTS User Manual - Page 162
GS700TS Smart Switch Software Administration Manual 7. Select an Action and define a new value in the first row Binding screen contains the following fields: Policy Binding Table • Policy Name - Displays the user-defined policy name. Port Selection Table • Port Number - Displays the bound and unbound - Netgear GS724TS | GS7xxTS User Manual - Page 163
in the GS700TS Smart Switch. Management Security The Management Security menu contains the following options: • "User Configuration" • "RADIUS" • "TACACS+" • "Authentication List" User Configuration The User Configuration menu contains the following options: • "Change Password" 6-1 V1.0, June 2009 - Netgear GS724TS | GS7xxTS User Manual - Page 164
Smart Switch Software Administration Manual Change Password The Change Password screen contains parameters for configuring device passwords. Authentication on this device uses only a password, not a username. To change the device password: 1. Click Security > Management Security > User Configuration - Netgear GS724TS | GS7xxTS User Manual - Page 165
GS700TS Smart Switch Software Administration Manual Figure 6-2 The RADIUS screen contains the following fields: • Host IP Address - Enter the RADIUS Server IP address. • Authentication Port - Enter the authentication port number. The authentication port is used to verify the RADIUS Server - Netgear GS724TS | GS7xxTS User Manual - Page 166
GS700TS Smart Switch Software Administration Manual • Active - Select the priority in which the add a new RADIUS Server entry: 1. Click Security > Management Security > RADIUS. The RADIUS screen displays. 2. Enter the Host IP Address, Authentication Port, Number of Retries, Timeout for Reply, Dead - Netgear GS724TS | GS7xxTS User Manual - Page 167
Smart Switch Software Administration Manual Figure 6-3 The RADIUS Accounting Server Configuration screen contains the following fields: • Accounting Mode - Select the RADIUS accounting method. The possible field values are: - None - Indicates RADIUS accounting is disabled. This is the default - Netgear GS724TS | GS7xxTS User Manual - Page 168
GS700TS Smart Switch Software Administration Manual TACACS+ Terminal Access Controller Access Control System (TACACS+) provides centralized security user access validation. The system supports up-to 2 TACACS+ servers. TACACS+ provides a centralized user management system, while still retaining - Netgear GS724TS | GS7xxTS User Manual - Page 169
GS700TS Smart Switch Software Administration Manual • Single Connection - Select whether a single open a new TACACS+ server entry: 1. Click Security > Management Security > TACACS+. The TACACS+ screen displays. 2. Enter the Host IP Address, Key String, Authentication Port and Timeout for Reply in - Netgear GS724TS | GS7xxTS User Manual - Page 170
GS700TS Smart Switch Software Administration Manual Authentication List The Authentication List screen contains information for defining an authentication method for the selected Authentication List. For example, if the user selects TACACS+ as the first entry, None as the second, this causes - Netgear GS724TS | GS7xxTS User Manual - Page 171
GS700TS Smart Switch Software Administration Manual 3. Select the order Configuration" 802.1x Configuration The Basic 802.1x Configuration screen allows network managers to configure network authentication parameters. In addition, the Guest VLAN option is enabled from the Basic 802.1x Configuration - Netgear GS724TS | GS7xxTS User Manual - Page 172
GS700TS Smart Switch Software Administration Manual The Basic 802.1x Configuration screen contains the following fields: • Port Based Authentication State - Select whether port-based authentication is enabled or disabled on the device. The possible field values - Netgear GS724TS | GS7xxTS User Manual - Page 173
GS700TS Smart Switch Software Administration Manual 6. If you selected Disable for the Port Based Configuration" • "Port Authentication" 802.1x Configuration The Advanced 802.1x Configuration screen allows network managers to configure network authentication parameters. In addition, the Guest VLAN - Netgear GS724TS | GS7xxTS User Manual - Page 174
GS700TS Smart Switch Software Administration Manual • Authentication Method - Enter the authentication method used for port authentication. The possible field values are: - RADIUS, None - Indicates port authentication is first attempted through the - Netgear GS724TS | GS7xxTS User Manual - Page 175
GS700TS Smart Switch Software Administration Manual To configure port-based authentication global properties: - Displays the interfaces. • User Name - Displays the supplicant (client) user name, once the user is authenticated. • Port Control via the port. Managing Security v1.0, June 2009 6-13 - Netgear GS724TS | GS7xxTS User Manual - Page 176
GS700TS Smart Switch Software Administration Manual • Guest VLAN - Select whether the Guest VLAN is enabled or disabled on the port. The default VLAN cannot be defined as a Guest VLAN. The possible field values are: - Enable - Enables using a Guest VLAN for the unauthorized port. If a Guest VLAN is - Netgear GS724TS | GS7xxTS User Manual - Page 177
GS700TS Smart Switch Software Administration Manual 3. Select the Port Control state, Guest VLAN mode and Periodic Reauthentication status in the provided fields in the first row. 4. If you selected Enable as the Periodic Reauthentication status, enter the Reauthentication - Netgear GS724TS | GS7xxTS User Manual - Page 178
GS700TS Smart Switch Software Administration Manual Figure 6-9 The Storm Only - Counts Broadcast traffic only. This mode is enabled by default. • Broadcast Rate Threshold - Enter the maximum rate (kilobits per 3500 - 1000000. The default value for both FE and GE ports is 3500. 6-16 v1.0, June 2009 - Netgear GS724TS | GS7xxTS User Manual - Page 179
GS700TS Smart Switch Software Administration Manual 2. Select the interface. configured. Locked port security monitors both received and learned packets that are received on specific ports. Access to the locked port is limited to users with specific MAC addresses. These addresses are either manually - Netgear GS724TS | GS7xxTS User Manual - Page 180
GS700TS Smart Switch Software Administration Manual Figure 6-10 The Port Security screen contains the following fields: • Interface - Displays the port or LAG name. • Status - Select the port security status. The possible field values are: - Locked - Indicates the port is currently locked. - - Netgear GS724TS | GS7xxTS User Manual - Page 181
Smart Switch Software Administration Manual - Forward - Forwards packets from an unknown source without learning the MAC address. - Discard - Discards packets from any unlearned source. This is the default whether protected or unprotected. The default configuration is unprotected. To define protected - Netgear GS724TS | GS7xxTS User Manual - Page 182
Smart Switch Software Administration Manual or LAG's managers to define classification actions and rules for specific ingress ports. Packets entering an ingress port, with an active ACL, are either admitted or denied entry and the ingress port is disabled. If they are denied entry, the user - Netgear GS724TS | GS7xxTS User Manual - Page 183
GS700TS Smart Switch Software Administration Manual • "MAC Rules" • "MAC Binding Configuration" • "IPv4 ACL" • "IPv4 Rules" • "IPv4 Binding Configuration" • "IPv6 ACL" • "IPv6 Rules" • "IPv6 Binding Configuration" • "Binding Table" MAC ACL The MAC Configuration screen allows a MAC Based ACL to be - Netgear GS724TS | GS7xxTS User Manual - Page 184
Smart Switch Software Administration Manual • Name - Enter the user > ACL > MAC ACL. The MAC Configuration screen displays. 2. Enter the ACL Name > ACL > MAC ACL. The MAC Configuration screen displays. 2. Select the ACL entry MAC Rule to be defined within a configured ACL. Rules can be added only if - Netgear GS724TS | GS7xxTS User Manual - Page 185
GS700TS Smart Switch Software Administration Manual The MAC Rules screen contains the following fields: MAC Rules • ACL Name - Select the ACL Name from the list. MAC Rules Table • Priority - Enter the rule priority. When the packet is matched to a rule, user groups are either granted permission or - Netgear GS724TS | GS7xxTS User Manual - Page 186
GS700TS Smart Switch Software Administration Manual 1. Click Security > ACL > MAC Rules. The MAC Rules screen displays. 2. Select the ACL Name from the list in the provided field. 3. Select the rule entry. 4. Click DELETE to remove the entry. MAC Binding Configuration The MAC Binding Configuration - Netgear GS724TS | GS7xxTS User Manual - Page 187
GS700TS Smart Switch Software Administration Manual 2. Select the interfaces to which the ACLs are bound. 3. Select the ACL Name from the list in the provided field. 4. Select the interfaces to bind to the selected ACL Name by one of the following methods. a. Click on the Unit's or LAG's gold bar to - Netgear GS724TS | GS7xxTS User Manual - Page 188
Smart Switch Software Administration Manual • Number of Rules - Displays the current number of rules in the ACL. IPv4 Rules The IPv4 Rules screen allows an IP Rule to be defined within a configured to a rule, user groups are either granted permission or denied device management access. The rule - Netgear GS724TS | GS7xxTS User Manual - Page 189
Smart Switch Software Administration Manual • Source Port - Enter the source port that is matched to packets. • Destination Port - Enter the destination port that is matched to packets. • Action - Select the action applied to packets with IP addresses entry. Managing Security v1.0, June 2009 6-27 - Netgear GS724TS | GS7xxTS User Manual - Page 190
GS700TS Smart Switch Software Administration Manual IPv4 Binding Configuration The IPv4 Binding Configuration screen contains an ACL is assigned on a port, LAG or, VLAN, flows from that ingress interface that do not match the ACL are matched to the default rule, which is Drop unmatched packets. - Netgear GS724TS | GS7xxTS User Manual - Page 191
GS700TS Smart Switch Software Administration Manual IPv6 ACL The IPv6 ACL screen allows an IPv6 Based ACL to be defined. To view or rename IPv6 Based ACLs: 1. Click Security > ACL > IPv6 ACL. The IPv6 ACL screen displays: Figure 6-18 The IPv6 ACL screen contains the following fields: IPv6 ACL • - Netgear GS724TS | GS7xxTS User Manual - Page 192
GS700TS Smart Switch Software Administration Manual 4. Enter the ACL Name in the provided field in the first, editable row. 5. Click APPLY to update the device. To remove an IP-based ACL entry: 1. Click Security > ACL > IPv6 ACL. The IPv6 ACL screen displays. 2. Select the ACL entry. 3. Click DELETE - Netgear GS724TS | GS7xxTS User Manual - Page 193
Smart Switch Software Administration Manual • Source IP Address - Enter the source IP Address. • Prefix Length - Enter the source IP Prefix Length. The Prefix field is applicable only when the IPV6 Static IP address is defined as a Global IPv6 address. The range is 5 - 128. • Destination IP Address - Netgear GS724TS | GS7xxTS User Manual - Page 194
Smart Switch Software Administration Manual 1. Click Security > ACL > IPv6 Rules. The IPv6 Rules screen displays. 2. Select the ACL Name from the list in the provided field. 3. Select the rule entry. 4. Click DELETE to remove the entry. IPv6 Binding Configuration The IPv6 Binding Configuration - Netgear GS724TS | GS7xxTS User Manual - Page 195
GS700TS Smart Switch Software Administration Manual 3. Select the ACL Name from the list in the provided field. 4. Select the interfaces to bind to the selected ACL Name by one of the following methods. a. Click on the port or LAG gold bar to display the associated interfaces, and then select the - Netgear GS724TS | GS7xxTS User Manual - Page 196
following main menu options: • "Logs" • "RMON" • "Port Mirroring" The description that follows in this chapter describes configuring and managing monitoring settings in the GS700TS Smart Switch. Logs Event messages have a unique format, as per the SYSLOG RFC recommended message format for all error - Netgear GS724TS | GS7xxTS User Manual - Page 197
GS700TS Smart Switch Software Administration Manual This section provides information for managing logs. The logs enable viewing device events in real time, and recording the events for later usage. Logs record and manage events and report errors and informational messages. The Logs menu contains - Netgear GS724TS | GS7xxTS User Manual - Page 198
Smart Switch Software Administration Manual Log Filter The Log Filter screen contains fields for defining which events are recorded to which logs. Log messages are listed from the highest severity to the lowest severity level. To configure for example, two device ports are operational problem has - Netgear GS724TS | GS7xxTS User Manual - Page 199
Smart Switch Software Administration Manual - Debug - Provides debugging messages. • Log File - Select the minimum message severity level to appear in the log file malfunction occurs; for example, two device ports are not functioning, is functioning, but an operational problem has occurred. - Notice - Netgear GS724TS | GS7xxTS User Manual - Page 200
Smart Switch Software Administration Manual is saved if a critical device malfunction occurs; for example, two device ports are not functioning, while the rest of the a device warning. The device is functioning, but an operational problem has occurred. - Notice - Indicates the system is functioning - Netgear GS724TS | GS7xxTS User Manual - Page 201
GS700TS Smart Switch Software Administration Manual 2. Click REFRESH or CLEAR LOGS to refresh or reset the Memory Logs screen. Flash Log The Flash Log screen contains information about log entries saved to the log file in Flash, including the time the log was generated, the log severity, and a - Netgear GS724TS | GS7xxTS User Manual - Page 202
Smart Switch Software Administration Manual device malfunction occurs; for example, two device ports are not functioning, is functioning, but an operational problem has occurred. - Notice - reset the Flash Logs screen. Server Log The Server Log screen contains information for viewing and configuring - Netgear GS724TS | GS7xxTS User Manual - Page 203
Smart Switch Software Administration Manual The Server Log screen contains the following fields: • Server IP - Enter the server's IP address to which logs can be sent. • UDP Port - Enter the UDP port to which the server logs are sent. The possible range is 1 - 65535. The default two device problem - Netgear GS724TS | GS7xxTS User Manual - Page 204
Smart Switch Software Administration Manual > Server Log. The Server Log screen displays. 2. Enter the Server IP address in the provided field in the first row. 3. Enter the UDP Port Remote Monitoring Statistics. RMON Statistics allow network managers to view network traffic information from a single - Netgear GS724TS | GS7xxTS User Manual - Page 205
Smart Switch Software Administration Manual the following fields: • Interface - Displays the port or LAG for which statistics are displayed. • Drop Events - Displays This number includes bad packets and FCS octets, but excludes framing bits. • Received Packets - Displays the number of packets - Netgear GS724TS | GS7xxTS User Manual - Page 206
GS700TS Smart Switch Software Administration Manual • Multicast Packets Received - Displays the number of good the device was last refreshed. 2. Click REFRESH or CLEAR ALL COUNTERS to refresh or reset the RMON Basic Statistics screen. Advanced The RMON Advanced menu contains the following options: • - Netgear GS724TS | GS7xxTS User Manual - Page 207
GS700TS Smart Switch Software Administration Manual Figure 7-7 The RMON Advanced Statistics screen contains the following fields: RMON Interface Statistics • Interface - Select the device for which statistics are displayed. The possible field values are: - Port - Select the specific port for which - Netgear GS724TS | GS7xxTS User Manual - Page 208
GS700TS Smart Switch Software Administration Manual • Undersize Packets - Displays the number of undersized of 1024 to 1522 byte frames received on the interface since the device was last refreshed. RMON Summary Statistics • Interface - Displays the port or LAG for which statistics are displayed. - Netgear GS724TS | GS7xxTS User Manual - Page 209
Smart Switch Software Administration Manual To view RMON Interface Statistics, select Port or LAG as the type of Interface and select the or CLEAR ALL COUNTERS to clear or reset the RMON Advanced Statistics screen. History definitions or polling periods. To configure RMON history information: 1. Click - Netgear GS724TS | GS7xxTS User Manual - Page 210
GS700TS Smart Switch Software Administration Manual Figure 7-8 The RMON History Control screen contains the following is 1-65535. The default value is 50. • Current Number of Samples - Displays the current number of samples taken. • Owner - Enter the RMON station or user that requested the RMON - Netgear GS724TS | GS7xxTS User Manual - Page 211
GS700TS Smart Switch Software Administration Manual To remove The RMON History Table screen contains interface specific statistical network samples. Each table entry represents Table screen. • Owner - Displays the RMON station or user that requested the RMON information. The field range is 0-20 - Netgear GS724TS | GS7xxTS User Manual - Page 212
GS700TS Smart Switch Software Administration Manual • Received Bytes - Displays the number of octets received on the interface since the device was last refreshed. This number includes bad packets and FCS octets, but excludes framing bits. • Received Packets - Displays the number of packets received - Netgear GS724TS | GS7xxTS User Manual - Page 213
Smart Switch Software Administration Manual Events Control The RMON Events Control screen contains fields for defining RMON events. To configure Displays the time that the event occurred. • Owner - Enter the device or user that defined the event. 2. Select the events control entry. 3. Enter the - Netgear GS724TS | GS7xxTS User Manual - Page 214
GS700TS Smart Switch Software Administration Manual 4. Select the event Type from the list in the provided field in the first row. 5. Click APPLY to update Click Monitoring > RMON > Advanced > Events Log. The RMON Events Log screen displays: Figure 7-11 7-19 v1.0, June 2009 Monitoring the Switch - Netgear GS724TS | GS7xxTS User Manual - Page 215
GS700TS Smart Switch Software Administration Manual The setting network alarms. Network alarms occur when a network problem or event, is detected. Rising and falling thresholds port or LAG interface. • Counter Value - Displays the selected MIB variable value. Monitoring the Switch v1.0, June 2009 - Netgear GS724TS | GS7xxTS User Manual - Page 216
GS700TS Smart Switch Software Administration Manual • Sample Type - Select the sampling method for the selected . • Interval - Enter the alarm interval time in seconds. • Owner - Enter the device or user that defined the alarm. 2. Select the alarm entry. 3. Select the Counter Name from the list - Netgear GS724TS | GS7xxTS User Manual - Page 217
GS700TS Smart Switch Software Administration Manual 5. Select the Sample Type from the list in the provided field in the first row. 6. Select > Alarms. The RMON Alarms screen displays. 2. Select the alarm entry. 3. Click DELETE to remove the alarm entry. Monitoring the Switch v1.0, June 2009 7-22 - Netgear GS724TS | GS7xxTS User Manual - Page 218
GS700TS Smart Switch Software Administration Manual Port Mirroring Port mirroring monitors and mirrors network traffic administrators can configure port mirroring by selecting a specific port from which to copy all packets, and other ports to which the packets are copied. The device supports one - Netgear GS724TS | GS7xxTS User Manual - Page 219
GS700TS Smart Switch Software Administration Manual • Type - Select the port mode configuration for port mirroring. The possible field values are: - TX Only - Indicates port mirroring is configured on transmitting ports only. - RX Only - Indicates port mirroring is configured on receiving ports only - Netgear GS724TS | GS7xxTS User Manual - Page 220
• "Reset" • "Upload" • "Download" • "File Management" • "Troubleshooting" The description that follows in this chapter describes configuring and managing maintenance options in the GS700TS Smart Switch. Reset The Reset menu contains the following options: • "Device Reboot" • "Factory Default" Device - Netgear GS724TS | GS7xxTS User Manual - Page 221
. Factory Default The Factory Default screen allows network managers to reset the device to the factory defaults shipped with the switch. Restoring factory defaults results in erasing the configuration file. Note: Selecting this option automatically reboots the device. The stacking defaults are - Netgear GS724TS | GS7xxTS User Manual - Page 222
GS700TS Smart Switch Software Administration Manual Figure 8-2 2. Check the confirmation box. 3. Click APPLY to reset the device to the factory defaults. Upload The Upload menu contains the following option: • "Upload" Upload System Files can be backed up using the Upload screen. To back up files: - Netgear GS724TS | GS7xxTS User Manual - Page 223
GS700TS Smart Switch Software Administration Manual Figure 8-3 The Upload screen contains the following fields: • File Type - Enter the type of file to be uploaded. The possible field values are: - Firmware - Upload the Firmware File. - Configuration - Upload the Configuration File. • via TFTP - - Netgear GS724TS | GS7xxTS User Manual - Page 224
the TFTP Server. • via HTTP - Select to download the file via the web browser interface (HTTP) and enter the file name in the provided box. • TFTP Server IP - Enter the TFTP Server IP Address from which the Firmware, Boot or Configuration file is downloaded. • Remote Filename - Enter the destination - Netgear GS724TS | GS7xxTS User Manual - Page 225
GS700TS Smart Switch Software Administration Manual 2. Select Firmware, Boot File or Configuration as the download File Type from the provided field. 3. Select whether to download via TFTP or via HTTP. 4. If you selected via HTTP, enter the file name in the provided box. 5. If you selected via TFTP, - Netgear GS724TS | GS7xxTS User Manual - Page 226
GS700TS Smart Switch Software Administration Manual • Active Image - Displays the image file which is currently active on the unit. • After Reset - Select the image file that is active after the specific unit is reset. The possible field values are: - Image 1 - Activates Image file 1 after the - Netgear GS724TS | GS7xxTS User Manual - Page 227
GS700TS Smart Switch Software Administration Manual Figure 8-6 The Cable Test screen contains the following fields: • Interface - Enter the port to which the cable is connected. • Test Result - Displays the cable test results. Possible values are: - No Cable - Indicates a cable is not connected to - Netgear GS724TS | GS7xxTS User Manual - Page 228
services including support and an online user guide in PDF format. The Help menu contains the following options: • "Support" • "User Guide" The description that follows in this chapter covers these features. c Support The Support screen provides access to the NETGEAR online support site - Netgear GS724TS | GS7xxTS User Manual - Page 229
Smart Switch Software Administration Manual User Guide The User Guide screen provides access to the online User Guide. To view the User Guide screen: 1. Click Help > Online Help > User Guide. The User Guide screen displays: Figure 9-2 2. Click APPLY to open a window and display the User Guide in PDF - Netgear GS724TS | GS7xxTS User Manual - Page 230
NETGEAR Model GS700TS Smart Switch. You can always configure the switch to default settings by using the Factory Reset function from a Web browser. Table A-1. Default Settings Feature Port Speed Port Duplex Flow Control (half duplex) Flow Control (full duplex) IP Configuration Password VLAN Link - Netgear GS724TS | GS7xxTS User Manual - Page 231
binding 24, 28, 32 B Bandwidth Settings 6 Boot File Download 5 C changing the password 9 configuration monitoring 1 network parameters 5 QoS 1 security 1 switch 1 system settings 1 Configuration Download 5 Configuration Upload 4 CoS 4 CPU 43 D defaults IP address 8 subnet mask 8 DHCP 4 DHCP server - Netgear GS724TS | GS7xxTS User Manual - Page 232
GS700TS Smart Switch Software Administration Manual M map CoS 8 Memory Logs 4 menus 2 Multicast Forward All Page 49 Multicast Groups 47, 48 N navigation menu 2 network alarms 20 network parameters 5 NIC settings 6 P password changing 9 Port mirroring 23 Port VLAN ID (PVID) 20 PVID 20 Q QoS 1 QoS
-
 1
1 -
 2
2 -
 3
3 -
 4
4 -
 5
5 -
 6
6 -
 7
7 -
8
-
9
-
10
-
11
-
12
-
13
-
14
-
15
-
16
-
17
-
18
-
19
-
20
-
21
-
22
-
23
-
24
-
25
-
26
-
27
-
28
-
29
-
30
-
31
-
32
-
33
-
34
-
35
-
36
-
37
-
38
-
39
-
40
-
41
-
42
-
43
-
44
-
45
-
46
-
47
-
48
-
49
-
50
-
51
-
52
-
53
-
54
-
55
-
56
-
57
-
58
-
59
-
60
-
61
-
62
-
63
-
64
-
65
-
66
-
67
-
68
-
69
-
70
-
71
-
72
-
73
-
74
-
75
-
76
-
77
-
78
-
79
-
80
-
81
-
82
-
83
-
84
-
85
-
86
-
87
-
88
-
89
-
90
-
91
-
92
-
93
-
94
-
95
-
96
-
97
-
98
-
99
-
100
-
101
-
102
-
103
-
104
-
105
-
106
-
107
-
108
-
109
-
110
-
111
-
112
-
113
-
114
-
115
-
116
-
117
-
118
-
119
-
120
-
121
-
122
-
123
-
124
-
125
-
126
-
127
-
128
-
129
-
130
-
131
-
132
-
133
-
134
-
135
-
136
-
137
-
138
-
139
-
140
-
141
-
142
-
143
-
144
-
145
-
146
-
147
-
148
-
149
-
150
-
151
-
152
-
153
-
154
-
155
-
156
-
157
-
158
-
159
-
160
-
161
-
162
-
163
-
164
-
165
-
166
-
167
-
168
-
169
-
170
-
171
-
172
-
173
-
174
-
175
-
176
-
177
-
178
-
179
-
180
-
181
-
182
-
183
-
184
-
185
-
186
-
187
-
188
-
189
-
190
-
191
-
192
-
193
-
194
-
195
-
196
-
197
-
198
-
199
-
200
-
201
-
202
-
203
-
204
-
205
-
206
-
207
-
208
-
209
-
210
-
211
-
212
-
213
-
214
-
215
-
216
-
217
-
218
-
219
-
220
-
221
-
222
-
223
-
224
-
225
-
226
-
227
-
228
-
229
-
230
-
231
-
232
 |
 |
June 2009
202-10505-01
NETGEAR
, Inc.
350 East Plumeria Drive
San Jose, CA 95134 USA
GS700TS Smart Switch
Software Administration
Manual