Netgear WNDAP350 Application Note: Deploy a ProSecure UTM in a Multi SSID Mult - Page 4
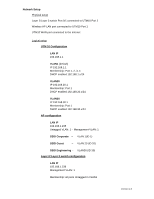
UTM10 Configuration, VLAN1, Corporate, VLAN 30, Port 1 - access point
 |
UPC - 606449064643
View all Netgear WNDAP350 manuals
Add to My Manuals
Save this manual to your list of manuals |
Page 4 highlights
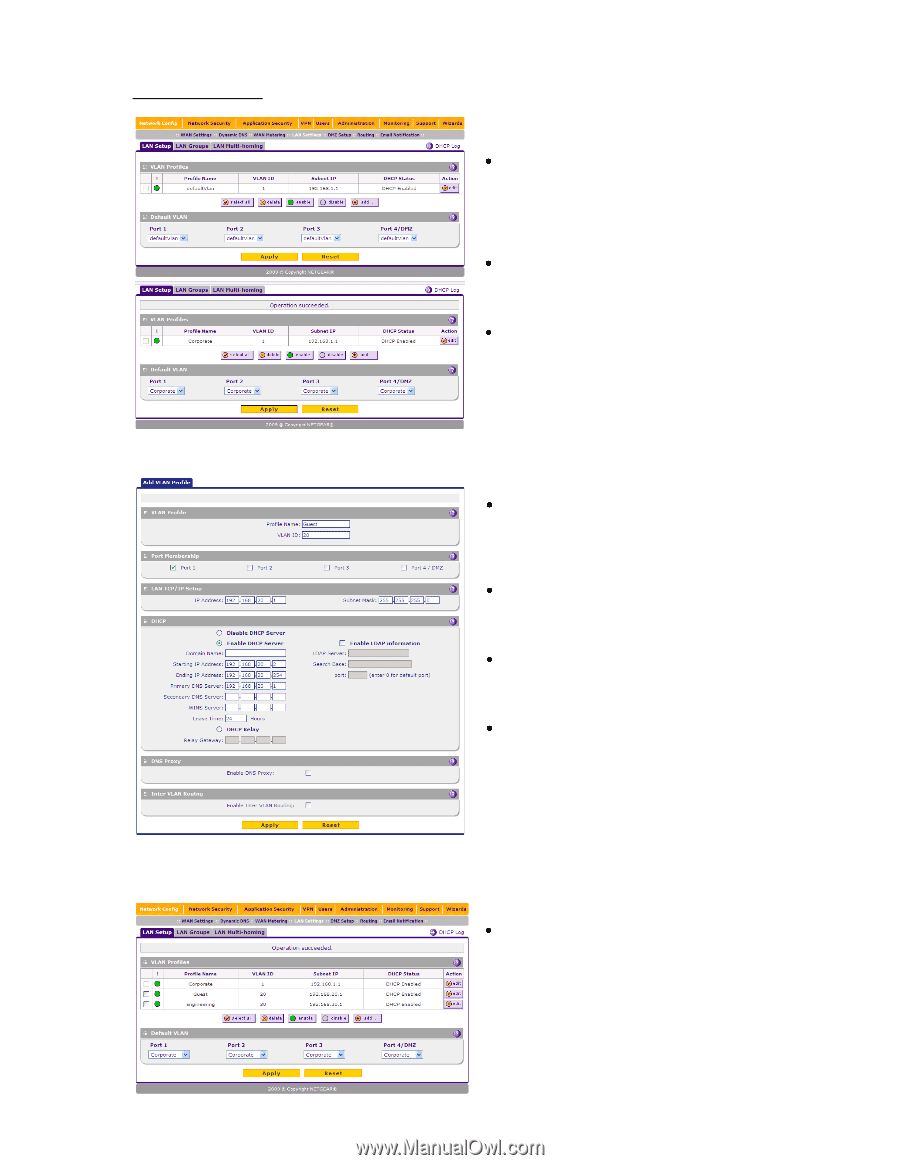
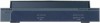
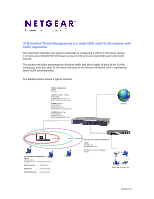
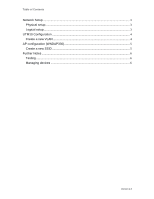
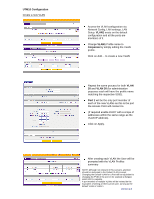
UTM10 Configuration Create a new VLAN Access the VLAN configuration via Network Config, LAN settings, LAN Setup. VLAN1 exists on the default configuration and all the ports are members of it. Change VLAN1 Profile name to Corporate by simply editing the VLAN profile. Click on Add... to create a new VLAN Repeat the same process for both VLAN 20 and VLAN 30 (for administration purposes each will have the profile name matching the respective SSID). Port 1 will be the only port member of each of the new VLANs as this is the port the Access Point will connect to. (If required enable DHCP with a scope of addresses within the same range as the VLAN IP address). Click on Apply. After creating each VLAN the User will be prompted with the VLAN Profiles summary NOTE: Although not relevant in this scenario, attention should be dedicated to the Default VLAN concept. Changing the Default VLAN for a Port will be equivalent to changing the PVID of the port on for example a Netgear switch 802.1q capable. A port member of multiple VLANs will be instead be the equivalent of setting an 802.1q trunk port, as long as the default VLAN is VLAN 1. Version 2.0
-
 1
1 -
 2
2 -
 3
3 -
 4
4 -
 5
5 -
 6
6
 |
 |