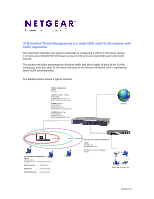
Netgear WNDAP350 Application Note: Deploy a ProSecure UTM in a Multi SSID Mult - Page 5
AP configuration WNDAP330, Corporate - vlan
 |
UPC - 606449064643
View all Netgear WNDAP350 manuals
Add to My Manuals
Save this manual to your list of manuals |
Page 5 highlights
AP configuration (WNDAP330) Create a new SSID Access the AP configuration via Security, Profile settings (by default all only the SSID Netgear is active, whilst all the SSIDs are assigned to VLAN 1 In the bottom of the page click on Edit to modify the Netgear profile name and SSID to Corporate - note how this will reflect the settings performed on the UTM relating to the VLAN 1 profile Apply the changes Enable both Profile numbers 2 and 3 to activate the respective SSID. Perform the relevant changes to assign one profile to VLAN 20 and one to VLAN 30 also reflecting the same profiles and SSID names NOTE: The security level on each profile will depend on the Security policy in use in the network Version 2.0
-
 1
1 -
 2
2 -
 3
3 -
 4
4 -
 5
5 -
 6
6
 |
 |
Version 2.0
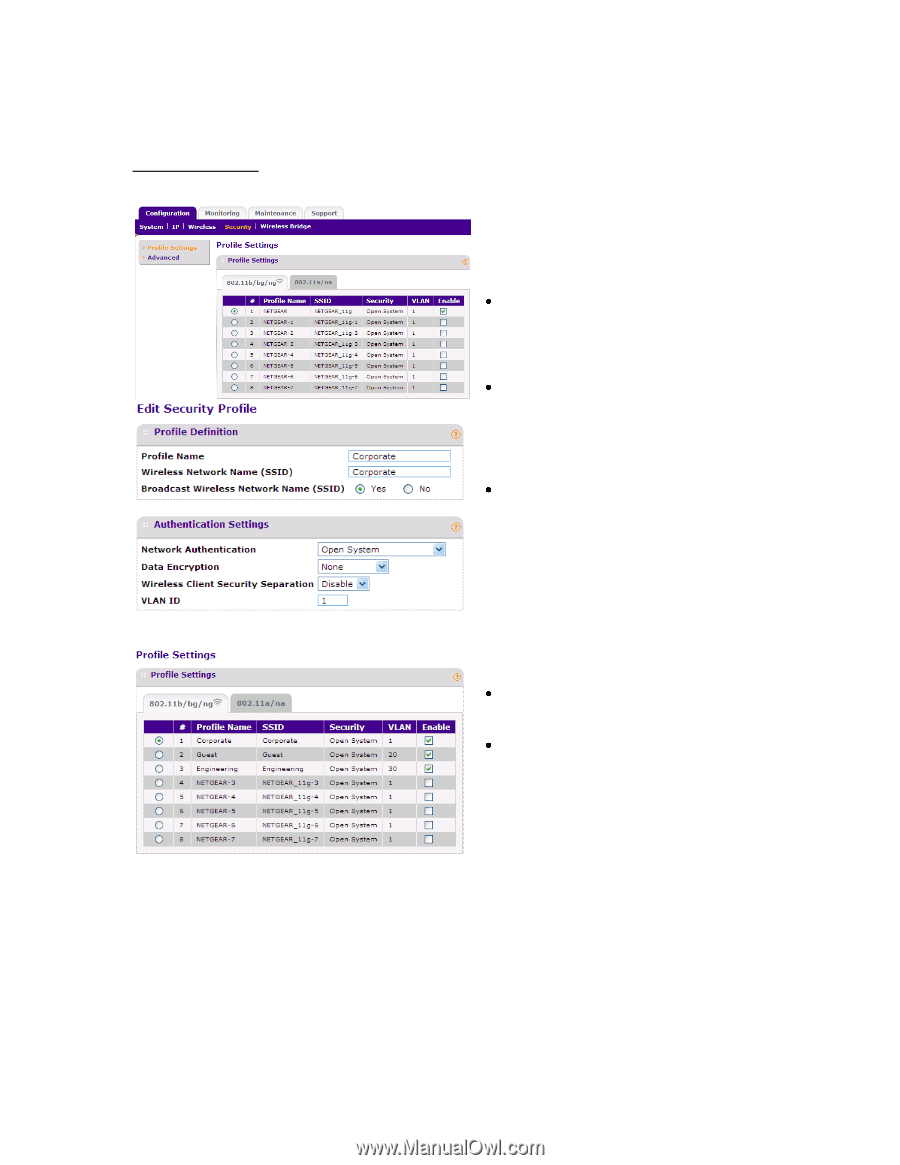
AP configuration (WNDAP330)
Create a new SSID
Access the AP configuration via Security,
Profile settings (by default all only the
SSID Netgear is active, whilst all the
SSIDs are assigned to VLAN 1
In the bottom of the page click on Edit to
modify the Netgear profile name and
SSID to
Corporate
–
note how this will
reflect the settings performed on the UTM
relating to the VLAN 1 profile
Apply the changes
Enable both Profile numbers 2 and 3 to
activate the respective SSID.
Perform the relevant changes to assign
one profile to VLAN 20 and one to VLAN
30 also reflecting the same profiles and
SSID names
NOTE: The security level on each profile will depend on
the Security policy in use in the network