Nextar I4-BC User Guide - Page 24
Step Three
 |
UPC - 714129937269
View all Nextar I4-BC manuals
Add to My Manuals
Save this manual to your list of manuals |
Page 24 highlights
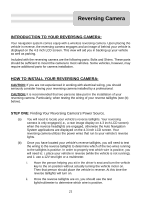
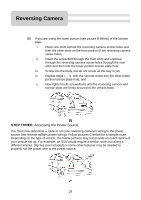
Reversing Camera (B) If you are using the lower portion (see picture B below) of the license plate: i. Place one shim behind the reversing camera screw holes and then the other shim on the front portion of the reversing camera screw holes; ii. Insert the screw/bolt through the front shim and continue through the reversing camera screw holes through the rear shim and then into the lower portion license plate hole; iii. Screw into the body, but do not screw all the way in yet; iv. Repeat steps i. - iii. with the second screw into the other lower portion license plate hole; and v. Now tighten both screws/bolts until the reversing camera and license plate are firmly secured to the vehicle body. B STEP THREE: Accessing the Power Source. You must now determine a route to run your reversing camera's wiring to the power source (the reverse taillight power wiring). Follow pictures C below for a sample route. Depending on the type of vehicle, the below pictures may not provide an exact replica of your vehicle set up. For example, an SUV would require a similar route, but along a different interior. Slip ties (not included) or some other fastener may be needed to properly run the power wire to the power source. C 24
-
 1
1 -
2
-
3
-
4
-
5
-
6
-
7
-
8
-
9
-
10
-
11
-
12
-
13
-
14
-
15
-
16
-
17
-
18
-
 19
19 -
 20
20 -
 21
21 -
 22
22 -
 23
23 -
 24
24 -
 25
25 -
 26
26 -
 27
27 -
 28
28 -
 29
29
 |
 |
